Search Results

185 results found.

Santorini – Legacy

Last Updated On

About Santorini

Santorini is a WordPress theme designed for hotels and resorts. It allows you to display your content primarily by using the six custom post types available. These are “Galleries”, “Rooms”, “Slides”, “Services”, “Testimonials” and “Attractions”. The above act as standard WordPress posts or pages but each of them has extra fields or custom layout which differentiates them from the former. The homepage is comprised of the homepage slider and custom widgets specially crafted to bring those custom post types together as discussed later on in the documentation.

Theme installation

The easiest way to install the theme, is by accessing your WordPress admin panel, then go to Appearance > Themes. Select the Install Themes tab and click the Upload link located just below the tab’s name. Click on Browse… and select the WordPress theme zip file you just downloaded. Then click the Install Now button, and after a few seconds, your new theme should be installed. Click activate and the theme is ready to use.

In order to install the theme manually, or in case you have trouble installing it through the admin panel, you have to unzip the WordPress theme’s zip file on your computer, and upload via FTP the resulting theme folder into your WordPress installation themes folder (wp-content/themes). Then, from the WordPress admin go to Appearance > Themes. The theme should be available in your themes list. Click activate.

After activation, you will be redirected to the CSSIgniter Settings panel (accessible from Appearance > CSSIgniter Settings) to start customizing your brand new theme.

Image Sizes

The recommended image sizes for the Santorini Resort theme are:

  • Fullwidth homepage slider: 1920×850
  • Fixed width homepage slider: 950×640
  • CI Item Widget (frontpage widgets featured images): 750×865
  • Single post featured image: 750×400
  • Inner photo gallery slider (room, attraction etc): 925×465

Please keep in mind that any image uploaded should be larger than 750px for best results, and generally for each section at least larger or equal than its recommended width. For example,  the images of an inner slider of a room should be 425px in height but more importantly they should be equal or larger than 925px in width.

Useful Plugins

These plugins provide functionality and features used directly (or not) by the Theme. So, it is recommended to install and activate them before importing your sample content.

  • CSSIgniter Shortcodes you can use our custom made shortcode plugin to help you create a variety of layouts and elements on your site. Instructions can be found here.
  • Socials Ignited use this plugin to create a widget that links to all your social profiles. You can also customize it with your icons and add new social networks, a guide can be found here.
  • Contact Form 7 use this plugin to create a contact form, then copy the shortcode it gives you and paste it in an empty page.

Importing Sample Content using One Click Import

To automate the process of importing and for a better experience we have natively included support for OneClick Import Plugin. Let install it fist:

From your WordPress dashboard

  1. Visit ‘Plugins > Add New’,
  2. Search for ‘One Click Demo Import’ and install the plugin,
  3. Activate ‘One Click Demo Import’ from your Plugins page.

From WordPress.org

  1. Download ‘One Click Demo Import’.
  2. Upload the ‘one-click-demo-import’ directory to your ‘/wp-content/plugins/’ directory, using your favorite method (ftp, sftp, scp, etc…)
  3. Activate ‘One Click Demo Import’ from your Plugins page.

Once the plugin is activated you will find the actual import page in: Appearance > Import Demo Data.

 Click on the Import demo data button and you are done!

This plugin requires PHP version of at least 5.3.x, but we recommend version 5.6.x or better yet 7.x. Please contact your hosting company and ask them to update the PHP version for your site.

Setting up your theme

1) Creating theme pages

Let’s start by adding pages you are going to need. Go to Pages > Add New and create the following pages:

  1. “Home” this will serve as your homepage, assign to it either the “Homepage /w Full Slider” or the “Homepage /w Fixed Slider” template from the “Page attributes” panel, depending on the size of the slider you want on your homepage.
  2. “Blog” this will be your posts page. Just create it, no further action needed.
  3. “Contact” here you can place your contact form which you will create using the Contact Form 7 plugin. Assign to it the “Contact” template and then navigate to CSSIgniter settings > Contact options to set your address the coordinates for your map (map can also be disabled from here).
  4. “Booking” your booking form will be placed here, apply the “Booking Page” template. Once you publish the page go to CSSIgniter settings > Contact options select the Booking page, fill in the e-mail you want your booking inquiries sent to and save changes.
  5. “Gallery Listing” this page will display your galleries. Two layouts are available either a three column layout by applying the “Gallery listing 3 Cols” template from the page attributes panel, or a four column layout by applying the “Gallery listing 4 Cols” one.
  6. “Room Listing” this page will display your rooms. Two layouts are available either a three column layout by applying the “Room listing 3 Cols” template from the page attributes panel, or a four column layout by applying the “Room listing 4 Cols” one.
  7. “Services Listing” this page will display your services. Apply to it the “Services Listing” template from the page attributes panel.
  8. “Attractions Listing” this page will display your attractions. Two layouts are available either a three column layout by applying the “Attractions listing 3 Cols” template from the page attributes panel, or a four column layout by applying the “Attractions listing 4 Cols” one.

(TIP, all page titles serve as examples, you can name your pages according to your needs.)

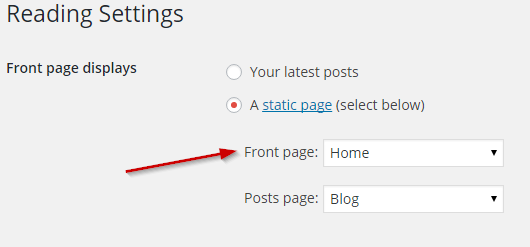
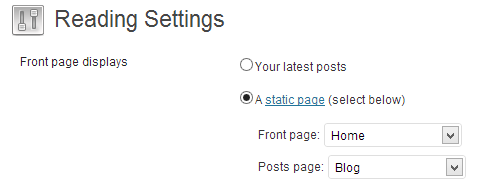
Once the pages are created, navigate to Settings > Reading and set the “Home” page to be your static frontpage and the “Blog” page as your posts page, as demonstrated in the image below.

ReadingSettings

2) Populating your blog

To add new posts to your blog, go to Posts > add new, title your post, enter the content in the editor, upload a featured image by clicking “Set featured image” on the Featured Image panel, add a category and/or tag to the post, if you so desire, from the respective panels and publish the post by clicking “Publish”.

3) Adding Galleries

To create a new gallery item go to Galleries > Add New, set the gallery’s name as a title, enter some text if you wish in the content editor, set a featured image and proceed to upload your images by clicking the “Add Images” button in the “Gallery Details” panel (please read the “Creating Galleries” section below, first) and finally publish the gallery item. Single gallery column numbers can be controlled from the Gallery settings panel below the main text editor.

4) Adding Rooms

To create a new room item go to Rooms > new Room, set the room’s name as a title, enter relevant information in the content editor, and set a featured image. Then move to the “Room Details” panel. Here you can add images to your room’s slider (please read the “Creating Galleries” section below, first), add the room’s amenities, add a price and let visitors know if current price is an offer.

5) Adding Slider items

To add items to your homepage’s slider go to Slider Items > new Slider Item, set a title for the slider item and upload a featured image (which will be the image displayed on the homepage), enter any text you might want to show when the single slider item is viewed (please notice that any text entered here will appear only if you leave the URL box blank in the slider settings below). Next move to the Slider Details panel, give the slider a subtitle, a custom link and change the ‘Read More’ button text if you so desire. Finally, publish the slider item. Homepage slider behavior can be controlled under CSSIgniter settings > Homepage options.

6) Adding Testimonials

To create a new Testimonial, go to Testimonials > New Testimonial, set the author’s name as the title, and the testimonial’s text in the content box, finally, publish it. Testimonials can be used in any widgetized area you like by using the “CI Item” widget and will appear in room listing pages.

7) Adding Attractions

To add an attraction go to Attractions > Add New. Add the attraction’s name as a title, any text necessary and upload a featured image. In the Attraction Details panel you can upload images related to the attraction to create a gallery (please read the “Creating Galleries” section below, first), when finished, publish the item.

8) Creating your menu

Now that your content is in place, you need to set up the menus. Santorini’s main navigation is split in two parts, one part on either side of the logo. Go to Appearance > Menus and create two menus, name them “Left menu” and “Right menu”. Customize each one by adding menu items to it and then go to “Manage Locations”, set the menus on their respective positions and save.
You can also set up the two footer menus in a similar fashion, you can either display the same menu or create different ones for the footer.

(TIP, for more info on creating and managing menus, please read the WordPress Menu User Guide here)

9) Adding content to your Homepage

The homepage on Santorini features three widgetized areas, these are: the “Homepage #1 Fullwidth” directly below the slider, the “Homepage #1 Three Column” which is below the fullwidth one and the the “Homepage #3 Side” which is located to the right of the latest post on the homepage. You can access this area and add content to it in Appearance > Widgets.

Duplicate the demo’s layout

On the demo’s homepage we have two slider items, one CI Item widget, with a testimonial selected on the Homepage #1 Fullwidth. Following are three CI Item widgets with a page, a gallery and the room listing page respectively, in the “Homepage #1 Three Column” sidebar. Finally we have a CI Special Offer widget, the Socials Ignited widget and the CI Newsletter widget on the “Homepage #3 Side” sidebar.

The theme’s footer features an area for you to enter your copyright info, privacy policy etc. To change the text you need to go to CSSIgniter settings > Site options (6th box down). Primary footer text appears on the left side of the footer and secondary on the right.

11) Setting up the weather

For info on how to set up the weather display on the theme, please have a look at this guide.

12) About the language switcher

The theme is compatible with the WPML plugin. The Header Top Right sidebar is designed to hold the WPML’s language switcher widget, as seen on the theme’s demo.

How to use the page builder template

The theme comes bundled with a page builder template which allows you to use your favorite page builder plugin on it and create unique layouts very easily.

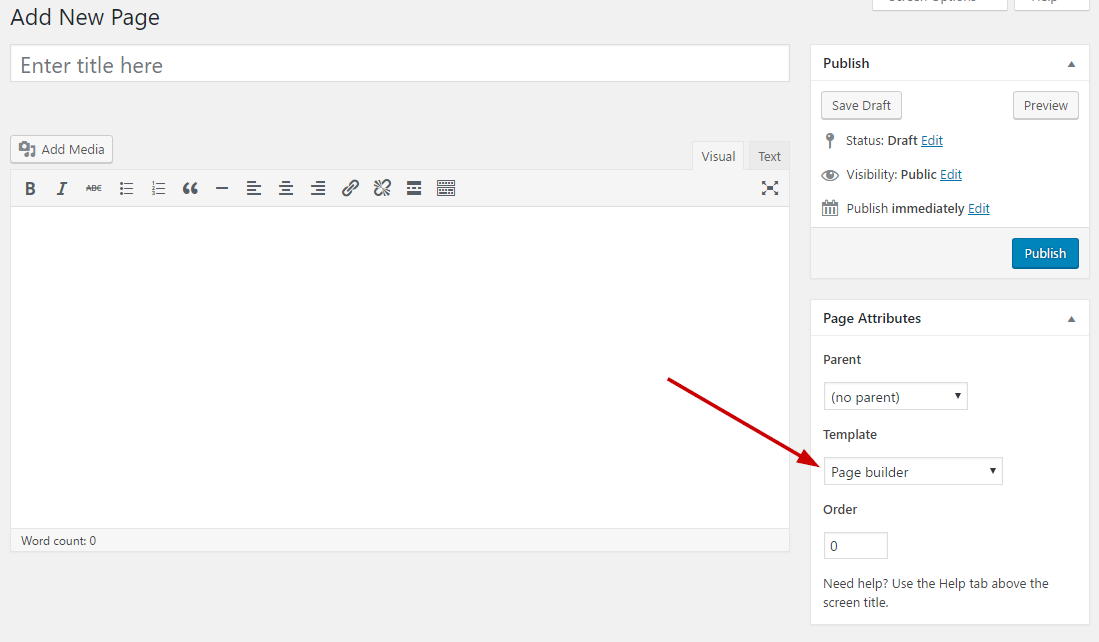
To use that template start by going to Pages > Add New. This will create a new page. Add a title to your page and select the Page builder template from the template drop down in the Page Attributes metabox.

ci_page_builder_template

That’s it. You can now start building your page using the page builder of your choice, once done publish it and check it out.

Additional Information

Creating Galleries

To create a gallery using our gallery management system follow these steps:

On the “Gallery Information” panel click the Add Images button.

gallery_info

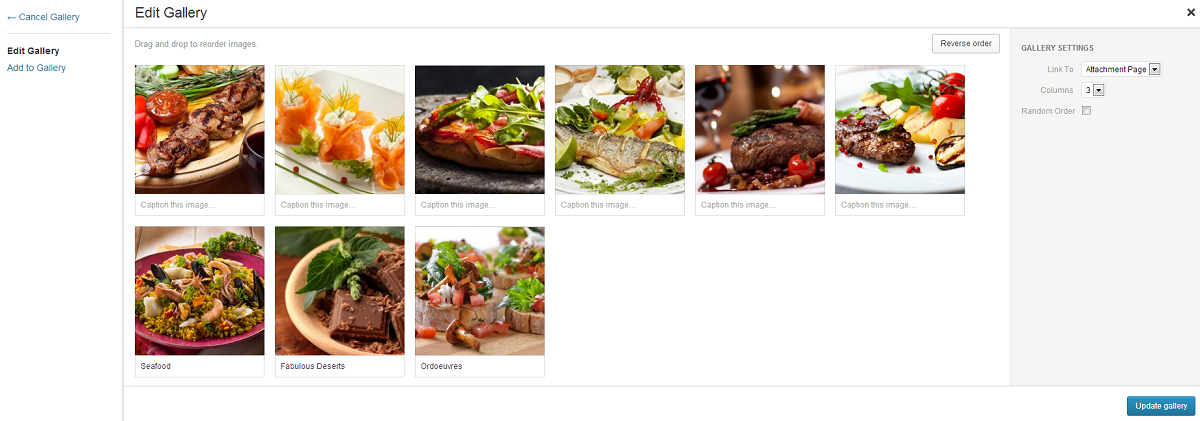
To upload your images, drag & drop them in the Edit Gallery window which will pop-up, or select Add to Gallery in order to select already uploaded ones. Once you are done, click the Update Gallery button on the lower right.

edit_gallery

Your “Gallery Information” panel will look like this

gallery_w_img

You can re-arrange the order of images by drag & drop.

gallery_move_img

If you wish to remove an image from the gallery, hover your mouse over it and click the X as shown below.

gallery_remove_img

By checking the Randomize order box your gallery images will appear in random order which will change on every page refresh.

When done, publish the gallery item.

If you need to add images after the gallery’s creation just follow the same procedure.

Next Steps

Still have questions or problems setting up your CSSIgniter Theme? We will be happy to help you out! Please visit our support Hub 

Vidiho

Last Updated On

Theme installation

The easiest way to install the theme, is by accessing your WordPress admin panel, then go to Appearance → Themes. Select the Install Themes tab and click the Upload link located just below the tab’s name. Click on Browse… and select the WordPress theme zip file you just downloaded. Then click the Install Now button, and after a few seconds, your new theme should be installed. Click activate and the theme is ready to use.

In order to install the theme manually, or in case you have trouble installing it through the admin panel, you have to unzip the WordPress theme’s zip file on your computer, and upload via FTP the resulting theme folder into your WordPress installation themes folder (wp-content/themes). Then, from the WordPress admin go to Appearance → Themes. The theme should be available in your themes list. Click activate.

After activation, you will be redirected to the CSSIgniter Settings panel (accessible from Appearance → CSSIgniter Settings) to start customizing your brand new theme.

Image Sizes

The recommended image sizes for the Vidiho theme are:

  • Post thumbnail size: 284x80px
  • Blog thumbnail: 300x170px
  • Slider: 960x530px

Useful Plugins

These plugins provide functionality and features used directly (or not) by the Theme. So, it is recommended to install and activate them before importing your sample content.

  • CSSIgniter Shortcodes you can use our custom made shortcode plugin to help you create a variety of layouts and elements on your site. Instructions can be found here.
  • Socials Ignited use this plugin to create a widget that links to all your social profiles. You can also customize it with your icons and add new social networks, a guide can be found here.
  • Contact Form 7 use this plugin to create a contact form, then copy the shortcode it gives you and paste it in an empty page.

Importing Sample Content using One Click Import

To automate the process of importing and for a better experience we have natively included support for OneClick Import Plugin. Let install it fist:

From your WordPress dashboard

  1. Visit ‘Plugins > Add New’,
  2. Search for ‘One Click Demo Import’ and install the plugin,
  3. Activate ‘One Click Demo Import’ from your Plugins page.

From WordPress.org

  1. Download ‘One Click Demo Import’.
  2. Upload the ‘one-click-demo-import’ directory to your ‘/wp-content/plugins/’ directory, using your favorite method (ftp, sftp, scp, etc…)
  3. Activate ‘One Click Demo Import’ from your Plugins page.

Once the plugin is activated you will find the actual import page in: Appearance > Import Demo Data.

 Click on the Import demo data button and you are done!

This plugin requires PHP version of at least 5.3.x, but we recommend version 5.6.x or better yet 7.x. Please contact your hosting company and ask them to update the PHP version for your site.

Theme features

Post formats

Your theme comes with support of post formats. These allow you to change the behavior of each post, depending on the format you choose. Depending on the post format, an icon appears, post format icon on the right of each post, stating the type of the post, and clicking on that, takes you to a listing page of that post type.
To choose a post format, create a new (or edit an existing) post, and from the Format box, select the format you want. The supported formats are:

  • Standard: This is the standard format, just a plain post that can have a featured image.
  • Video: The video post type allows you to embed videos from a variety of sources. On the Video Details box, enter the URL of a video from a supported website, for example:
    https://www.youtube.com/watch?v=4Z9WVZddH9w

    You can also paste in the same box, the embed codes given by unsupported websites. YouTube is supported, but for the sake of example:

    <iframe width="560" height="315" src="https://www.youtube.com/embed/4Z9WVZddH9w" frameborder="0" allowfullscreen></iframe>

Widgets

This theme supports widgets. There are various widget areas defined.

  • Blog Sidebar, which appears on the right hand side of all posts and video.
  • Pages Sidebar, which appears on the right hand side of all normal pages.
  • Footer Widgets, which appears on the footer of all posts and pages.
  • Social Widget on Header, which appears on the top right corner of the website’s header, and is shown on all posts and pages. This area is exclusively designed to hold only one instance of the -=CI SOCIAL=- widget. If you want this area to remain blank, don’t assign the widget on this area.

The theme also comes bundled with a few widgets developed by CSSIgniter. For information on using widgets, please see http://codex.wordpress.org/Widgets_SubPanel

Shortcodes

The theme, like all CSSIgniter themes, is complemented by the CSSIgniter Shortcodes plugin which provides a variety of shortcodes for your use. See the instructions for usage information.

Custom Menus

This theme supports custom menus. There is one menu location defined, Main Menu, that appears on the top of each page. For information on using custom menus, please see read http://codex.wordpress.org/Appearance_Menus_Screen.

Front Page template

To set-up a front page, you need to create two pages. Name the first one “Blog” or something similar. Name the second one “Front Page” or something similar, and from the Page Attributes box assign it the Front Page template. Next, go to Settings → Reading, on the Front page displays select A static page and on the following two drop-downs select first your Front Page and then your Blog page. Save your changes.

The front page consists of a slider, a Recent videos section, a Latest articles section, and a sidebar. The sidebar used is the Blog Sidebar.
To assign images and/or videos to the slider, you need to create blog posts. From your admin screen, go to Posts → New Post, enter a title, content, assign a big enough Featured Image and on the Slider Details box, check the Show this post’s image/video on the homepage slider checkbox.
To display a video, you need to select the Video post format and assign a oEmbed compatible URL, or the embed code from unsupported websites. You still need to have the Show this post’s image/video on the homepage slider checkbox checked.
If the post has the video post format assigned but the url/code of the video is empty, its featured image will be used on the slider instead.
The number of recent videos and latest articles that are displayed on the front page, can be changed from the CSSIgniter Settings panel.

Archive page template

You can have an archive page displaying your posts based on the date. All you need is to create an empty page and assign the Archive template from the Page Attributes box.

Full Width Page template

You may have any page displaying full-width, without a sidebar. All you need is to assign the Full Width, No Sidebar template from the Page Attributes box.

Settings Panel

Our custom options panel can be found under Appearance → CSSIgniter Settings. Let’s have a look at each tab’s options:

Site Options

From this tab you can set your site’s properties.

  • Logo text: Textual logo – site title
  • Slogan text: Textual slogan – site description
  • Upload your logo: Allows you to upload a logo image. You need to upload it to the correct size. Logo text is used as alternative logo description.
  • Color scheme: Allows you to change the color scheme used.
  • Upload your favicon: Uploads and registers a favicon. It must be already in .ico format.
  • Sample content: Creates or deletes the sample content.

Homepage Options

From this tab you can refine the behavior of the front page template.

  • Number of video posts: Sets the number of Recent video posts displayed on the front page.
  • Number of normal posts: Sets the number of Latest articles displayed on the front page.
  • Slider Options: Allows you to fine-tune the behavior of the slider.

Background Options

Within the background options tab you can override the template’s background settings and set yours as needed. If don’t want that, just keep this tab disabled by checking the checkbox “Disable custom background”.

Display Options

Various options that affect what your website displays.

  • Read More text: What will be displayed instead of the default Read More…
  • Excerpt length (in words): Limits how many words the excerpt will be, and whether it should be linked to the post.
  • Excerpt auto cut-off text: When a manual excerpt is not provided, WordPress generates one automatically from your post’s content, limiting the words according to the setting above. Because that may be mid-paragraph, the cut-off text is appended at the end to show that the text continues.
  • Title separator: How the various elements of thetag will be separated (dash, pipe, colon, etc)
  • Show “Comments are closed” message: Allows you to hide/show the default “Comments are closed” message when comments are disabled.

Social Options

These options control the behavior of the -=CI Social=- widget. The widget displays Social Media icons, depending on the services you have enabled and provided a link to your profile, in this page.

Archive Options

These options control the behavior of the Archive page (if you created one) with the Archive page template assigned.

Google options

  • Google Analytics Code: Just copy paste your Google Analytics code exactly as given by their website, and you are all set for tracking visits.

FeedBurner Options

  • FeedBurner Feed URL: Paste the feed that FeedBurner provides you with, and it will be automatically be server to your users.
  • FeedBurner Email URL: Paste the URL FeedBurner provides for registering to email updates.

BuySellAds Options

  • BuySellAds.com Code: Paste the BSA code as given by their website and it will be automatically included on every page. Use our accompanying widget -=CI BuySellAds.com=- to display the ads.

Custom CSS

Paste your custom css in the box, and it will override the theme’s styles, along with the Background Options.

How to use the page builder template

The theme comes bundled with a page builder template which allows you to use your favorite page builder plugin on it and create unique layouts very easily.

To use that template start by going to Pages > Add New. This will create a new page. Add a title to your page and select the Page builder template from the template drop down in the Page Attributes metabox.

ci_page_builder_template

That’s it. You can now start building your page using the page builder of your choice, once done publish it and check it out.

Next Steps

Still have questions or problems setting up your CSSIgniter Theme? We will be happy to help you out! Please visit our support Hub 
Ultraseven

Last Updated On

About UltraSeven

UltraSeven is an e-commerce theme for WordPress. It is WooCommerce compatible and allows you to easily setup a functional and beautiful e-shop to sell your merchandise. Its homepage consists of a slider and a widgetized area which allows you to use widgets to display your products, also a shortcode version of the homepage is available to give you more customization options.

WordPress theme installation

The easiest way to install the theme, is by accessing your WordPress admin panel, then go to Appearance > Themes. Select the Install Themes tab and click the Upload link located just below the tab’s name. Click on Browse… and select the WordPress theme zip file you just downloaded. Then click the Install Now button, and after a few seconds, your new theme should be installed. Click activate and the theme is ready to use.

In order to install the theme manually, or in case you have trouble installing it through the admin panel, you have to unzip the WordPress theme’s zip file on your computer, and upload via FTP the resulting theme folder into your WordPress installation themes folder (wp-content/themes). Then, from the WordPress admin go to Appearance > Themes. The theme should be available in your themes list. Click activate.

After activation, you will be redirected to the CSSIgniter Settings panel (accessible from Appearance > CSSIgniter Settings) to start customizing your brand new theme.

Image Sizes

Thumbnail: 480x360px
Homepage slider: 1220x480px
Blog thumbnails: 480x360px
Product thumbnail: 100x100px
Shop page (product listing) thumbnail: 320x430px
Single product featured image: 560px in width, not limited in height

Useful Plugins

These plugins provide functionality and features used directly (or not) by the Theme. So, it is recommended to install and activate them before importing your sample content.

  • Revolution Slider: The theme comes bundled with the Revolution slider plugin, if you want to install it you can find the plugin’s zip file in the /plugins/ folder of the theme. You can have a look at the plugin’s documentation here to help you create a slider.
  • CSSIgniter Shortcodes you can use our custom made shortcode plugin to help you create a variety of layouts and elements on your site. Instructions can be found here.
  • Socials Ignited use this plugin to create a widget that links to all your social profiles. You can also customize it with your icons and add new social networks, a guide can be found here.
  • Contact Form 7 use this plugin to create a contact form, then copy the shortcode it gives you and paste it in an empty page.

WooCommerce

To enable eCommerce functionality for your website you need to install and activate the WooCommerce plugin by WooThemes. You can download the plugin free of charge from the WordPress Plugin Repository. For installation and usage instructions please refer to the plugin’s documentation.

Once you have installed and activated the WooCommerce plugin please install its pages by clicking on the button that WooCommerce provides on its banner. This will likely create a duplicate of some pages along with the pages install by the sample content but its a needed step. You can delete the old pages that came with the sample content or use them instead by going to WooCommerce > Settings > Pages and assign them anew.

TIP: If you need different product image sizes than the ones set by the theme, go to WooCommerce > Settings and in the Products tab set the image sizes that best fit your shop under the Product Image Sizes section.

Importing Sample Content using One Click Import

To automate the process of importing and for a better experience we have natively included support for OneClick Import Plugin. Let install it fist:

From your WordPress dashboard

  1. Visit ‘Plugins > Add New’,
  2. Search for ‘One Click Demo Import’ and install the plugin,
  3. Activate ‘One Click Demo Import’ from your Plugins page.

From WordPress.org

  1. Download ‘One Click Demo Import’.
  2. Upload the ‘one-click-demo-import’ directory to your ‘/wp-content/plugins/’ directory, using your favorite method (ftp, sftp, scp, etc…)
  3. Activate ‘One Click Demo Import’ from your Plugins page.

Once the plugin is activated you will find the actual import page in: Appearance > Import Demo Data.

 Click on the Import demo data button and you are done!

This plugin requires PHP version of at least 5.3.x, but we recommend version 5.6.x or better yet 7.x. Please contact your hosting company and ask them to update the PHP version for your site.

Importing sample content

The easiest way to get started and find your way around using this theme, is by installing it into a fresh WordPress installation, and importing our sample content.
To get it go to CSSIgniter settings > Site Options, scroll all the way down and click the Download sample content link. Extract the zip file you downloaded and upload the xml file in Tools > Import > WordPress (if not already present, you will be prompted to install the WordPress importer plugin), assign the authors to an existing user and make sure you check the “import attachments” box. You can now import the sample content.

You can also download the Sample Content for Ultraseven by clicking here

WARNING: As this will create posts, pages, custom post types, categories, widgets, etc. and change various system settings, it is strongly advised that you do this on a clean WordPress installation, without any previous and/or precious data. Under no circumstances we can be held responsible for total or partial data loss, so please be careful.

Setting up your theme

1) Creating theme pages

Let’s start by adding pages you are going to need. Go to Pages > Add New and create the following pages:

  1. “Home” this will serve as your homepage, assign to it the “Homepage Widgetized Template
    or the “Homepage Shortcodes Template” from the “Page attributes” panel. See below for homepage configuration.
  2. “Blog” this will be your posts page. Just create it, no further action needed.
  3. “Contact” here you can place your contact form.

(TIP, all page titles serve as examples, you can name your pages according to your needs.)

Once the pages are created, navigate to Settings > Reading and set the “Home” page to be your static frontpage and the “Blog” page as your posts page, as demonstrated in the image below.

ReadingSettings

2) Populating your blog

To add new posts to your blog, go to Posts > add new, title your post, enter the content in the editor, upload a featured image by clicking “Set featured image” on the Featured Image panel, add a category and/or tag to the post, if you so desire, from the respective panels and publish the post by clicking “Publish”.

3) Adding products

The most important thing of your e-shop are your products, to add them check this detailed guide provided by WooThemes here.

4) Adding Slider items

UltraSeven comes with two slider options, one is Flexslider which you probably have seen on the majority of our themes, to add items to this slider go to Slider Items > new Slider Item, set a title for the slider item and upload a featured image (which will be the image displayed on the homepage), finally, publish the slider item. You can control slider behavior from CSSIgniter settings > Homepage options (2nd box).

The other option is Revolution Slider which is a premium slider plugin. To install it, unpack the zip theme’s zip file and locate the plugins/revslider folder. Inside you will find the slider’s documentation, which you need to read to see how you can use it and the revslider.zip file which you need to install by going to Plugins > Add new, click upload, choose file, point to the revslider.zip and finally click Install now. Once the plugin is installed, click to activate it. Then setup your slider according to its documentation and navigate to CSSIgniter settings > Homepage options, select Use Revolution Slider and write its alias in the box. Save and you are done. For more information about the Revolution Slider plugin, please have a look at the Useful Plugins section below.

5) Creating your menu

Now that your content is in place, you will need a menu. Go to Appearance > Menus, check the pages you want on your menu and add them, give your menu a name and save it. Finally you will need to set your menu as “Main” menu, this can be done either by checking the “Main menu” box in “Menu Settings” just below your menu items in Menu Structure, or by going to the “Manage Locations” tab and selecting the menu you just created.
You can also create a menu which will appear in the bar on the top of the header, create a new menu, as before, and set it as Top Menu from “Manage Locations”. Finally the theme features a “Mobile Menu” location in case you want to customize the appearance of the menu, when the site is viewed on a mobile device. Create a menu for the mobile view and set it as your Mobile Menu from “Manage Locations”. If you don’t set one the Main Menu will be set by default.

(TIP, for more info on creating and managing menus, please read the WordPress Menu User Guide here)

6) Setting up your Homepage

As mentioned earlier, UltraSeven comes with two different general homepage options:

Widgetized Homepage

If you have selected to use this template, navigate to Appearance > Widgets and assign widgets to the FrontPage Widget Area. Please note that only the following widgets are suggested for the homepage:

  • WooCommerce Products
  • WooCommerce Recently Viewed Products
  • WooCommerce Top Rated Products
  • -= CI Offer Box =-
  • -= CI Recent Posts =-
  • Revolution Slider (if installed)

Shortcoded Homepage
You can create unlimited variations of Homepages or simple Pages by using UltraSeven’s shortcodes. Please refer to this link for an overview of the available shortcodes and check out the Homepage variations in the sample content (listed as Homepage 1, 2, 3 .. ) to get a glimpse of how they are used.

Duplicate the demo’s layout

The theme’s demo has the “Widgetized Homepage” template selected. The revolution slider plugin is activated and the following widgets on the Front Page Widget Area sidebar: WooCommerce Products showing products by date, CI Offer, WooCommerce Products showing best sellers, and the “CI Recent Posts”. On the Footer Widgets Colums 1-4 sidebars we have respectively, a CI About Me widget, a CI Flickr Widdet, a Text widget, and finally the CI Socials Ignited widget along with another text widget.

The theme’s footer features an area for you to enter your copyright info, privacy policy etc. To change the text you need to go to CSSIgniter settings > Site options and use the appropriate box (5th box down).

8) e-Commerce options

Under CSSIngiter settings > e-Commerce options you can modify the number of columns your shop pages will have along with the number of products that will be displayed on shop listing pages.

9) Custom Widgets

The theme features ten custom widgets which are displayed below

custom_widgets

All widgets can be accessed from Appearance > Widgets. Below each widget you will find a small description explaining their functionality.

10)Page with e-shop sidebar template

Normal pages display widgets assigned to the Pages sidebar. You can make any page display the e-Shop sidebar instead, by assigning to the page the Page with e-shop sidebar template from the Page Attributes box. This way you can display appropriate information to maximize your sales, whichever way you see fit.

The CSSIgniter settings panel

Last but not least, under Appearance > CSSIgniter settings, you can find our custom built settings panel. From here you can manipulate various aspects of your theme, including, but not limited to, changing your logo, setting a custom background, changing color scheme and applying custom styles via the custom CSS tab. All options feature a description so you instantly know their provided functionality.

How to use the page builder template

The theme comes bundled with a page builder template which allows you to use your favorite page builder plugin on it and create unique layouts very easily.

To use that template start by going to Pages > Add New. This will create a new page. Add a title to your page and select the Page builder template from the template drop down in the Page Attributes metabox.

ci_page_builder_template

That’s it. You can now start building your page using the page builder of your choice, once done publish it and check it out.

Next Steps

Still have questions or problems setting up your CSSIgniter Theme? We will be happy to help you out! Please visit our support Hub 
Neuton

Last Updated On

Theme installation

The easiest way to install the theme, is by accessing your WordPress admin panel, then go to Appearance → Themes. Select the Install Themes tab and click the Upload link located just below the tab’s name. Click on Browse… and select the WordPress theme zip file you just downloaded. Then click the Install Now button, and after a few seconds, your new theme should be installed. Click activate and the theme is ready to use.

In order to install the theme manually, or in case you have trouble installing it through the admin panel, you have to unzip the WordPress theme’s zip file on your computer, and upload via FTP the resulting theme folder into your WordPress installation themes folder (wp-content/themes). Then, from the WordPress admin go to Appearance → Themes. The theme should be available in your themes list. Click activate.

After activation, you will be redirected to the CSSIgniter Settings panel (accessible from Appearance → CSSIgniter Settings) to start customizing your brand new theme.

Image Sizes

The recommended image sizes for the Neuton theme are:

  • Listing widget thumbnails: 700x464px
  • Small hero image: 600x277px
  • Big hero image: 600x554px
  • Fullwidth thumbnail: 1300x600px
  • Main thumbnail size: 825x380px

Useful Plugins

These plugins provide functionality and features used directly (or not) by the Theme. So, it is recommended to install and activate them before importing your sample content.

  • CSSIgniter Shortcodes you can use our custom made shortcode plugin to help you create a variety of layouts and elements on your site. Instructions can be found here.
  • Socials Ignited use this plugin to create a widget that links to all your social profiles. You can also customize it with your icons and add new social networks, a guide can be found here.
  • Contact Form 7 use this plugin to create a contact form, then copy the shortcode it gives you and paste it in an empty page.

Importing Sample Content using One Click Import

To automate the process of importing and for a better experience we have natively included support for OneClick Import Plugin. Let install it fist:

From your WordPress dashboard

  1. Visit ‘Plugins > Add New’,
  2. Search for ‘One Click Demo Import’ and install the plugin,
  3. Activate ‘One Click Demo Import’ from your Plugins page.

From WordPress.org

  1. Download ‘One Click Demo Import’.
  2. Upload the ‘one-click-demo-import’ directory to your ‘/wp-content/plugins/’ directory, using your favorite method (ftp, sftp, scp, etc…)
  3. Activate ‘One Click Demo Import’ from your Plugins page.

Once the plugin is activated you will find the actual import page in: Appearance > Import Demo Data.

 Click on the Import demo data button and you are done!

This plugin requires PHP version of at least 5.3.x, but we recommend version 5.6.x or better yet 7.x. Please contact your hosting company and ask them to update the PHP version for your site.

Creating your homepage

The theme comes with two Homepage Templates, one with the featured Hero section where your featured news show up as a grid and one with a slideshow.

To create a homepage navigate from within the WordPress Dashboard to Pages > Add New, give your page a title (e.g. Home) and from the right assign a homepage Page Template (named either “Front Page w/ Hero” or “Front Page w/ Slider” respectively). Just leave the page content blank and Publish it.

After you’ve published it, navigate to Settings > Reading and set the page you’ve just created as your static page.

Populating your homepage is just a matter of adding the custom widget “-=CI Posts from Category=-” in the homepage widget areas (namely: Homepage Widgets 1, Homepage Widget 2 and the Homepage Sidebar where you can put just about any widget you wish). The -=CI Posts from Category=- widget is basically a 7 in 1 widget where you can select how you wish to display your post listings from the selected category.

Marking a post as featured by clicking on the “Mark this post as featured.” checkbox will send the post to the hero (or slider) section of your homepage.

Widgets

This theme supports widgets. There are multiple widget areas defined. The theme also comes bundled with a few widgets developed by CSSIgniter. For information on using widgets, please see http://codex.wordpress.org/Widgets_SubPanel

Make sure you have populated your sidebars with widgets (especially the Footer Columns) so that your website does not appear empty.

Custom Menus

This theme supports custom menus. There are three menu locations defined, Main Menu, that appears under the header, Header menu which appears in the ribbon across the top of your website and Footer Menu which appears under your Footer Widgets. For information on using custom menus, please see read http://codex.wordpress.org/Appearance_Menus_Screen.

Reviews

To create a new Review, go to Reviews → New Review. A review is no different than a post, only it does not support post formats and has a rating custom field where you can place your rating for the review. The Category taxonomy is identical for Reviews and Posts for your convenience. You can create a “Reviews” category if you wish to group your reviews and show them in the homepage via the Posts from Category widget.

Full Width Page template

You may have any page displaying full-width, without a sidebar. All you need is to assign the Full Width, No Sidebar template from the Page Attributes box.

Archive page template

You can have an archive page displaying your posts based on the date. All you need is to create an empty page and assign the Archive template from the Page Attributes box.

Contact page template

You can have an contact page displaying a contact form using the Contact Form 7 or Gravity Forms plugin. All you need is to create a page and paste your contact form shortcode in it.

Trending Topics are automatically generated by the theme’s algorithm which analyzes your most recent comments for the last 7 days, gets the most popular posts from those comment numbers and extract their Tags in order to generate the Trending Topics.

What this basically means is that in order for the Trending Topics feature to work you need to have tagged your posts (normal WordPress tags) and have comments in the last 7 days. The rest is automatic.

Theme Settings

Our custom options panel can be found under Appearance → CSSIgniter Settings.

How to use the page builder template

The theme comes bundled with a page builder template which allows you to use your favorite page builder plugin on it and create unique layouts very easily.

To use that template start by going to Pages > Add New. This will create a new page. Add a title to your page and select the Page builder template from the template drop down in the Page Attributes metabox.

ci_page_builder_template

That’s it. You can now start building your page using the page builder of your choice, once done publish it and check it out.

Next Steps

Still have questions or problems setting up your CSSIgniter Theme? We will be happy to help you out in our support forums

Igloo – Legacy

Last Updated On

About Igloo

Igloo is a WordPress theme for restaurants that allows you to display your menu (food or drink items), photo galleries, your customers’ testimonials and any announcements you might have, mostly by using four different Custom Post Types: Slider Items, Menu Items, Galleries and Testimonials. All the above act as standard WordPress posts or pages but each of them has extra fields which differentiate them from the former. The homepage is comprised of custom widgets specially crafted to bring those custom post types together as discussed later on in the documentation.

WordPress theme installation

The easiest way to install the theme, is by accessing your WordPress admin panel, then go to Appearance > Themes. Select the Install Themes tab and click the Upload link located just below the tab’s name. Click on Browse… and select the WordPress theme zip file you just downloaded. Then click the Install Now button, and after a few seconds, your new theme should be installed. Click activate and the theme is ready to use.

In order to install the theme manually, or in case you have trouble installing it through the admin panel, you have to unzip the WordPress theme’s zip file on your computer, and upload via FTP the resulting theme folder into your WordPress installation themes folder (wp-content/themes). Then, from the WordPress admin go to Appearance > Themes. The theme should be available in your themes list. Click activate.

After activation, you will be redirected to the CSSIgniter Settings panel (accessible from Appearance > CSSIgniter Settings) to start customizing your brand new theme.

Image Sizes

  • Home slider full width: 1920x420px
  • Home slider fixed width: 1240x420px
  • Thumbnails: 770x520px

Useful Plugins

To get the sample content file you can click the link in the notice that will appear on your dashboard immediately after activating the theme.

  • CSSIgniter Shortcodes you can use our custom made shortcode plugin to help you create a variety of layouts and elements on your site. Instructions can be found here.
  • Socials Ignited use this plugin to create a widget that links to all your social profiles. You can also customize it with your icons and add new social networks, a guide can be found here.
  • Contact Form 7 use this plugin to create a contact form, then copy the shortcode it gives you and paste it in an empty page.

Importing Sample Content using One Click Import

To automate the process of importing and for a better experience we have natively included support for OneClick Import Plugin. Let install it fist:

From your WordPress dashboard

  1. Visit ‘Plugins > Add New’,
  2. Search for ‘One Click Demo Import’ and install the plugin,
  3. Activate ‘One Click Demo Import’ from your Plugins page.

From WordPress.org

  1. Download ‘One Click Demo Import’.
  2. Upload the ‘one-click-demo-import’ directory to your ‘/wp-content/plugins/’ directory, using your favorite method (ftp, sftp, scp, etc…)
  3. Activate ‘One Click Demo Import’ from your Plugins page.

Once the plugin is activated you will find the actual import page in: Appearance > Import Demo Data.

 Click on the Import demo data button and you are done!

This plugin requires PHP version of at least 5.3.x, but we recommend version 5.6.x or better yet 7.x. Please contact your hosting company and ask them to update the PHP version for your site.

Setting up your theme

1) Creating theme pages

Let’s start by adding pages you are going to need. Go to Pages > Add New and create the following pages:

“Home” this will serve as your homepage, assign to it either the “Frontpage Fullwidth Slider” or the “Frontpage Fixed Slider” template from the “Page attributes” panel and publish the page..

“Blog” this will be your posts page. Just create it, no further action needed.

“Contact” here you can place your contact form, apply the “Contact Page” template.

“Menu” this page will serve as your menu listing page, apply the “Menu Template” to it.

“Location” here you can place info relevant to your business’ location, apply the “Location Page” template. The page features a map showing your location, you can set the location under CSSIgniter settings > Contact options.

“Gallery Listing” this page will host your galleries, apply to it the “Galleries Listing” templateand notice the “Gallery Listing Options” panel that appears. Here you can select the number of columns your gallery listing page will have.

gallery_columns

(TIP, all page titles serve as examples, you can name your pages according to your needs.)

Once the pages are created, navigate to Settings > Reading and set the “Home” page to be your static frontpage and the “Blog” page as your posts page, as demonstrated in the image below.

ReadingSettings

2) Populating your blog

To add new posts to your blog, go to Posts > add new, title your post, enter the content in the editor, upload a featured image by clicking “Set featured image” on the Featured Image panel, add a category and/or tag to the post, if you so desire, from the respective panels and publish the post by clicking “Publish”.

3) Adding Slider items

To add items to your homepage’s slider go to Slider Items > new Slider Item, set a title for the slider item and upload a featured image (which will be the image displayed on the homepage, the image should be at least 1920×420 if you chose the fullwidth slider template and 1240×420 if you chose the fixed template.), in the Slider Details panel you can set a URL & text for the slide’s button, finally, publish the slider item. Slider speed and autoslide functionality can be adjusted under CSSIgniter settings > Homepage options.

4) Adding Menu items

  1. First, you need to create some categories for your goods. From your admin panel, go to Menu Items > Menu Categories, and then create some categories such as Appetizers, Main Dishes, Desserts and Drinks.
  2. Then, you need to create the actual goods. Go to Menu Items > New Menu Item and enter the title (e.g. Bloody Mary), on the main content box enter the description (e.g. A bloody-red spicy cocktail with tomato-juice and Tabasco), select the Menu Category that it belongs into (Drinks), add a Featured Image by clicking on Set featured image (at least 700×450), and finally, on the Menu Item Price box add the price.

5) Adding Galleries

To create a new gallery item go to Galleries > new Gallery, set the gallery’s name as a title, enter some text if you wish in the content editor, set a featured image and proceed to upload your images by clicking the “Add Images” button in the “Gallery Information” panel ( Notice, if you are using versions 1.1 and older, please read the “Creating Gallery items and uploading images” section first), drag & drop to rearrance the image order and publish the gallery.

6) Adding Testimonials

To create a new Testimonial, go to “Testimonials > New Testimonial”, set the author’s name as the title, and the testimonial’s text in the content box, finally, publish it. Testimonials can be used in any widgetized area you like by using the “CI Testimonials” widget.

7) Creating your menu

Now that your content is in place, you will need a menu. Go to Appearance > Menus, check the pages you want on your menu and add them, give your menu a name and save it. Finally you will need to set your menu as “Main” menu, this can be done either by checking the “Main menu” box in “Menu Settings” just below your menu items in Menu Structure, or by going to the “Manage Locations” tab and selecting the menu you just created.

(TIP, for more info on creating and managing menus, please read the WordPress Menu User Guide here)

8) Adding content to your Homepage

The homepage on Igloo features three widgetized areas, the Homepage Testimonial Widget, the Homepage Second Row and the Homepage Third Row. All three feature a small description on how to use them optimally to display your content. You can access and add content to them in Appearance > Widgets.

The theme’s footer features an area for you to enter your copyright info, privacy policy etc. To change the text you need to go to CSSIgniter settings > Site options and use the appropriate box (4th box down).

10) Changing header text

To modify the text displayed on the right side of the header navigate to CSSIgniter settings > Contact options (1st box) and follow the on-screen instructions.

11) Header images

Pages, posts and single galleries in Igloo feature header images. To set the default and learn more about how you can have custom images on each item, please navigate to CSSIgniter settings > Display options (2nd box). When using custom header images you might want to hide the featured image from the page’s/post’s body, to do that again in CSSIgniter settings > Display options and un-check one (or both) of these boxes

feat_toggle

12) Custom Widgets

The theme features seven custom widgets which are displayed below

custom_widgets

All widgets can be accessed from Appearance > Widgets. Below each widget you will find a small description explaining their functionality.

The CSSIgniter settings panel

Last but not least, under Appearance > CSSIgniter settings, you can find our custom built settings panel. From here you can manipulate various aspects of your theme, including, but not limited to, changing your logo, setting a custom background, changing color scheme and applying custom styles via the custom CSS tab. All options feature a description so you instantly know their provided functionality.

How to use the page builder template

The theme comes bundled with a page builder template which allows you to use your favorite page builder plugin on it and create unique layouts very easily.

To use that template start by going to Pages > Add New. This will create a new page. Add a title to your page and select the Page builder template from the template drop down in the Page Attributes metabox.

ci_page_builder_template

That’s it. You can now start building your page using the page builder of your choice, once done publish it and check it out.

Additional information

  1. Create a new Gallery.
  2. Click “add media” or “Upload images”.
  3. Drag & drop the images from your computer (do not use already uploaded images).
  4. When your images are done uploading click the “X” on top right (do not click insert to post).
  5. Finish setting up the rest of the item’s details, if any, and publish the item.
  1. Edit the Gallery.
  2. Click “add media” or “Upload images”.
  3. Notice on the top left of the media manager a drop-down menu, select “Uploaded to this post”.
  4. Add/remove or re-order with drag & drop.
  5. When you are done click the “X” on top right.
  6. Update the item.

Next Steps

Still have questions or problems setting up your CSSIgniter Theme? We will be happy to help you out! Please visit our support Hub 

Medi – Legacy

Last Updated On

About Medi

Medi is a versatile business WordPress theme designed with health professionals in mind, that allows you to display your services and personnel by using the two custom post types provided, “Services” and “Personnel”. The above act as standard WordPress posts or pages but each of them has extra fields which differentiate them from the former. The homepage is comprised of custom widgets specially crafted to bring those custom post types together as discussed later on in the documentation.

Theme installation

The easiest way to install the theme, is by accessing your WordPress admin panel, then go to Appearance → Themes. Select the Install Themes tab and click the Upload link located just below the tab’s name. Click on Browse… and select the WordPress theme zip file you just downloaded. Then click the Install Now button, and after a few seconds, your new theme should be installed. Click activate and the theme is ready to use.

In order to install the theme manually, or in case you have trouble installing it through the admin panel, you have to unzip the WordPress theme’s zip file on your computer, and upload via FTP the resulting theme folder into your WordPress installation themes folder (wp-content/themes). Then, from the WordPress admin go to Appearance → Themes. The theme should be available in your themes list. Click activate.

After activation, you will be redirected to the CSSIgniter Settings panel (accessible from Appearance → CSSIgniter Settings) to start customizing your brand new theme.

Image Sizes

The recommended image sizes for the Medi theme are:

  • CI Thumb: 780x780px (General thumbnail size, used on listing pages and widgets)
  • CI Slider: 1920x550px (Used on the homepage’s slider)

Useful Plugins

These plugins provide functionality and features used directly (or not) by the Theme. So, it is recommended to install and activate them before importing your sample content.

  • CSSIgniter Shortcodes you can use our custom made shortcode plugin to help you create a variety of layouts and elements on your site. Instructions can be found here.
  • Socials Ignited use this plugin to create a widget that links to all your social profiles. You can also customize it with your icons and add new social networks, a guide can be found here.
  • Contact Form 7 use this plugin to create a contact form, then copy the shortcode it gives you and paste it in an empty page.

Importing Sample Content using One Click Import

To automate the process of importing and for a better experience we have natively included support for OneClick Import Plugin. Let install it fist:

From your WordPress dashboard

  1. Visit ‘Plugins > Add New’,
  2. Search for ‘One Click Demo Import’ and install the plugin,
  3. Activate ‘One Click Demo Import’ from your Plugins page.

From WordPress.org

  1. Download ‘One Click Demo Import’.
  2. Upload the ‘one-click-demo-import’ directory to your ‘/wp-content/plugins/’ directory, using your favorite method (ftp, sftp, scp, etc…)
  3. Activate ‘One Click Demo Import’ from your Plugins page.

Once the plugin is activated you will find the actual import page in: Appearance > Import Demo Data.

 Click on the Import demo data button and you are done!

This plugin requires PHP version of at least 5.3.x, but we recommend version 5.6.x or better yet 7.x. Please contact your hosting company and ask them to update the PHP version for your site.

Setting up your theme

1) Creating theme pages

Let’s start by adding pages you are going to need. Go to Pages → Add New and create the following pages:

  1. “Home” this will serve as your homepage, assign to it the “Frontpage” template from the “Page attributes” panel.
  2. “Blog” this will be your posts page. Just create it, no further action needed.
  3. “Contact” here you can place your contact form, apply the “Contact” template. You can customize the location displayed on the map in CSSIgniter settings → Contact options.
  4. “Personnel” this page will list your personnel, you can select two different layouts for the personnel listing page by selecting either the “Personnel Listing” or the “Personnel Listing #2” template. You can customize the number of columns on the listing page in CSSIgniter settings → Display options (3rd box down).
  5. “Services” this page will list your services, you can select two different layouts for the services listing page by selecting either the “Services Listing” or the “Services Listing #2” template. You can customize the number of columns on the listing page in CSSIgniter settings → Display options (2nd box down).

(TIP, all page titles serve as examples, you can name your pages according to your needs.)

Once the pages are created, navigate to Settings → Reading and set the “Home” page to be your static frontpage and the “Blog” page as your posts page, as demonstrated in the image below.

reading_homepage

2) Populating your blog

To add new posts to your blog, go to Posts → add new, title your post, enter the content in the editor, upload a featured image by clicking “Set featured image” on the Featured Image panel, add a category and/or tag to the post, if you so desire, from the respective panels and publish the post by clicking “Publish”.

3) Adding Personnel

To create a new personnel item go to Personnel → new Personnel, set the person’s name as a title, enter relevant information in the content editor, set a featured image and publish the personnel item.

4) Adding Services

To create a new service item go to Services → new Service, set the service’s name as a title, enter relevant information in the content editor, set a featured image and publish the service item.

5) Adding Slider items

To add items to your frontpage’s slider go to Slider Items → new Slider Item, set a title for the slider item and upload a featured image (which will be the image displayed on the frontpage), in the Slider Settings panel you can set a URL to which your visitors will be redirected when the slider’s button is clicked, finally, publish the slider item. Slider options can be found in CSSIgniter settings → Homepage options, you can manipulate sliding functionality, effect and slideshow speed.

6) Creating your menu

Now that your content is in place, you will need a menu. Go to Appearance → Menus, check the pages you want on your menu and add them, give your menu a name and save it. Finally you will need to set your menu as “Main” menu, this can be done either by checking the “Main menu” box in “Menu Settings” just below your menu items in Menu Structure, or by going to the “Manage Locations” tab and selecting the menu you just created.

(TIP, for more info on creating and managing menus, please read the WordPress Menu User Guide here)

7) Adding content to your Homepage

The homepage on Medi consists of five widgetized areas which feature all the content unique to the homepage. You can access these areas and add content to them in Appearance → Widgets. Add any widgets you like in any of the “Front Page Widgets #” bars to shape the Homepage to your liking.

The theme’s footer features an area for you to enter your copyright info, privacy policy etc. To change the text you need to go to CSSIgniter settings → Site options (4th box down). Primary footer text appears on the left side of the footer and secondary on the right.

9) Changing header text

You can have a custom text line on the header as well to host a telephone number for example. To edit its content, navigate to CSSIgniter settings → Display options (1st box).

All widgets can be accessed from Appearance → Widgets. Below each widget you will find a small description explaining their functionality.

Settings Panel

Last but not least, under Appearance → CSSIgniter settings, you can find our custom built settings panel. From here you can manipulate various aspects of your theme, including, but not limited to, changing your logo, setting a custom background, changing color scheme and applying custom styles via the custom CSS tab. All options feature a description so you instantly know their provided functionality.

How to use the page builder template

The theme comes bundled with a page builder template which allows you to use your favorite page builder plugin on it and create unique layouts very easily.

To use that template start by going to Pages > Add New. This will create a new page. Add a title to your page and select the Page builder template from the template drop down in the Page Attributes metabox.

ci_page_builder_template

That’s it. You can now start building your page using the page builder of your choice, once done publish it and check it out.

Next Steps

Still have questions or problems setting up your CSSIgniter Theme? We will be happy to help you out! Please visit our support Hub 
Aegean

Last Updated On
ATTENTION: This documentation is about the new version of Aegean, if you are using the legacy version please visit its documentation page here

Server Requirements

If you already have WordPress installed, it means that you meet the minimum server requirements and you can perfectly install this theme without any issues. To get the most out of your website though, you should get in touch with your web host and ask them if they meet the following criteria:

  • PHP version 7.4 or greater.
  • MySQL version 5.6 or greater OR MariaDB version 10.1 or greater.
  • HTTPS support.

Theme installation (video)

Here is a video guide to help you install the theme and the Ignition Framework plugin.

Prerequisites

Ignition Framework

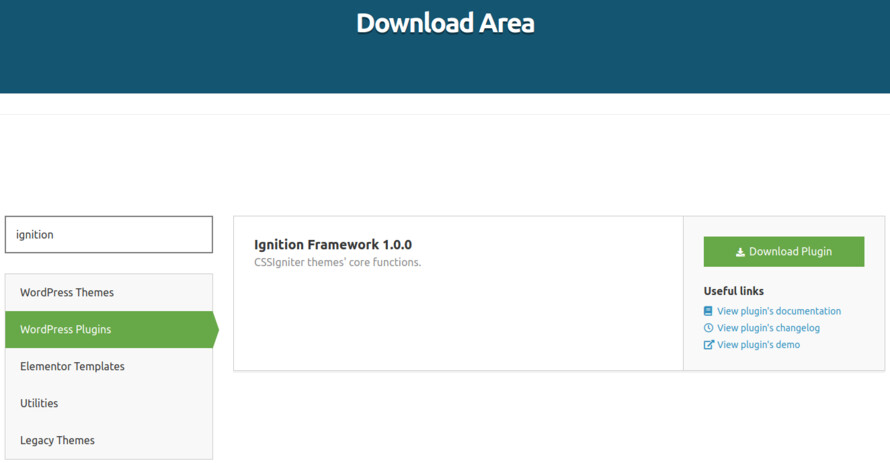
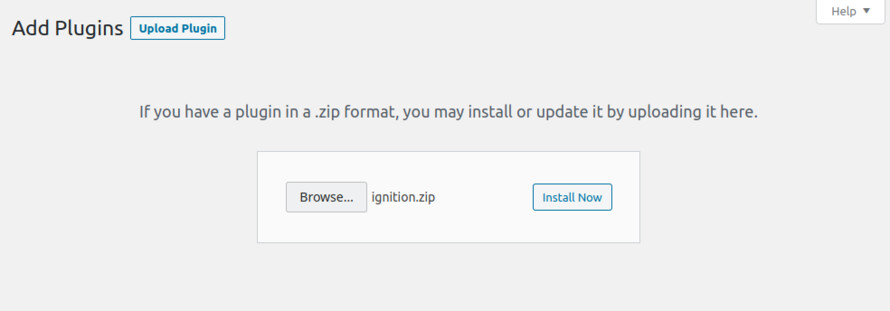
This theme requires our free Ignition framework plugin to be installed. Simply visit the Downloads area, download the Ignition Framework plugin, upload it through your Dashboard > Plugins > Add new and Activate it.

It really doesn’t matter if you install the theme or the plugin first. Just make sure to install both in order to get the whole functionality.

For more information about the installation procedure along with some small videos check out this article.

Theme installation

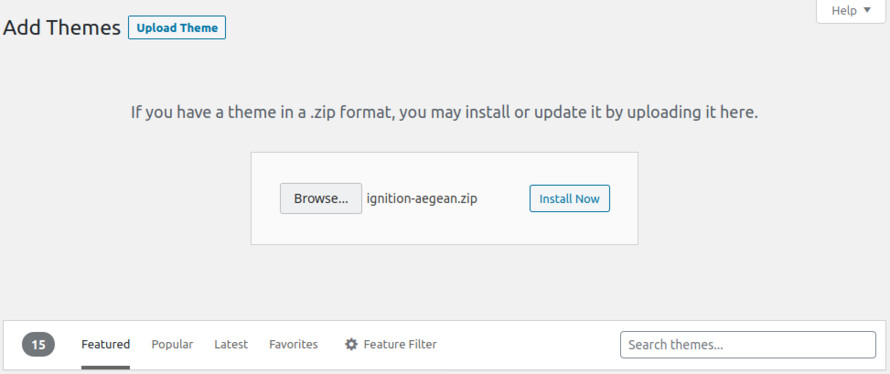
Installing the theme is a very simple process. Go to your dashboard under Appearance > Themes > Add new, click Upload Theme and upload the zip file. Once uploaded click Install Now and then the Activate Theme link.

Once the theme is installed and activated you will be forwarded to the theme’s onboarding page.

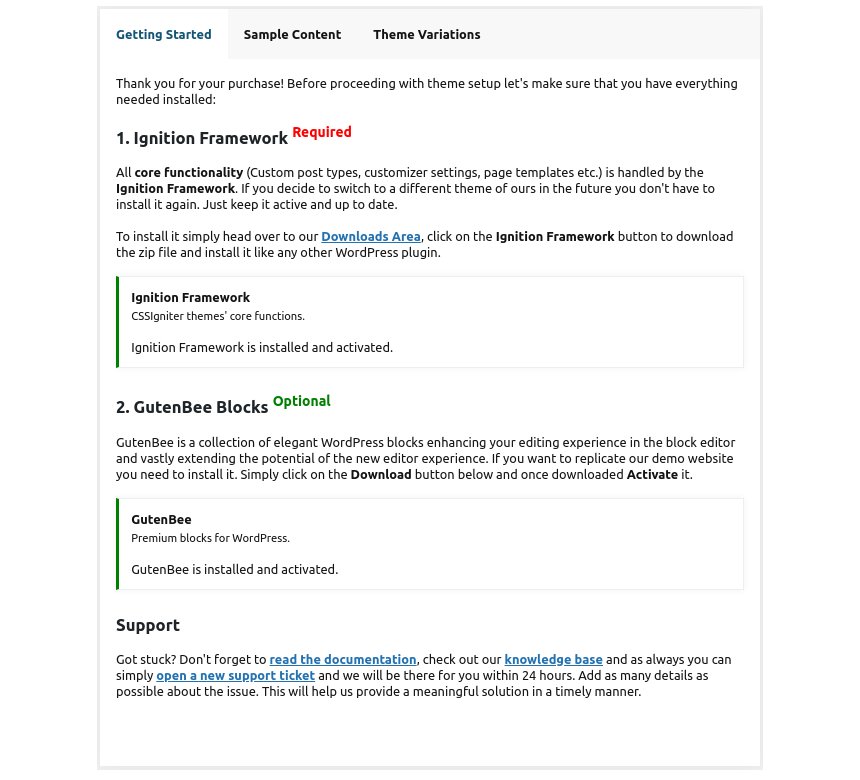
You will be prompted to install and activate the Ignition Framework plugin if you haven’t done so already. Here you can also install our free custom blocks plugin, GutenBee. Through the onboarding page you have access to many useful links, such as the theme’s documentation, our knowledge base articles and direct links to our support hub.

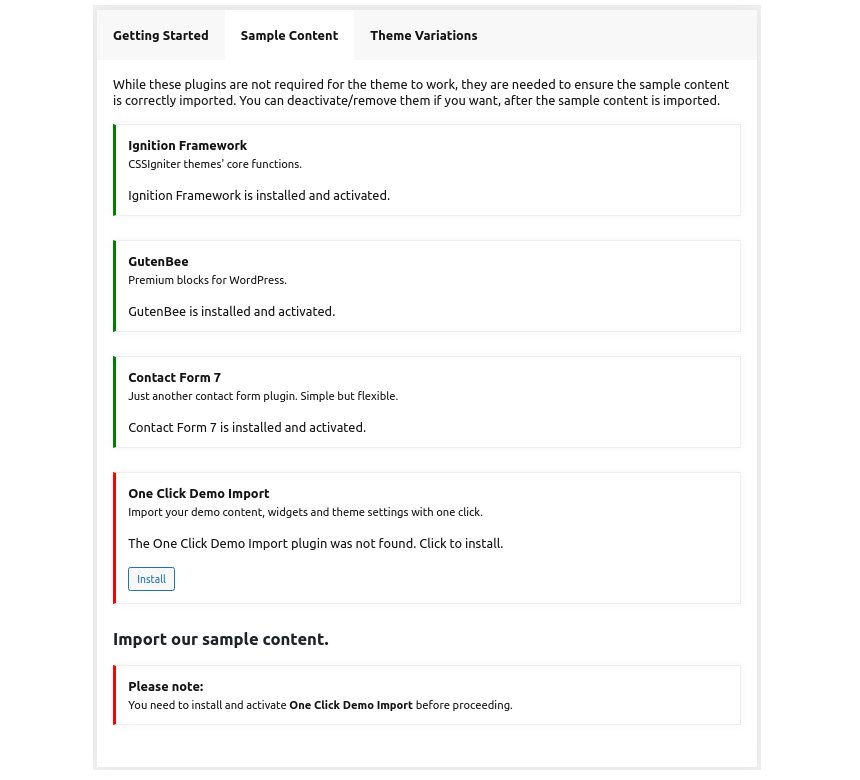
In the Sample Content tab of the onboarding page you can install and activate all the plugins required to import the sample content and proceed with its installation. More info on that on the next section.

NOTE: The only plugin required for the theme to work properly is the Ignition Framework plugin, all other plugins are entirely optional if you don’t need their functionality or are not planning on importing the sample content. You can safely skip installing and activating them if you are sure you don’t need them.

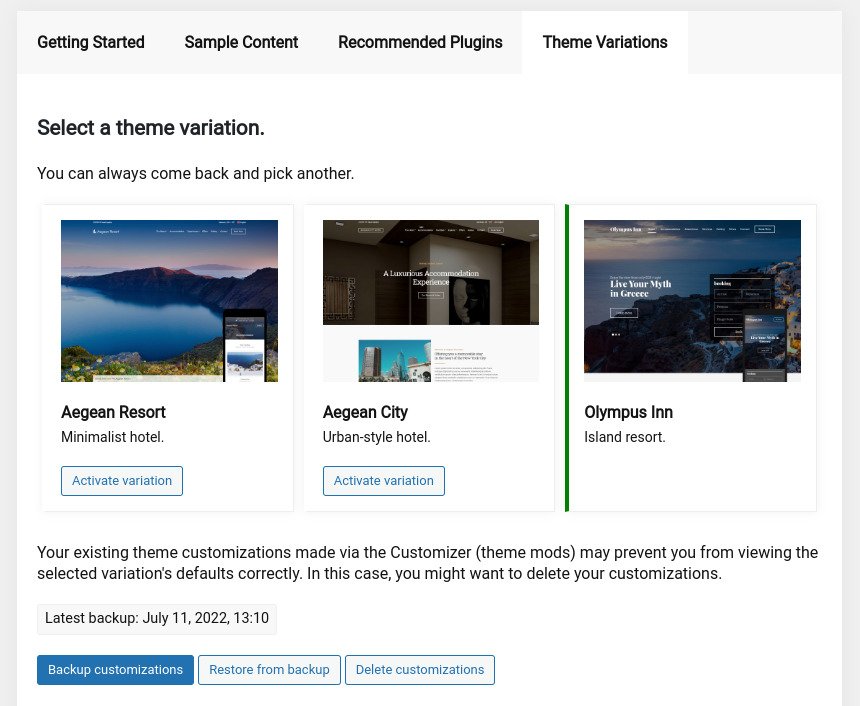
Finally in the Theme Variations tab you have the ability to choose one of the available theme variations for the current theme. Aegean Resort offers three variations, the Aegean Resort, the Aegean City and the Olympus Inn ones. Changing variations will change the color palette of your theme, it will also change Customizer options so be sure to back up your existing ones using the built in tool or another database backup plugin.


How to import the sample content

If you like what you see in our demo websites for Aegean Resort, Aegean City or Olympus Inn you can simply import the sample content. This means that a close approximation of our demo website will be imported in your WordPress installation. Now all you have to do is simply replace the content of these pages with your content. Importing the sample content can help serve as a basis on which you can continue to build and expand your site, however keep in mind that this procedure is entirely optional.

Check this video guide on how to import the sample content:

  • In your WordPress dashboard visit Appearance > Theme Options > Sample Content.
  • Click Install and then Activate for each of the required plugins.
  • Click the Get Started button and in the next screen, move over the screenshot of the builder/variation of your preference and click the Import Demo button.
NOTE: Due to the nature of the import mechanism some links may link back to our demo website. If you are not sure how to update / change these links simply get in touch and we’ll help you out.

Image sizes

Web page loading times are greatly affected by the size of your images. For best results make sure to use images with the recommended dimensions as described below:

  • Main post thumbnail: 870x580px
  • Item:  615x410px
  • Large Item: 1170x780px
  • Article Media 510x510px
  • Mini-cart items 160x160px
NOTE: If for any reason you want to change the dimensions of any of the predefined image sizes you have to use a plugin.  This guide describes the process of modifying image sizes.
NOTE: All image sizes are the minimum recommended, adding larger image sizes will result in cropping them to fit.

Setting up site-wide sections

It’s considered a good practice to set up the areas of your website that you won’t be editing a lot in the future, like the general site layout, the header, footer and some secondary functionality.

General Site Options

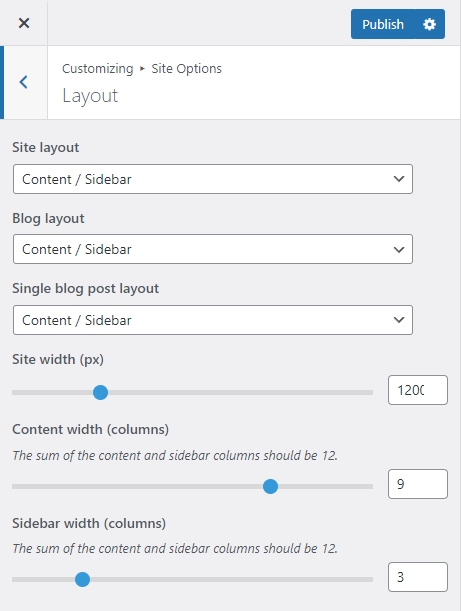
You can change your general site options under Appearance > Customize > Site Options. Under the Layout section you can control your site’s, blog’s and single blog post’s layout, as well as the site width and content/sidebar column ratio. The layout can then be overridden in each post/page individually. Under the Colors tab you can select the basic color palette for your installation and add a background image. Finally under Typography you can select the ideal font pairing from a full list of Google Fonts and customize font properties for key elements on desktop and mobile devices alike. You also have the option to disable Google Fonts altogether.

As you can see in our demo website all pages have a Transparent page header featuring a background image and 3 main components:

  1. Top Bar
  2. Logo
  3. Main Menu

The layout of the header can be set globally under Customize > Header > Layout.

Top Bar

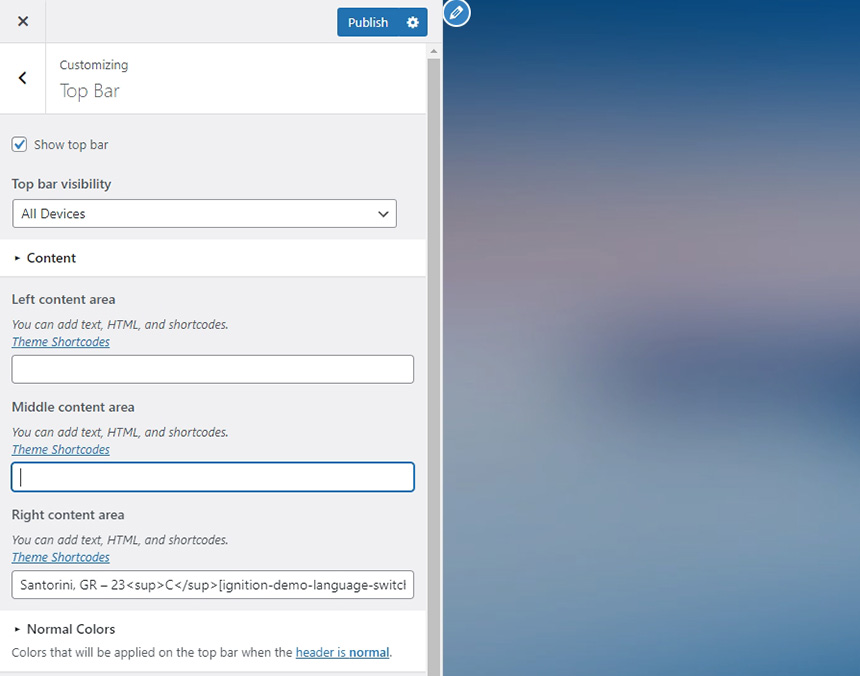
To edit the top bar go to Customize > Top Bar. Here you can toggle the top bar entirely and fill the 3 content areas with simple text, plain HTML, or shortcodes. Refer to the shortcodes section below for information regarding the shortcodes.

Logo

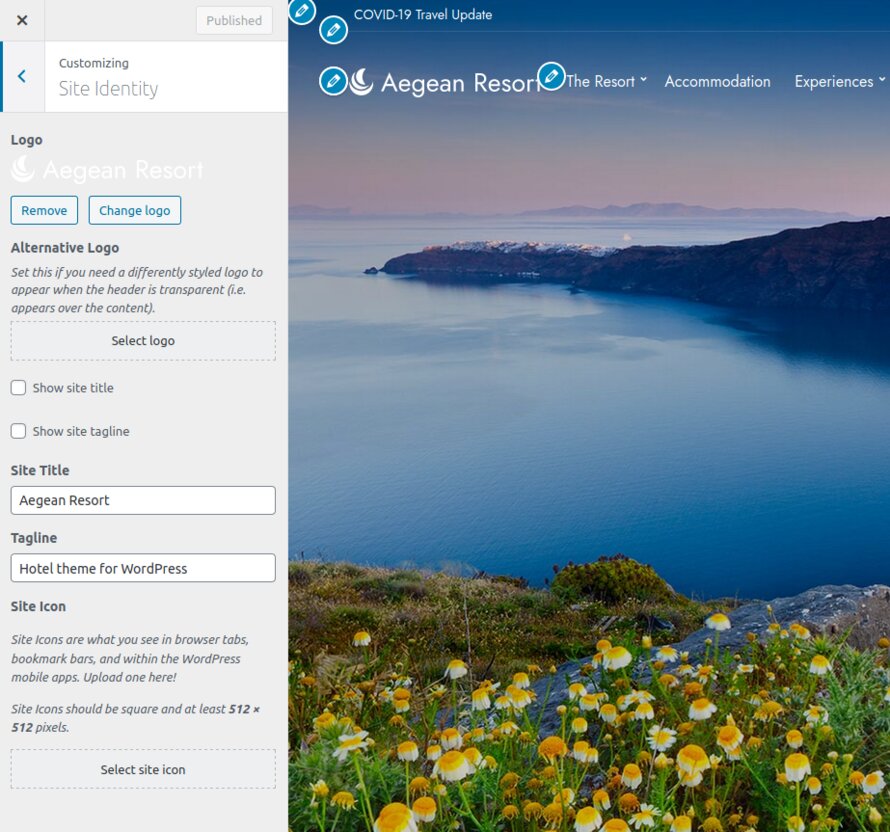
The recommended maximum width of your logo is 160px. To upload your logo visit the Customizer through your WordPress dashboard Customize > Site Identity. You can see you can upload 2 logos. The main and the alternative one. The alternative logo can be used if you want a different logo to appear when the header layout is set to Transparent under Customize > Header > Layout. In the theme’s demo we use the main logo everywhere.

Main Menu

If you are not familiar with WordPress menus here is a detailed guide.

Navigate to Customize > Menus. Enter a menu name (It can be anything you like) and click on the Create Menu button. In the next page click the Add Items button and start adding items to the menu. Now all you have to do is assign this menu to a location through the Menu Locations section, check the Main menu location and you are done. Your navigation menu should be now visible on your website.

Create a menu button

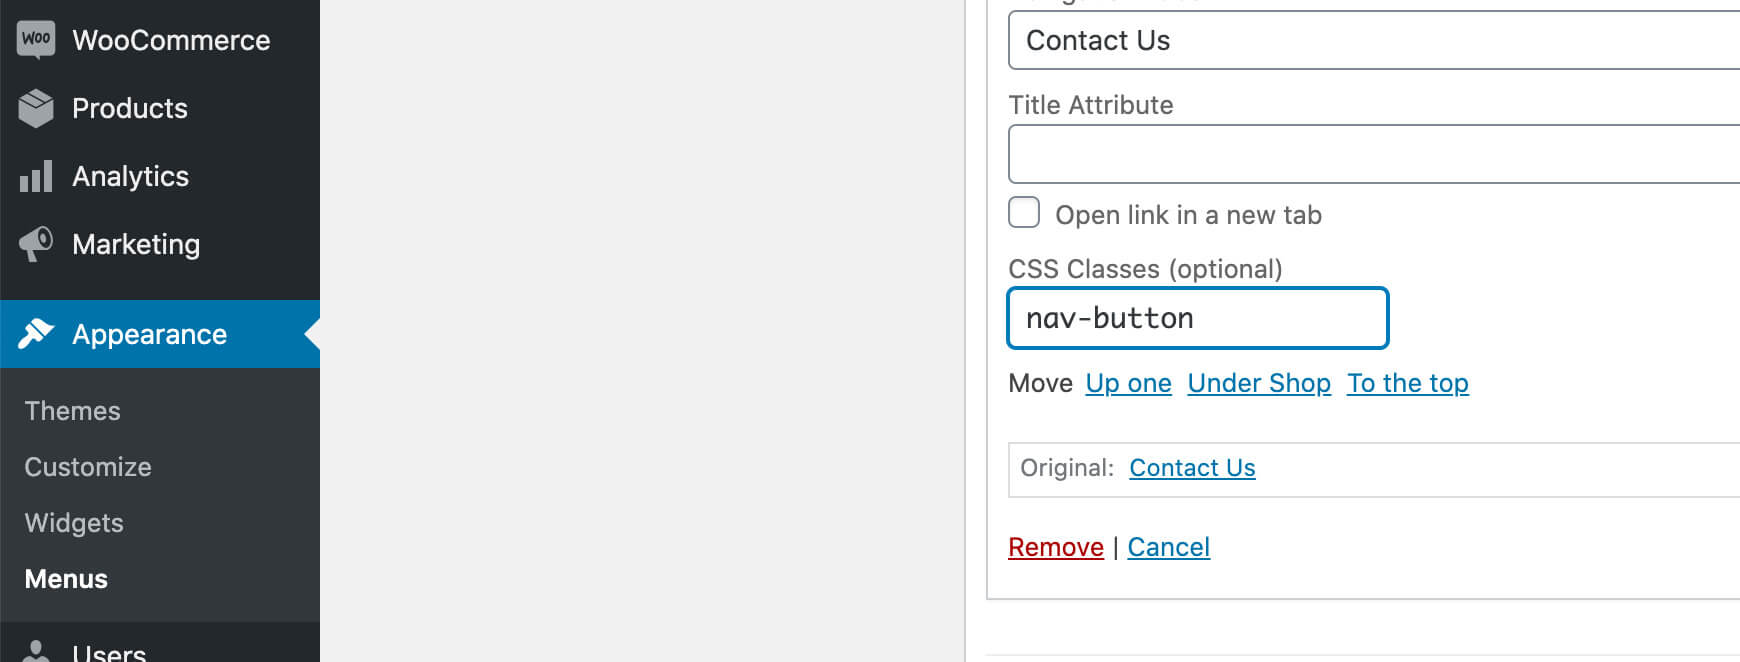
You can create a special button-like menu item by setting a certain class for to it. The class name is nav-button and you can set it under Appearance > Menus for the item you want. First enable this section from Screen Options.

This is a predefined class you can use for your menu items

The page title section

This section allows you to create an area just below the menu which can display the page’s title & subtitle along with a background image or color.

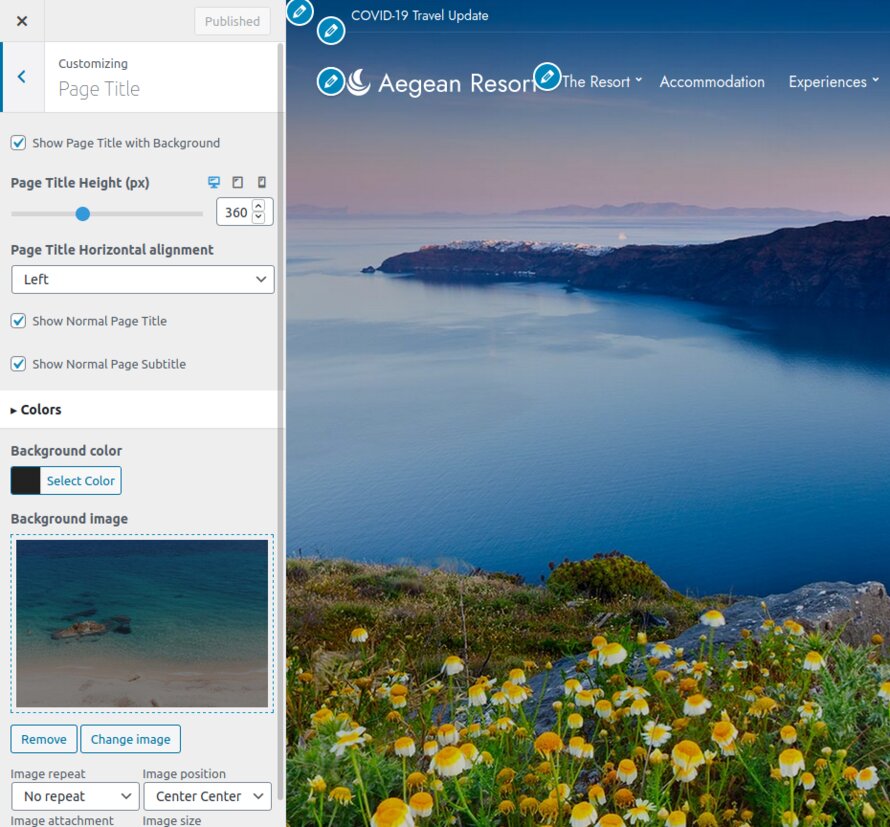
The page title section can be modified under Customize > Page title. You can choose to disable the page title with background section entirely, change its height, alignment, content and toggle the site’s breadcrumbs. Under the Colors section you can set a background color, a background image, an overlay color and also set the primary and the secondary text colors.

In some cases, like in our demo website, you might want to have different background images on different posts, pages and custom post types.

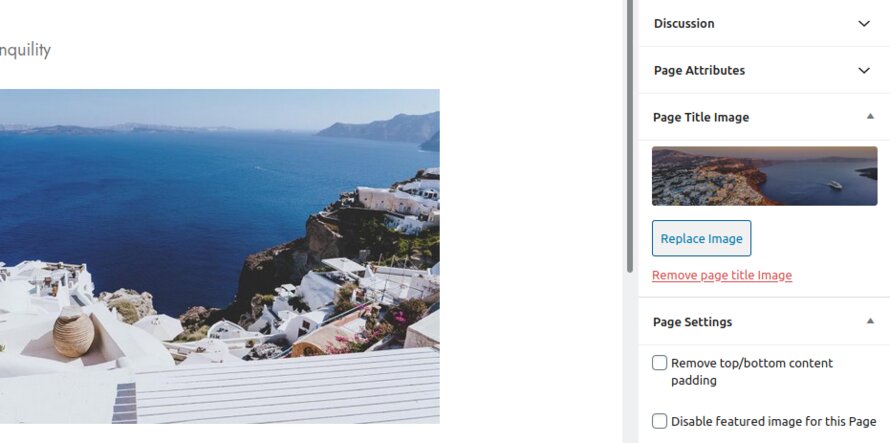
To achieve that create or edit a page. On the right sidebar locate the Page title image field. Upload a new image and preview this page. As you can see we have successfully overridden the image set in the Customizer settings.

NOTE: The purpose of the Transparent header option is to have your main header components (Top bar, Logo & Main Menu) on top of a background image or background color which means that you have to set on in the Customize > Page title > Color section.

In our Knowledge Base you can find more info about the page title section, the breadcrumbs and the page template overrides.

The footer area is a widgetized area that can be populated with widgets through Customize > Widgets. You can also remove the credits at the very bottom of this area by visiting Customize > Footer > Credits content. You can also adjust the colors by setting a background color & image and modify the border, title and text colors.

Utilities

Lightbox

The theme offers a lightbox for your images which is by default disabled to avoid conflicts with third party plugins which offer lightboxes. If you want to use it you can enable it under Customize > Utilities > Lightbox.

Weather

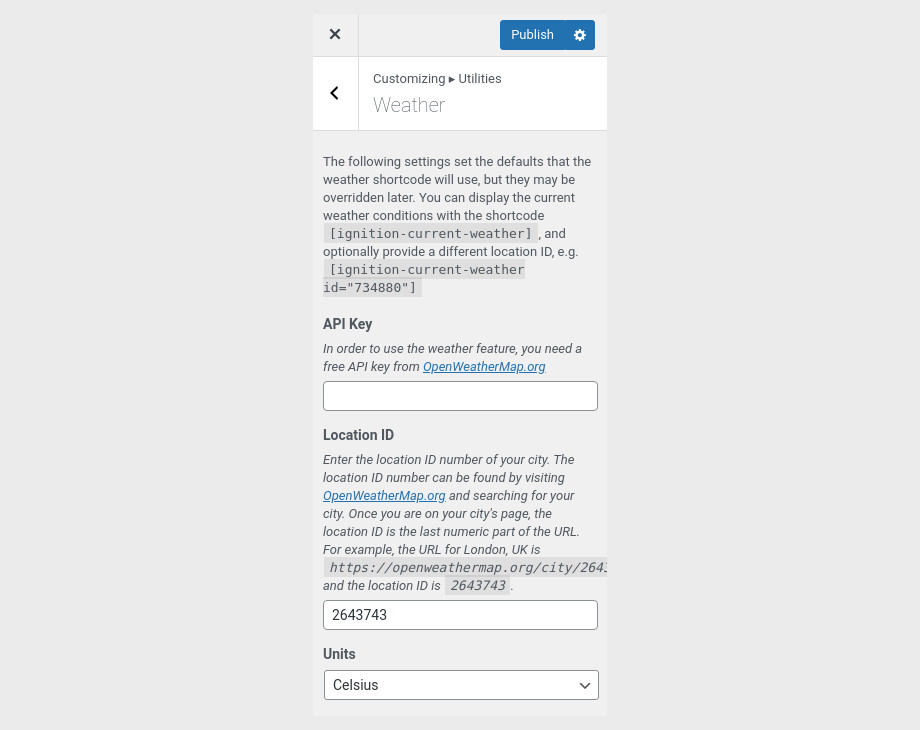
You can choose to show the weather for a chosen location using the weather shortcode anywhere inside your installation. First you will need to set it up by providing an API key and location under Customize > Utilities > Weather.

Block editor Dark Mode

Some themes might have a dark color scheme which is reflected in the block editor, this can make working with certain blocks a bit harder. Enabling the editor dark mode using the provided checkbox will apply certain styles to the editor in order to improve the content creation experience.

For more information check out this knowledge base article about available customization options.

Custom post types

Create a new Accommodation

Navigate to Accommodation > Add New. Then under the Accommodation tab start adding the basic item attributes. These are:

  • Summary: Control the location and appearance of the sidebar. More info about these options can be found here.
  • Categories: Set a category for the item which will also serve as a filter on the post type’s listing pages.
  • Featured image: Will appear on all related listings and on the item’s single page.
  • Excerpt: Add a manual excerpt that will appear on post listings and on the page title section as a subtitle (if applicable).
  • Page Title Image: Set a custom post title background image for the item. Leave blank if you want to keep the default settings configured earlier.
  • Page Settings: Here you can fine tune the item’s appearance. E.g. toggle the featured image, change header type, hide the page title/subtitle, breadcrumbs etc. All our demo services respect the Customizer options. More info about these options can be found here.

Setting up the pages

NOTE: All blocks used in the construction of the pages below are provided by the GutenBee plugin unless mentioned otherwise.

Homepage

Create a new page from Pages > Add New, then select from the right side under Summary the Full width boxed template. From Page Settings > Content Area tab, check the Remove top/bottom content padding and from Page Settings > Page Title tab, set Show Page Title with Background, Show Normal Page Title and Show Normal Page Subtitle to hide.

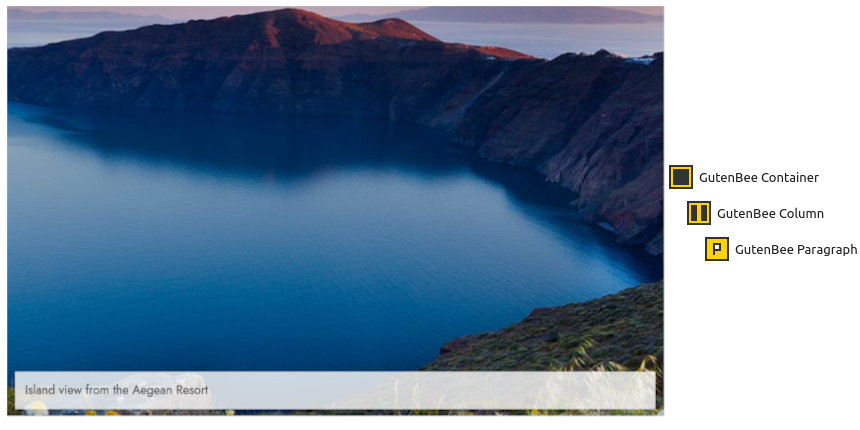
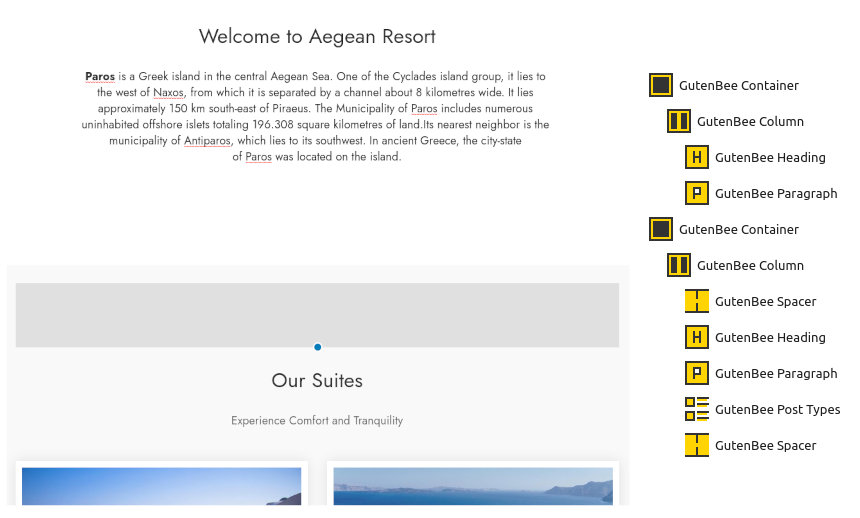
The homepage hero section consists of a Container block with its height set to -1, vertical content alignment and the Theme Grid option enabled. It also has a background image under Block Appearance and an overlay background color with some transparency. It contains a single column with a Paragraph block.

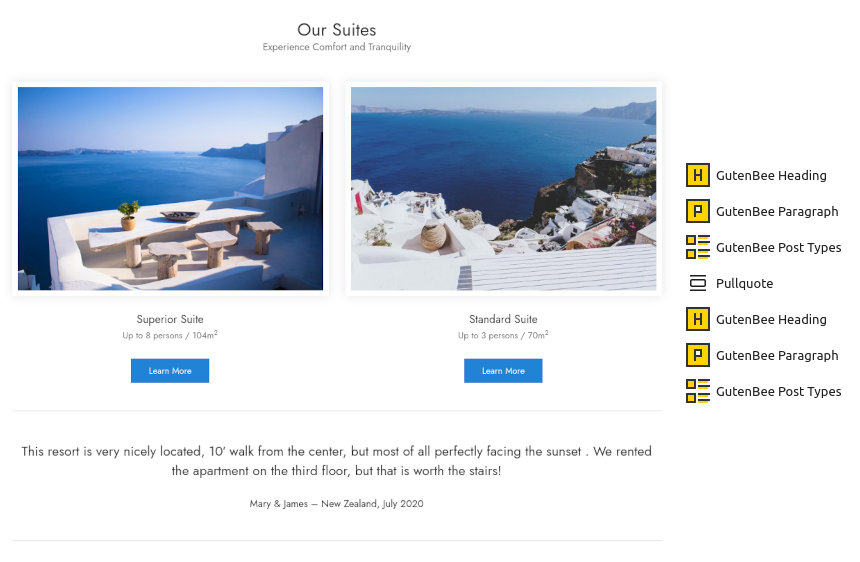
Next up we have a Container block with a single column containing a Heading and a Paragraph. Following is another Container with a single column. This houses a Heading/Paragraph/Post Types set wrapped by two Spacer blocks. The Post Types block displays two accommodation items from the suites category in a two column layout.

Continuing on we have another block set like the Hero section above, but this time the Container’s height is set to 500px. Following we have another container with the Theme Grid option enabled and a single column. This contains a Core Pullquote and another set of Heading/Paragraph/Post Types blocks. The Post Types block displays three accommodation items from the Rooms category in a three column layout.

This pattern is repeated with yet another hero section and a Container with a Heading/Paragraph/Post Types set. The Post Types block displays three posts in a three column layout.

Save – publish the page and set it as your FrontPage under Customize > Homepage Settings.

Single Accommodation

We’ll use this accommodation as a point of reference. In your WordPress dashboard navigate to  Accommodation > Add new.

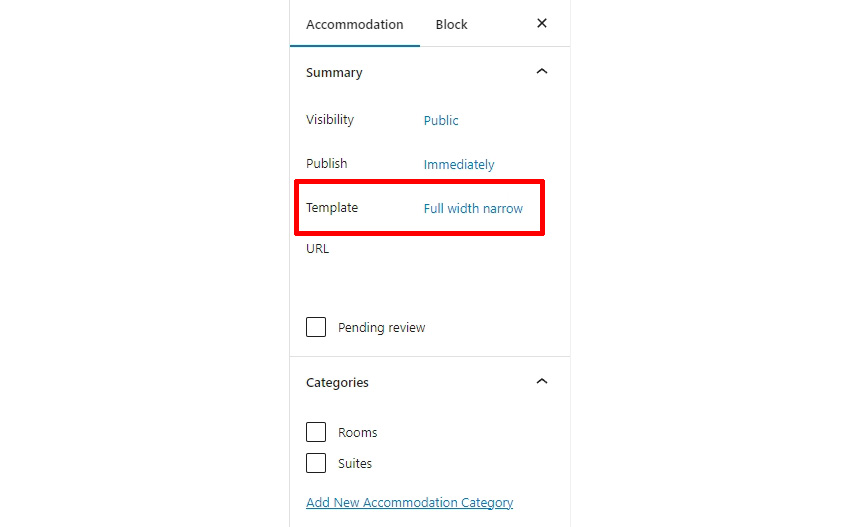
If you want a layout similar to our demo select the Full width narrow page template from the Summary section.

To recreate the header, you need to add a new page title image. On the right sidebar locate the Page Title Image option and upload your image. Also in the Excerpt field add any important details for this room like the capacity, size of the room etc. This will appear exactly below the room’s title.

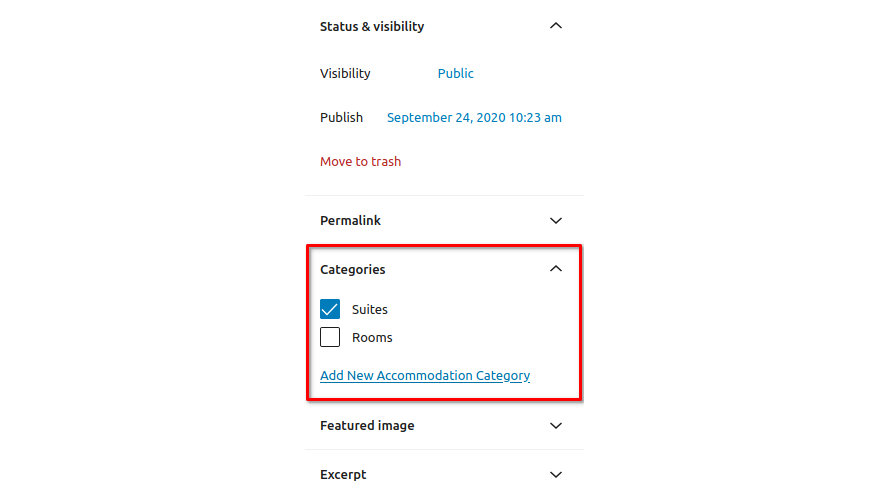
If you offer various types of accommodation (in our demo website we have Rooms and Suites ) you can categorize them using the Categories taxonomy. Create your taxonomy terms and assign your pages to them as needed.

NOTE: You also need to set a Featured image. We will disable its visibility through the Disable featured image for this Accommodation option but we will need it for the Accommodation archive page and the home page.

Create the content

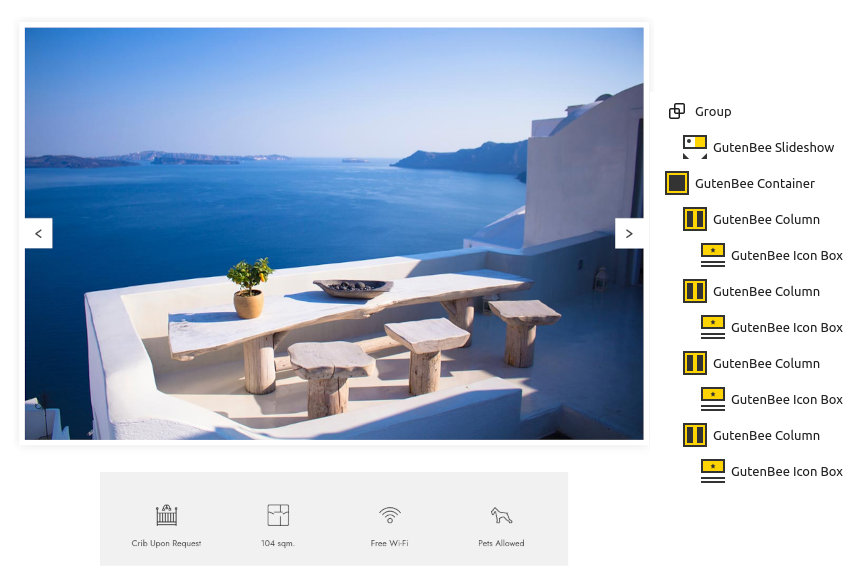
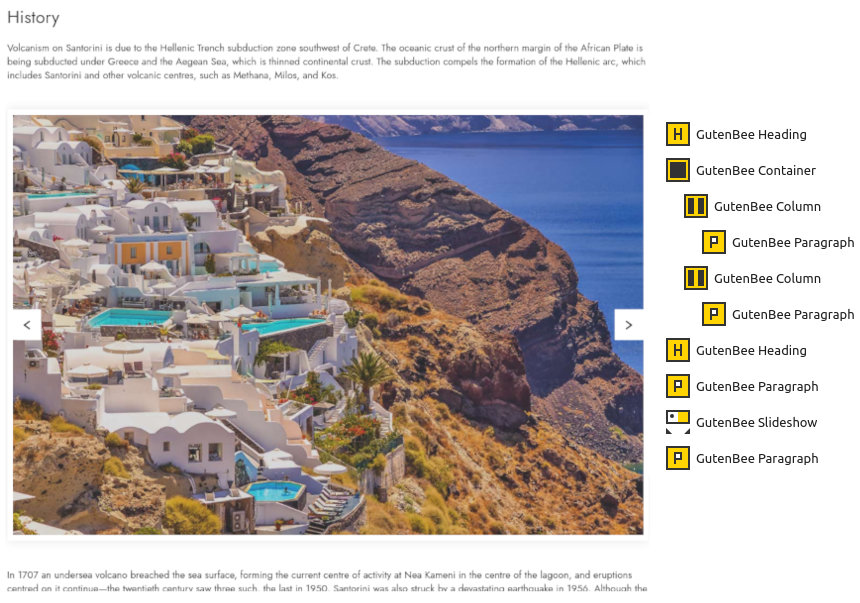
The post start with a Slideshow block wrapped in a Core Group block. The Core Group block has the Wide Width option set to it in order for the slider to be wider than the page’s content. Below the slider we find a Container block with four columns. Each column contains an Icon Box block with the focused amenity’s icon and short description.

Next up we have a Heading and two Paragraph blocks with some info. Following there is a Container block with two columns wrapped in a Core Group block with the Wide Width option enabled. The left column has a background image set under Block Appearance and does not contain any blocks. The right column contains a Heading and a Core List block outlining the room’s amenities. Closing this section we have another paragraph.

The next section consists of a Core Pullquote block with a testimonial, a Heading, a Core Table block with the suite’s rates per season, another Heading, a Core List with some room info and finally Heading and an Accordion with some FAQs.

Closing the item is the booking section which consists of a Divider, a Heading, a Paragraph and a Button.

Accommodation listing

This page will serve as your main Room/Suite listing page. Let’s create a new page first from Accommodation > Add New. Set the page’s template to Full width boxed under Summary, and from Page Settings > Page Title, add a Background Image and proceed to the content.

Here we have a Heading and a Paragraph block which serve as the Accommodation category’s title and subtitle. Next we have a Post Types block which displays two accommodation items from the suites category in a two column layout. Following is a Core Pullquote with a testimonial and another set of Heading, Paragraph, Post Types. This time the Post Types block displays three accommodation items from the rooms category in a three column layout.

Location Page

Create a new page under Pages > Add New. Set the page’s template to Full width boxed under Summary, and from Page Settings > Page Title, add a Background Image and proceed to the content.

The layout of the page is pretty straightforward. We start with a a Heading, a Container block with two columns, each containing a Paragraph, we continue with another Heading, a Paragraph, a Slideshow and another Paragraph closing this section.

The gallery section of the page starts off with a Divider, a Heading, a Paragraph and the Gallery block.

Finally the sights section starts with a Divider and a Heading. To create the alternating image/text layout we need three ( in the case of the demo ) Container blocks with two columns each. The one column will house the image and the other will house the Heading and the Paragraph. In each container we swap the order of the columns to get the desired layout.

Services Page

Create a new page under Pages > Add New. Set the page’s template to Full width boxed under Summary, and from Page Settings > Page Title, add a Background Image and proceed to the content.

The page starts with an Image block. Next we have a Container block with two columns. The left column has a width of 33.33% and contains a single Heading. The right column contains a Paragraph with some info, another Container with two columns, each containing a Core List and finally a Paragraph with contact info closes out the parent column. Similar simple layouts are used by the Facilities and Activities pages.

Dining Page

Create a new page under Pages > Add New. Set the page’s template to Full width boxed under Summary, and from Page Settings > Page Title, add a Background Image and proceed to the content.

The dining page starts out with a Container containing two columns, each columns contains a Paragraph. Next we have a Heading/Paragraph combo serving as a title/subtitle for the menu. Following are two Heading / Food Menu block items displaying four menu items in a two column layout. Next is a Core Pullquote containing a testimonial, the Core Pullquote is wrapped by Spacer blocks. Finally we have another Heading/Food Menu pair.

Offers page

This is your main blog page. You can create a new page and set it as your posts page under Customize > Homepage Settings. You can modify its appearance under Customize > Blog > Archives.

Create a new page under Pages > Add New. Set the page’s template to Full width boxed under Summary, and from Page Settings > Page Title, add a Background Image and proceed to the content. Add a GutenBee Gallery block and select the gallery type as Justified with a height of 440px and a margin of 10px. Set the style of the gallery to Default.

Contact

Create a new page under Pages > Add New. Set the page’s template to Full width boxed under Summary, and from Page Settings > Page Title, add a Background Image and proceed to the content.

The page starts with a Google Maps block set to 500px height. Next we have a Container block with two columns and centered content alignment. The left column has a width of 66.66% and contains a Heading, a Paragraph and a Core Shortcode block which houses the contact form’s shortcode. The right column’s content is provided by a mix of Heading, Paragraph and Icon blocks.

Common features

This section offers information on features common on all Ignition Framework based themes.

Shortcodes

The Ignition Framework offers a multitude of custom shortcodes these are:

Custom menu: [ignition-custom-menu name="your menu name"]

Site search: [ignition-site-search]

Date: [ignition-date]

Weather: [ignition-current-weather id="your-location-id(optional)"]

Minicart button: [ignition-minicart-button]

Language switcher:[ignition-language-switcher]

Icon link: [ignition-icon-link]

Instagram Feed: [ignition-instagram-feed]

WooCommerce search: [ignition-wc-search]

For more information have a look at this knowledge base article about shortcodes and their usage.

Page options

All themes offer six different templates which modify the location and appearance of the sidebar and the main content’s width.

Additionally pages have a common set of options which allow you to customize the appearance of the page title section, toggle breadcrumbs and more.

All settings are inherited from Customizer. So you can actually set some global settings and if you wish change certain pages to have different behavior.

Read the following article for a detailed explanation of the available templates and their options.

WooCommerce

Ignition Framework based themes are compatible with WooCommerce giving you the ability to create awesome online stores which perfectly match the appearance of the rest of your site.

WooCommerce is an optional plugin. You don’t need to install it if you are not looking to build an online store.

After activating WooCommerce it will create and set some default pages. These will serve as your Shop, Cart, Checkout and My Account pages.

The framework offers various customization options both for the main product listing page under Customize > WooCommerce > Product Catalog and for single products under Customize > WooCommerce > Single Products.

Learn more about the WooCommerce integration and the options offered here.

Global Sections

With the Global Sections custom post type included in all Ignition Framework based themes users can create content which can be easily reused in more than 15 key theme locations. For example users can create a newsletter subscription call to action box and immediately display it above the footer on all (or some) posts and pages, or create a banner ad an easily add it between posts in post listings etc.

Check out our knowledge base article for more information about Global Sections.

Blog page

This is you main blog page. You can create a new page and set it as your posts page under Customize > Homepage Options. You can customize it under Customize > Blog from the Archives section.

Widget areas

The theme provides special widget areas for your posts listings, pages and shop. You can use a plugin/module like Jetpack’s widget visibility to hide or show widgets for certain pages, posts or products.

Page builder support

Ignition Framework based themes work seamlessly with popular page builders like Elementor, Divi, Beaver builder and more to cater to the needs of those who like to build things visually.

Support

If you need help during the initial installation and setup of this theme feel free to get in touch and we will get back to you within 24 hours to help.

Beauté

Last Updated On

About Beaute

Beaute is a health & beauty WordPress theme. It allows you to display services available by your business, the personnel providing them and photo galleries related to your work. This is done mostly by using four different Custom Post Types: Personnel, Services, Galleries and Slider Items. All the above act as standard WordPress posts or pages but each of them has extra fields which differentiate them from the former. The homepage is comprised of custom widgets specially crafted to bring those custom post types together as discussed later on in the documentation.

WordPress theme installation

The easiest way to install the theme, is by accessing your WordPress admin panel, then go to Appearance > Themes. Select the Install Themes tab and click the Upload link located just below the tab’s name. Click on Browse… and select the WordPress theme zip file you just downloaded. Then click the Install Now button, and after a few seconds, your new theme should be installed. Click activate and the theme is ready to use.

In order to install the theme manually, or in case you have trouble installing it through the admin panel, you have to unzip the WordPress theme’s zip file on your computer, and upload via FTP the resulting theme folder into your WordPress installation themes folder (wp-content/themes). Then, from the WordPress admin go to Appearance > Themes. The theme should be available in your themes list. Click Activate.

After activation, you will be redirected to the CSSIgniter Settings panel (accessible from Appearance > CSSIgniter Settings) to start customizing your brand new theme.

Image Sizes

The recommended image sizes for the Beaute theme are:

  • Homepage slider: at least 1920x1080px
  • General thumbnail size : 760x390px it is recommended that all images are larger than this size.

Useful Plugins

These plugins provide functionality and features used directly (or not) by the Theme. So, it is recommended to install and activate them before importing your sample content.

  • CSSIgniter Shortcodes you can use our custom made shortcode plugin to help you create a variety of layouts and elements on your site. Instructions can be found here.
  • Socials Ignited use this plugin to create a widget that links to all your social profiles. You can also customize it with your icons and add new social networks, a guide can be found here.
  • Contact Form 7 use this plugin to create a contact form, then copy the shortcode it gives you and paste it in an empty page.
  • SoundCloud ShortCode this plugin is necessary if you are planning on adding SoundCloud tracks in your albums’ tracklistings.

Importing Sample Content using One Click Import

To automate the process of importing and for a better experience we have natively included support for OneClick Import Plugin. Let install it fist:

From your WordPress dashboard

  1. Visit ‘Plugins > Add New’,
  2. Search for ‘One Click Demo Import’ and install the plugin,
  3. Activate ‘One Click Demo Import’ from your Plugins page.

From WordPress.org

  1. Download ‘One Click Demo Import’.
  2. Upload the ‘one-click-demo-import’ directory to your ‘/wp-content/plugins/’ directory, using your favorite method (ftp, sftp, scp, etc…)
  3. Activate ‘One Click Demo Import’ from your Plugins page.

Once the plugin is activated you will find the actual import page in: Appearance > Import Demo Data.

 Click on the Import demo data button and you are done!

This plugin requires PHP version of at least 5.3.x, but we recommend version 5.6.x or better yet 7.x. Please contact your hosting company and ask them to update the PHP version for your site.

Setting up your theme

1) Creating theme pages

Let’s start by adding pages you are going to need. Go to Pages > Add New and create the following pages:

  1. “Home” this will serve as your homepage, assign to it the “Front page” template from the “Page attributes” panel and publish the page.
  2. “Blog” this will be your posts page. Just create it, no further action needed.
  3. “Gallery Listing” this page will display your galleries. Apply the “Gallery Listing” template to the page and notice the “Gallery Listing Details” panel that appears. The dropdown menu allows you to choose whether you want all galleries listed (by leaving empty) or selecting only one gallery category, so you can create different listing pages for each gallery category. You can adjust the number of galleries and gallery columns, on listing pages, by going to CSSIgniter settings > Gallery Options
  4. “Personnel Listing” this page will list your personnel, apply to it the “Personnel Listing” template.
  5. “Services Listing” this page will list your services, apply to it the “Services Listing” or the “Services Listing Fullwidth” template.
  6. “Contact” To set up your contact form simply apply the “Contact Page” template to a page and publish it. To set your location on the map go to CSSIgniter settings > Contact Options.

(TIP, all page titles serve as examples, you can name your pages according to your needs.)

Once the pages are created, navigate to Settings > Reading and set the “Home” page to be your static frontpage and the “Blog” page as your posts page, as demonstrated in the image below.

ReadingSettings

2) Populating your blog

To add new posts to your blog, go to Posts > add new, title your post, enter the content in the editor, upload a featured image by clicking “Set featured image” on the Featured Image panel, add a category and/or tag to the post, if you so desire, from the respective panels and publish the post by clicking “Publish”.

3) Adding Personnel

To create a new personnel item go to Personnel > new Personnel, set the person’s name as a title, enter relevant information in the content editor and set a featured image. In the “Personnel Details” panel fill in the person’s job title as show below and finally publish the item.

personnel_details

4) Adding Services

To create a new service item go to Services > new Service, set the service’s name as a title, enter relevant information in the content editor and set a featured image. In the “Service Details” panel fill price & duration of the service as shown below and finally publish the item.

service_details

5) Adding Galleries

To create a new gallery item go to Galleries > new Gallery, set the gallery’s name as a title, enter some text if you wish in the content editor, set a featured image and proceed to upload your images by clicking the “Add Images” button in the “Gallery Details” panel (please read the “Creating Galleries” section first) and finally publish the gallery item. Single gallery column numbers can be controlled in CSSIgniter settings > Gallery options.

6) Adding Slider items

To add items to your homepage’s slider go to Slider Items > new Slider Item, set a title for the slider item and upload a featured image (which will be the image displayed on the homepage), then in the “Slider Details” panel you can optionally set a URL to which the user will be redirected when clicking on the slide, finally, publish the slider item. Slider speed and autoslide functionality can be adjusted under CSSIgniter settings > Homepage options.

7) Creating your menu

Now that your content is in place, you will need a menu. Go to Appearance > Menus, check the pages you want on your menu and add them, give your menu a name and save it. Finally you will need to set your menu as “Main” menu, this can be done either by checking the “Main menu” box in “Menu Settings” just below your menu items in Menu Structure, or by going to the “Manage Locations” tab and selecting the menu you just created.

Beaute offers a second menu location on the footer. You can follow the same procedure to create a new menu and set its location to be “Footer Menu” to use it.

(TIP, for more info on creating and managing menus, please read the WordPress Menu User Guide here)

8) Adding content to your Homepage

The homepage on Beauté consists of a widgetized area which will feature all the content unique to the homepage. You can access these areas and add content to them in Appearance → Widgets. You can use the -= CI Post Type =- to enter to your Front page widgets sidebar and populate the area. Other widgets might not look so good on this area since it was specifically designed for this widget.

The theme’s footer features an area for you to enter your copyright info, privacy policy etc. To change the text you need to go to CSSIgniter settings > Site options and use the appropriate box (4th box down).

You can display a link to a certain page of your theme on the header next to the menu, to configure it go to CSSIgniter settings → Display options and fill in the appropriate information (2nd box).

11) Custom Widgets

The theme features eleven custom widgets.
Three of them are Beaute specific widgets.

All widgets can be accessed from Appearance → Widgets. Below each widget you will find a small description explaining their functionality.

The CSSIgniter settings panel

Last but not least, under Appearance > CSSIgniter settings, you can find our custom built settings panel. From here you can manipulate various aspects of your theme, including, but not limited to, changing your logo, setting a custom background, changing color scheme and applying custom styles via the custom CSS tab. All options feature a description so you instantly know their provided functionality.

How to use the page builder template

The theme comes bundled with a page builder template which allows you to use your favorite page builder plugin on it and create unique layouts very easily.

To use that template start by going to Pages > Add New. This will create a new page. Add a title to your page and select the Page builder template from the template drop down in the Page Attributes metabox.

ci_page_builder_template

That’s it. You can now start building your page using the page builder of your choice, once done publish it and check it out.

Additional information

Creating Galleries

To create a gallery using our gallery management system follow these steps:

On the “Gallery Information” panel click the Add Images button.

gallery_info

To upload your images, drag & drop them in the Edit Gallery window which will pop-up, or select Add to Gallery in order to select already uploaded ones. Once you are done, click the Update Gallery button on the lower right.

edit_gallery

Your “Gallery Information” panel will look like this

gallery_w_img

You can re-arrange the order of images by drag & drop.

gallery_move_img

If you wish to remove an image from the gallery, hover your mouse over it and click the X as shown below.

gallery_remove_img

By checking the Randomize order box your gallery images will appear in random order which will change on every page refresh.

When done, publish the gallery item.

If you need to add images after the gallery’s creation just follow the same procedure.

Next Steps

Still have questions or problems setting up your CSSIgniter Theme? We will be happy to help you out! Please visit our support Hub 
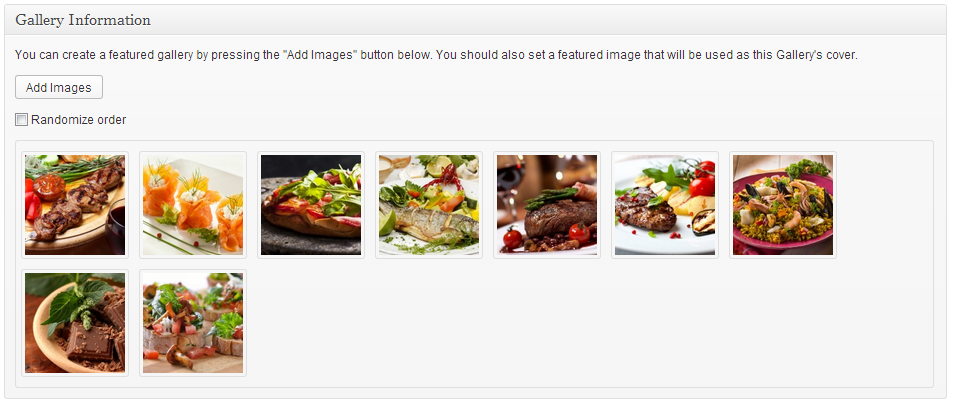
Tinos – Legacy

Last Updated On

About Tinos

Tinos is a blog/news WordPress theme for content oriented authors. It is designed to maximize your post’s exposure by providing to the reader the absolutely necessary information in a simple yet appealing manner, eliminating distractions. The homepage is covered entirely by your posts with a widgetized footer section also available.

WordPress theme installation

The easiest way to install the theme, is by accessing your WordPress admin panel, then go to Appearance > Themes. Select the Install Themes tab and click the Upload link located just below the tab’s name. Click on Browse… and select the WordPress theme zip file you just downloaded. Then click the Install Now button, and after a few seconds, your new theme should be installed. Click activate and the theme is ready to use.

In order to install the theme manually, or in case you have trouble installing it through the admin panel, you have to unzip the WordPress theme’s zip file on your computer, and upload via FTP the resulting theme folder into your WordPress installation themes folder (wp-content/themes). Then, from the WordPress admin go to Appearance > Themes. The theme should be available in your themes list. Click activate.

After activation, you will be redirected to the CSSIgniter Settings panel (accessible from Appearance > CSSIgniter Settings) to start customizing your brand new theme.

Image Sizes

The recommended minimum image sizes for Tinos are:

  • Thumbnail size: 768x600px

Useful Plugins

These plugins provide functionality and features used directly (or not) by the Theme. So, it is recommended to install and activate them before importing your sample content.

  • CSSIgniter Shortcodes you can use our custom made shortcode plugin to help you create a variety of layouts and elements on your site. Instructions can be found here.
  • Socials Ignited use this plugin to create a widget that links to all your social profiles. You can also customize it with your icons and add new social networks, a guide can be found here.
  • Contact Form 7 use this plugin to create a contact form, then copy the shortcode it gives you and paste it in the contact page you created earlier.

Importing Sample Content using One Click Import

To automate the process of importing and for a better experience we have natively included support for OneClick Import Plugin. Let install it fist:

From your WordPress dashboard

  1. Visit ‘Plugins > Add New’,
  2. Search for ‘One Click Demo Import’ and install the plugin,
  3. Activate ‘One Click Demo Import’ from your Plugins page.

From WordPress.org

  1. Download ‘One Click Demo Import’.
  2. Upload the ‘one-click-demo-import’ directory to your ‘/wp-content/plugins/’ directory, using your favorite method (ftp, sftp, scp, etc…)
  3. Activate ‘One Click Demo Import’ from your Plugins page.

Once the plugin is activated you will find the actual import page in: Appearance > Import Demo Data.

 Click on the Import demo data button and you are done!

This plugin requires PHP version of at least 5.3.x, but we recommend version 5.6.x or better yet 7.x. Please contact your hosting company and ask them to update the PHP version for your site.

Setting up your theme

1) Creating theme pages

Tinos does not need any pages to operate. If you’d like to add a contact page, you can create a page under Pages > Add New and use the shortcode given to you by the Contact Form 7 plugin in the page’s content area.

2) Populating your blog

To add new posts to your blog, go to Posts > Add New and follow the steps below

  1. give a title to your post,
  2. place your text in the content editor,
  3. upload a featured image by clicking “Set featured image” on the Featured Image panel,
  4. add a category and/or tag to the post, if you so desire, from the respective panels
  5. in the Post Details panle you can select if you want to split the content in two colums or not and the maximum number of words shown on the homepage for this post,
  6. from the Format panel on the right you can select the post format, if you select Standard you can go ahead and publish the post.
  7. if you select Video you will be presented with the Video Details panel, place the URL to your video in the box and publish,
  8. finally selecting Audio will activate the Audio Details panel, in which you can upload the mp3 you want to embed on your post, or if the mp3 is already hosted somewhere, you can just paste the URL in the box. Finish up by publishing your post.

3) Creating your menu

When your content is in place, you might need a menu (again in Tinos a menu is sort of optional). Go to Appearance > Menus, check the pages you want on your menu and add them, give your menu a name and save it. Finally you will need to set your menu as “Main” menu, this can be done either by checking the “Main menu” box in “Menu Settings” just below your menu items in Menu Structure, or by going to the “Manage Locations” tab and selecting the menu you just created.

(TIP, for more info on creating and managing menus, please read the WordPress Menu User Guide here)

4) Custom Widgets

The theme features five custom widgets, which can help you display additional information.

All widgets can be accessed from Appearance > Widgets. Below each widget you will find a small description explaining their functionality.

The Settings Panel

Last but not least, under Appearance > CSSIgniter settings, you can find our custom built settings panel. From here you can manipulate various aspects of your theme, including, but not limited to, changing your logo, setting a custom background, changing color scheme and applying custom styles via the custom CSS tab. All options feature a description so you instantly know their provided functionality.

Next Steps

Still have questions or problems setting up your CSSIgniter Theme? We will be happy to help you out! Please visit our support Hub 
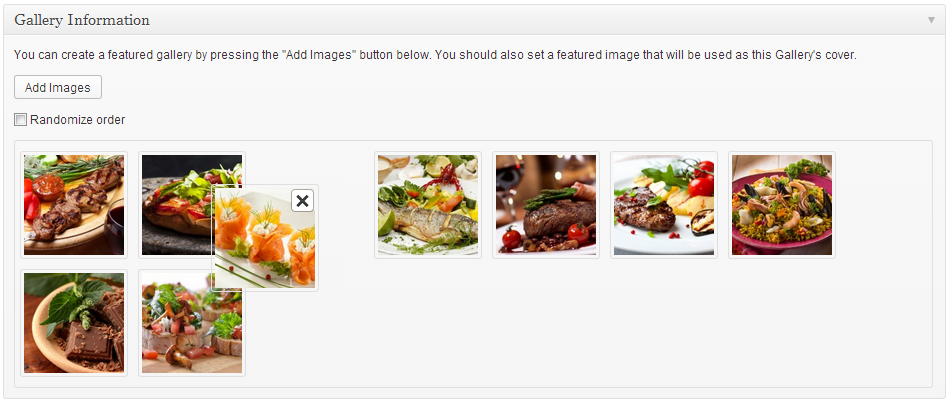
Berliner – Legacy

Last Updated On

About Berliner

Berliner is a WordPress theme designed for musicians and record labels . It allows you to display your content mainly by using the six custom post types provided, “Slides”, “Events”, “Discography”, “Videos” “Galleries” and “Artists”. The above act as standard WordPress posts or pages but each of them has specific functionality which differentiate them from the former. The homepage is comprised of custom widgets specially crafted to bring those custom post types together as discussed later on in the documentation.

WordPress theme installation

The easiest way to install the theme, is by accessing your WordPress admin panel, then go to Appearance > Themes. Select the Install Themes tab and click the Upload link located just below the tab’s name. Click on Browse… and select the WordPress theme zip file you just downloaded. Then click the Install Now button, and after a few seconds, your new theme should be installed. Click activate and the theme is ready to use.

In order to install the theme manually, or in case you have trouble installing it through the admin panel, you have to unzip the WordPress theme’s zip file on your computer, and upload via FTP the resulting theme folder into your WordPress installation themes folder (wp-content/themes). Then, from the WordPress admin go to Appearance > Themes. The theme should be available in your themes list. Click activate.

After activation, you will be redirected to the CSSIgniter Settings panel (accessible from Appearance > CSSIgniter Settings) to start customizing your brand new theme.

Image Sizes

The recommended image sizes for the Beaute theme are:

  • Homepage slider: 1920x600px
  • Discography & Gallery images : 700x700px
  • Page header image: 1920x250px
  • Video thumbnails: 700x450px
  • Event thumbnails: 700px in width, not restricted in height

Useful Plugins

These plugins provide functionality and features used directly (or not) by the Theme. So, it is recommended to install and activate them before importing your sample content.

  • CSSIgniter Shortcodes you can use our custom made shortcode plugin to help you create a variety of layouts and elements on your site. Instructions can be found here.
  • Socials Ignited use this plugin to create a widget that links to all your social profiles. You can also customize it with your icons and add new social networks, a guide can be found here.
  • Contact Form 7 use this plugin to create a contact form, then copy the shortcode it gives you and paste it in an empty page.

Importing Sample Content using One Click Import

To automate the process of importing and for a better experience we have natively included support for OneClick Import Plugin. Let install it fist:

From your WordPress dashboard

  1. Visit ‘Plugins > Add New’,
  2. Search for ‘One Click Demo Import’ and install the plugin,
  3. Activate ‘One Click Demo Import’ from your Plugins page.

From WordPress.org

  1. Download ‘One Click Demo Import’.
  2. Upload the ‘one-click-demo-import’ directory to your ‘/wp-content/plugins/’ directory, using your favorite method (ftp, sftp, scp, etc…)
  3. Activate ‘One Click Demo Import’ from your Plugins page.

Once the plugin is activated you will find the actual import page in: Appearance > Import Demo Data.

 Click on the Import demo data button and you are done!

This plugin requires PHP version of at least 5.3.x, but we recommend version 5.6.x or better yet 7.x. Please contact your hosting company and ask them to update the PHP version for your site.

Setting up your theme

1) Creating theme pages

Let’s start by adding pages you are going to need. Go to Pages > Add New and create the following pages:

  1. “Home” this will serve as your homepage, assign to it one of the three available “Homepage” templates from the “Page attributes” panel.
  2. “Blog” this will be your posts page. Just create it, no further action needed.
  3. “Events Listing” this page will list your events, apply the “Events Listing” template. You can disable the map if you so desire by going to CSSIgniter settings > Display Options and uncheck the designated box (2nd to last).
  4. “Discography Listing” this page will list your albums, apply the “Discography Listing” template.
  5. “Video Listing” this page will list your videos, apply the “Video Listing” template.
  6. “Galleries Listing”, here you can list your galleries, apply the “Galleries Listing” template.
  7. “Artists Listing”, here you can list your galleries, apply the “Artists Listing” template.

(TIP, all page titles serve as examples, you can name your pages according to your needs.)

Once the pages are created, navigate to Settings > Reading and set the “Home” page to be your static frontpage and the “Blog” page as your posts page, as demonstrated in the image below.

ReadingSettings

2) Populating your blog

To add new posts to your blog, go to Posts > Add New, title your post, enter the content in the editor, upload a featured image by clicking “Set featured image” on the Featured Image panel, add a category and/or tag to the post, if you so desire, from the respective panels and publish the post by clicking “Publish”.

3) Adding Events

To create a new event go to Events > New Event. Add a title, any text necessary and upload a featured image, then move to the Events Settings panel. In the Event Details section you can enter the event’s venue, location, date, start and finish time. In the Event Map below you can input the event’s location. Once done, publish the event.

4) Adding Discography items

To create a new discography item go to Discography > Add New, set the album’s name as a title, enter relevant information in the content editor, set a featured image and move to the Discography Settings panel below. Here you can fill in relevant album details, purchase details and finally add tracks to the item’s tracklisting. See the additional info section for more about the tracklisting.

5) Adding Slider items

To add items to your frontpage’s slider go to Slider Items > Add New, set a title for the slider item and upload a featured image (which will be the image displayed on the frontpage), in the Slider Settings panel you can set a URL to which your visitors will be redirected when the slider’s button is clicked, a subtitle for the slider and an icon which will appear above the button. When finished publish the slider item. You can select the number of slides on the slider or disable it entirely, if you so desire, under CSSIgniter settings > Homepage options.

6) Adding Videos

To add a new video go to Videos > Add New. Add a title, any text necessary and upload a featured image (if your video comes from YouTube the theme will pull the thumbnail automatically, you do not have to set a featured image), then move to the Video Settings panel. Fill in the location where the video was shot and add a URL to the video, if it is a self-hosted video check the corresponding box and publish the video.

7) Adding Galleries

To create a new gallery item go to Galleries > Add New, set the gallery’s name as a title, enter some text if you wish in the content editor, set a featured image and proceed to upload your images by clicking the “Add Images” button in the “Gallery Details” panel (please read the “Creating Galleries” section below, first) and finally publish the gallery item. Single gallery column numbers can be controlled in CSSIgniter settings > Gallery options.

8) Adding Artists

To add an artist go to Artists > Add New. Add the artist’s name as a title, any text necessary and upload a featured image, then publish the item.

9) Creating your menu

Now that your content is in place, you will need a menu. Go to Appearance > Menus, check the pages you want on your menu and add them, give your menu a name and save it. Finally you will need to set your menu as “Main” menu, this can be done either by checking the “Main menu” box in “Menu Settings” just below your menu items in Menu Structure, or by going to the “Manage Locations” tab and selecting the menu you just created.

(TIP, for more info on creating and managing menus, please read the WordPress Menu User Guide here)

10) Adding Hero images in Pages

You can apply a different hero image in specific pages. This will apply in all pages but not in the Blog or Shop, which the image is controlled from Customize→Theme Colors→Hero.

11) Changing Colors

You can easily change all basic theme colors from Customize→Theme Colors section creating your own visual theme. Here you can select colors for both your Header Hero and Global Colors.

For your Global section you can easily

  1. Add a background color and a background image that will apply everywhere
  2. Select your main pallete, for links, buttons etc

While in the header and menu section you can

  1. Select a header background color
  2. Change your menu styles

In this Hero section you can

  1. Select a background color for your hero
  2. Upload a generic hero image. This image is the default for your blog page and any page you dont have a specific one from the Page hero options.


12) Setup the Homepage player

Berliner provides a native player under the home slider. In order this player to appear you will need to have selected under CSSIgniter Settings→Audio Options a valid discrography item with audio files which will serve as the source of your music. You can also select a Shoutcast v2.0 + stream also.

  1. Select a discography item
  2. Select a Shoutcast stream
  3. Fetch automatically your playing song from the stream

13) Adding content to your Homepage

The homepage on Berliner consists of three widgetized areas which feature all the content unique to the homepage. You can access these areas and add content to them in Appearance > Widgets. Add any widgets you like in any of the “Homepage Sidebar #” areas to shape the Homepage to your liking.

You cannot edit the Homepage directly with any page builder. Instead you will need to use the page builder template included in the theme to create your landing page.

Duplicate the demo’s layout

On the demo’s homepage we have four slider items, six CI Item widgets, with an event selected on each, on the Homepage Sidebar #1. Following are the default 5 recent posts displayed (this number can be changed or posts can be replaced with the content of a page from CSSIgniter settings > Homepage options). We then have four CI Item widgets on Homepage Sidebar #2 displaying a gallery, an event, an album and a video. Finally on Homepage Sidebar #3 we have theCI Album Tracklisting, two CI Recent Items set to display 2 albums and 3 videos and finally the CI Top Tracks widget. On the Footer Sidebar 1 we have a text widget, the Footer Sidebar 2 is blank, on the Footer Sidebar 3 we have the CI About Me widget and finally in the Footer Sidebar 4 the CI Socials Ignited and a search widget.

The theme’s footer features an area for you to enter your copyright info, privacy policy etc. To change the text you need to go to CSSIgniter settings > Site options (4th box down). Primary footer text appears on the left side of the footer and secondary on the right.

15) Section Titles

Each listing page has a section title, these by default follow the naming of the custom post types, but you can change them to match your needs under CSSIgniter settings > Section Titles.

16) Custom Widgets

The theme features ten custom widgets, displayed below, which can help a lot when setting up your homepage.

widgets

All widgets can be accessed from Appearance > Widgets. Below each widget you will find a small description explaining their functionality.

The CSSIgniter settings panel

Last but not least, under Appearance > CSSIgniter settings, you can find our custom built settings panel. From here you can manipulate various aspects of your theme, including, but not limited to, changing your logo, setting a custom background, changing color scheme and applying custom styles via the custom CSS tab. All options feature a description so you instantly know their provided functionality.

How to use the page builder template

The theme comes bundled with a page builder template which allows you to use your favorite page builder plugin on it and create unique layouts very easily.

To use that template start by going to Pages > Add New. This will create a new page. Add a title to your page and select the Page builder template from the template drop down in the Page Attributes metabox.

ci_page_builder_template

That’s it. You can now start building your page using the page builder of your choice, once done publish it and check it out.

Additional Information

Creating Galleries

To create a gallery using our gallery management system follow these steps:

On the “Gallery Information” panel click the Add Images button.

gallery_info

To upload your images, drag & drop them in the Edit Gallery window which will pop-up, or select Add to Gallery in order to select already uploaded ones. Once you are done, click the Update Gallery button on the lower right.

edit_gallery

Your “Gallery Information” panel will look like this

gallery_w_img

You can re-arrange the order of images by drag & drop.

gallery_move_img

If you wish to remove an image from the gallery, hover your mouse over it and click the X as shown below.

gallery_remove_img

By checking the Randomize order box your gallery images will appear in random order which will change on every page refresh.

When done, publish the gallery item.

If you need to add images after the gallery’s creation just follow the same procedure.

Tracklisting

Each discography item, can have multiple tracks assigned to it. Tracks can be registered through the Tracks Details section, within the Discography Settings section.

track_details

To add a new track, press the Add Track button. This will add a new empty line for you to fill. First, add a title and optionally a subtitle.

If the track can be purchased online, enter the URL inside the Buy URL field.

You can provide a preview (or even the full song) for your visitors to listen to, by entering the URL of the MP3 file inside the Play URL field. You can upload and/or select an already uploaded song through the WordPress Media Manager, by pressing the button located inside the field.

You may allow your users to download the track, by entering the song’s URL inside the Download URL field. Please note that for locally hosted MP3s, the theme tries to force the visitor’s browser to download the file. If the file is on another server, whether it will be downloaded or just opened, is a matter of configuration of the remote server and not the theme’s issue.

You can also add the lyrics for each track, in the big Song Lyrics field.

Tracks can be re-arranged by dragging and dropping them in the appropriate order. Track numbers are automatically updated to be in sequence.

In order to remove a track, press the Remove Me button next to the desired track. Please be careful, as there is no confirmation of removal. If you publish/save/update the post, the change is irreversible.

Displaying the track listing

Once you add your tracks you may display them by using the [tracklisting] shortcode in the discography item’s main text box. By default, it will display the tracks of the current discography item, so the simplest usage is this:

[tracklisting]

You may also display the track listing of any discography item, in any other post/page or widget (that supports shortcodes) by passing the ID or slug parameter of the discography to the shortcode. E.g.:

[tracklisting id="25"]

or

[tracklisting slug="the-division-bell"]

You can also selectively display tracks, by passing their track number (counting from 1), separated by a comma, like this:

[tracklisting tracks="2,5,8"] 

and can limit the total number of tracks displayed like this:

[tracklisting limit="3"]

Of course, you can mix and match the parameters, so the following is totally valid:

[tracklisting slug="the-division-bell" tracks="2,5,8" limit="2"]

Next Steps

Still have questions or problems setting up your CSSIgniter Theme? We will be happy to help you out! Please visit our support Hub 
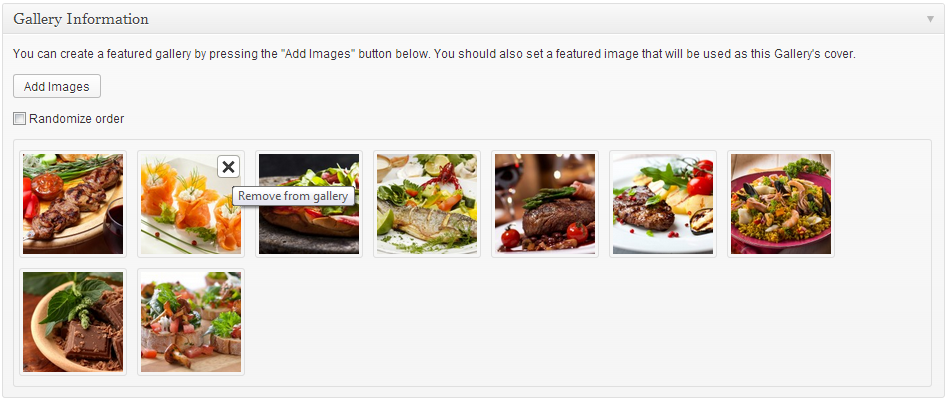
Get access to all WordPress themes & plugins

24/7 Support Included. Join 115,000+ satisfied customers.

Pricing & Sign Up

30-day money-back guarantee. Not satisfied? Your money back, no questions asked.

Back to top