Documentation for Aegean – Legacy
- About Aegean Resort
- WordPress theme installation
- Image Sizes
- Logo Size
- Useful Plugins
- Importing Sample Content using One Click Import
- Setting up your theme
- Adding Rooms
- Adding Galleries
- Adding Videos
- Setting up the Slider
- Creating your menu
- Setting up the weather
- The CSSIgniter settings panel
- Footer setup
- Changing theme colors
- Changing theme typography
- Custom Widgets
- How to use the page builder and page builder contained template
- Next Steps
About Aegean Resort
Aegean Resort is a WordPress theme designed for hotels and resorts. It allows you to display your rooms and create photo and video galleries by using the three custom post types provided, Rooms, Galleries, and Videos. The above act as standard WordPress posts or pages but each of them has extra fields that differentiate them from the former. The homepage is comprised of the homepage slider and custom widgets specially crafted to bring those custom post types together as discussed later on in the documentation.
WordPress theme installation
The easiest way to install the theme is by accessing your WordPress admin panel, then go to Appearance → Themes. Select the Install Themes tab and click the Upload link located just below the tab’s name. Click on Browse… and select the WordPress theme zip file you just downloaded. Then click the Install Now button, and after a few seconds, your new theme should be installed. Click activate and the theme is ready to use.
In order to install the theme manually, or in case you have trouble installing it through the admin panel, you have to unzip the WordPress theme’s zip file on your computer and upload via FTP the resulting theme folder into your WordPress installation themes folder (wp-content/themes). Then, from the WordPress admin go to Appearance → Themes. The theme should be available in your themes list. Click activate.
After activation, you will be redirected to the CSSIgniter Settings panel (accessible from Appearance → CSSIgniter Settings) to start customizing your brand new theme.
Image Sizes
The recommended image sizes for the Aegean Resort theme are:
- Homepage widgets: 500x250px
- Homepage slider: 1920x850px
- Page header image: 2200x230px
- Blog featured image: 630x150px
- Two column room listing page: 450x220px
- Room inner slider: 920x390px
- Related rooms: 640x240px
Logo Size
We are using 189x110px for our demo logo. Feel free to use any size you wish though.
Useful Plugins
These plugins provide functionality and features used directly (or not) by the Theme. So, it is recommended to install and activate them before importing your sample content.
- GutenBee: A free set of awesome Gutenberg blocks and advanced capabilities.
- Contact Form 7 Use this plugin to create a contact form, then copy the shortcode it gives you and paste it in an empty page.
Importing Sample Content using One Click Import
To automate the process of importing and for a better experience we have natively included support for OneClick Import Plugin. Let install it fist:
From your WordPress dashboard
- Visit ‘Plugins > Add New’,
- Search for ‘One Click Demo Import’ and install the plugin,
- Activate ‘One Click Demo Import’ from your Plugins page.
From WordPress.org
- Download ‘One Click Demo Import’.
- Upload the ‘one-click-demo-import’ directory to your ‘/wp-content/plugins/’ directory, using your favorite method (ftp, sftp, scp, etc…)
- Activate ‘One Click Demo Import’ from your Plugins page.
Once the plugin is activated you will find the actual import page in: Appearance > Import Demo Data.
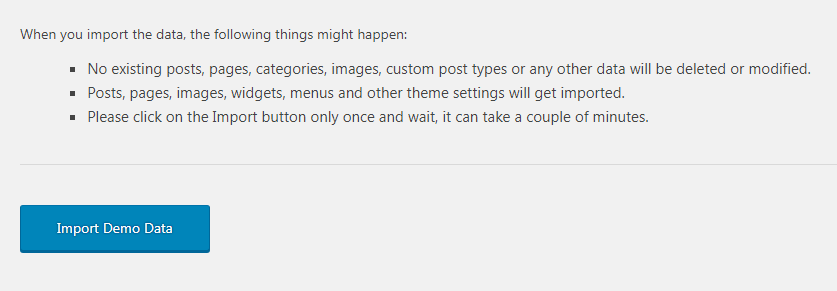
Click on the Import demo data button and you are done!
This plugin requires PHP version of at least 5.3.x, but we recommend version 5.6.x or better yet 7.x. Please contact your hosting company and ask them to update the PHP version for your site.
Setting up your theme
Homepage
This will serve as your homepage. First, create a new page from Pages→Add New and assign to it the “Homepage” template from the “Page attributes” panel.

Then add it as your front page from your Settings→Reading

Homepage Template will also render your Slider Items, while it is several widget areas to control your content. Frontpage is a widgetized area that has two main areas that accept all theme-specific widgets. In detail the Homepage Widgets area contains two CI Page widgets which will render Rooms/pages/posts as small blocks while the Homepage Testimonial widget area contains the CI Testimonial Widget with your Testimonials. You can add find this under Appearance→Widgets or under Customize→Widgets

Remember the frontpage template since its an area only for widgets, will not be editable directly with page builders or the block editor. For that you will need to use the page builder template instead.
Simple and Fullwidth pages
All pages include a header section which you can use to add a different header image than the generic under CSSIgniter Settings
While you can select from a variety of page templates, like the “Fullwidth” and “Left Sidebar“. Each one provides a different set of styling options for your content.
Blog
This will be your posts page. Create a simple new page from Pages→Add New, and select it from Settings→Reading.
Populating your blog
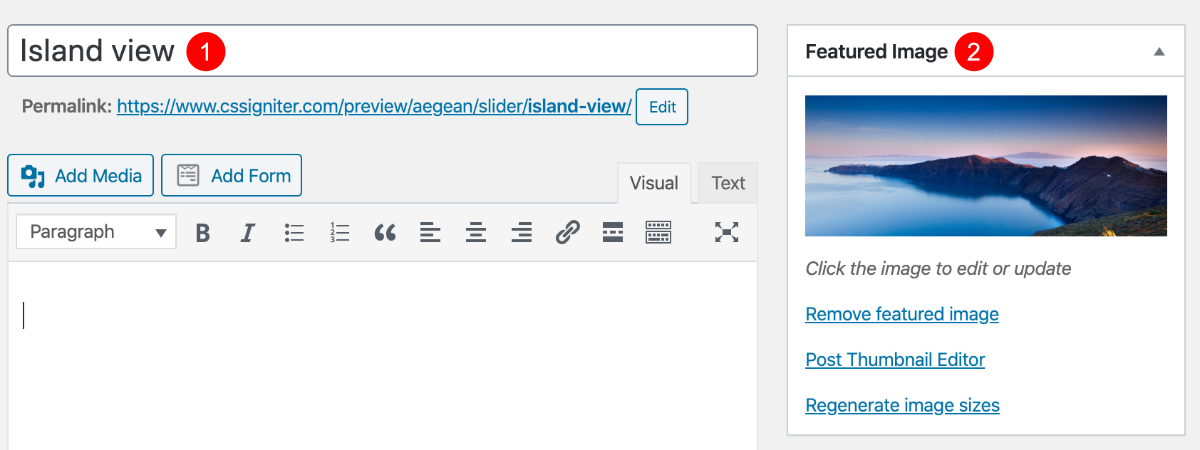
To add new posts to your blog, go to Posts → Add new, title your post, enter the content in the editor, upload a featured image by clicking “Set featured image” on the Featured Image panel, add a category and/or tag to the post, if you so desire, from the respective panels and publish the post by clicking “Publish”.
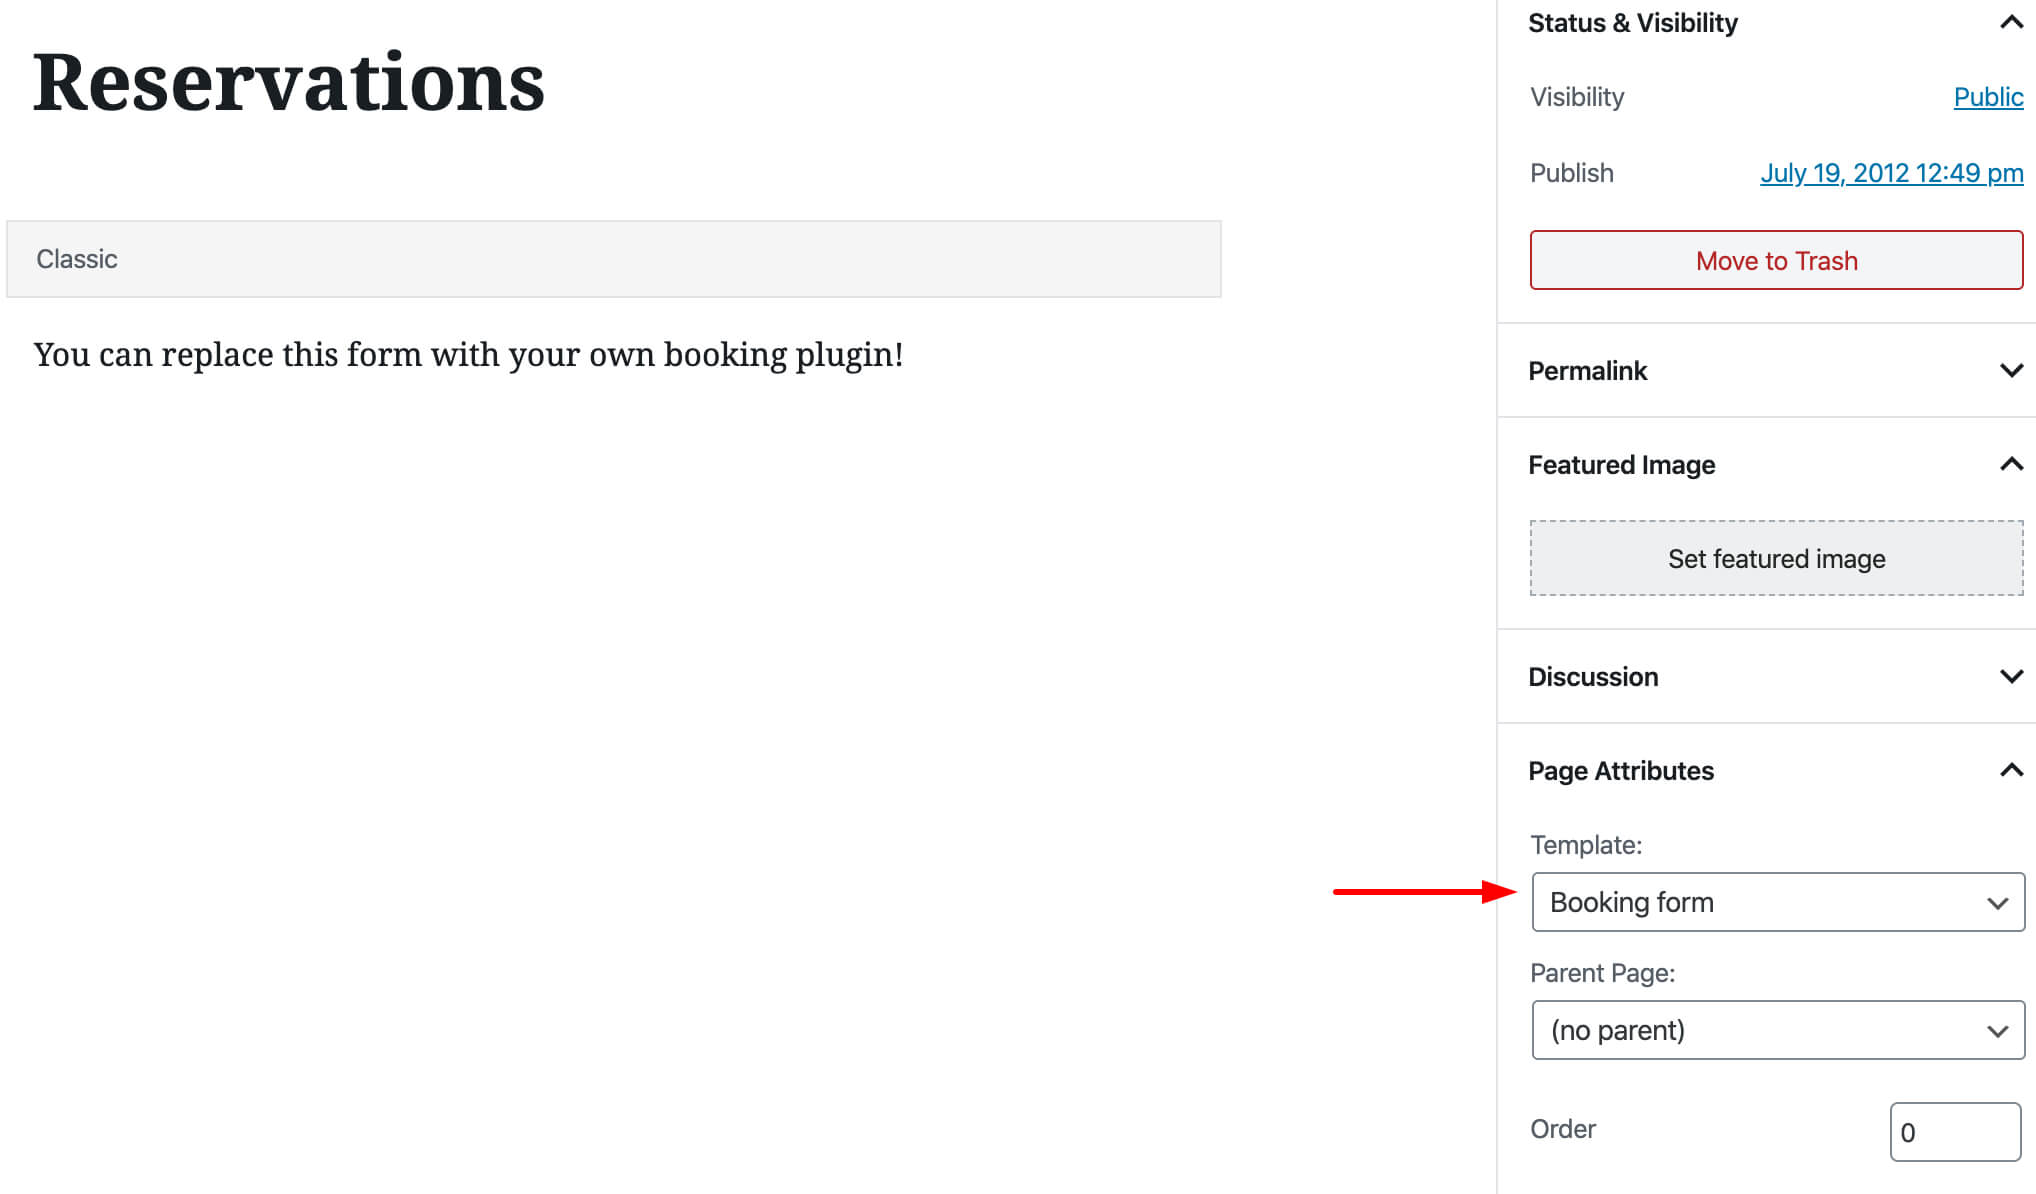
Reservation Page
Create a simple new page from Pages→Add New, and apply the “Booking form” template as shown below:
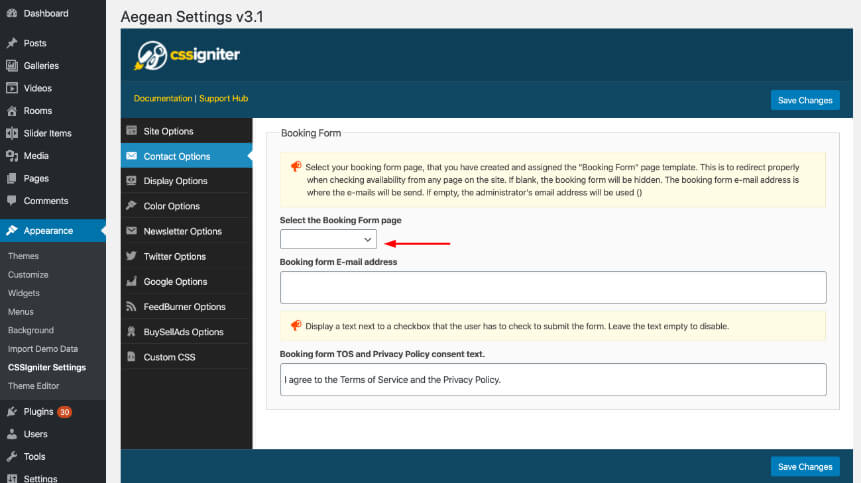
Once you publish the page go to CSSIgniter settings → Contact options and select that Booking page, fill in the e-mail you want your booking inquiries sent to and save changes. Also, you might need to add TOS consent since its mandatory in the EU.
Adding Rooms
In order to create a new room item navigate to Rooms → new Room, set the room’s name as a title, enter relevant information in the content editor, and set a featured image. Then move to the “Room Details” panel. Here you can add images to your room’s slider, add the room’s amenities, add a price and let visitors know if the current price is an offer.
Rooms support the new block editor, while it is suggested that you add a featured image in order for your Room to appear in the Room Listing Template. Of course, you can always use a third party builder like Elementor or return to the Classic Editor

- Add your blocks
- Add a featured image (mandatory for listing pages)
- Select a category for your Room post
We suggest using Gutenbee plugin which provides a unique set of blocks, that will help you create an awesome visual experience for your Rooms
Details panel
Details panel will help you change various aspects and styling of your Room pot. In the title tab, you can:
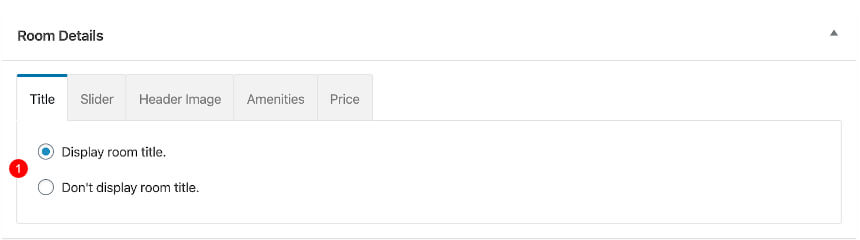
- Select to show or hide the Room title
Under the Slider tab you can add images for your Room slider:

- Add your images
- Randomize their order
- Select if you wish to show or now the slider
In the Header tab, you can

- Select if your featured image will serve as a main header image for the room. You can select a generic image through CSSIgniter Settings → Display Options which will appear everywhere.
For the Amenities tab you can select your Amenities

- Add new fields
- Remove the ones you don’t need
- Select where you wish them to appear
Finally, under the Price tab, you can:
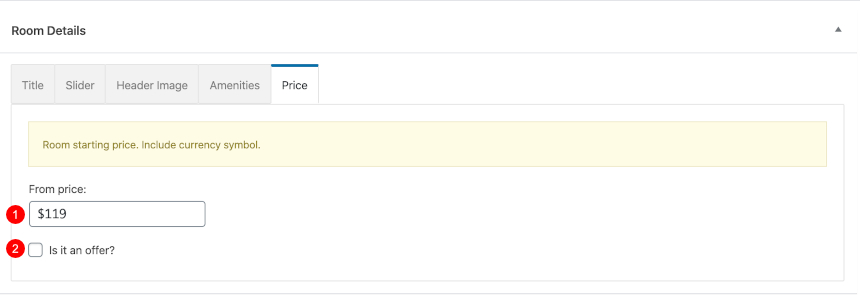
- Add a price
- Announce this room/price as an offer
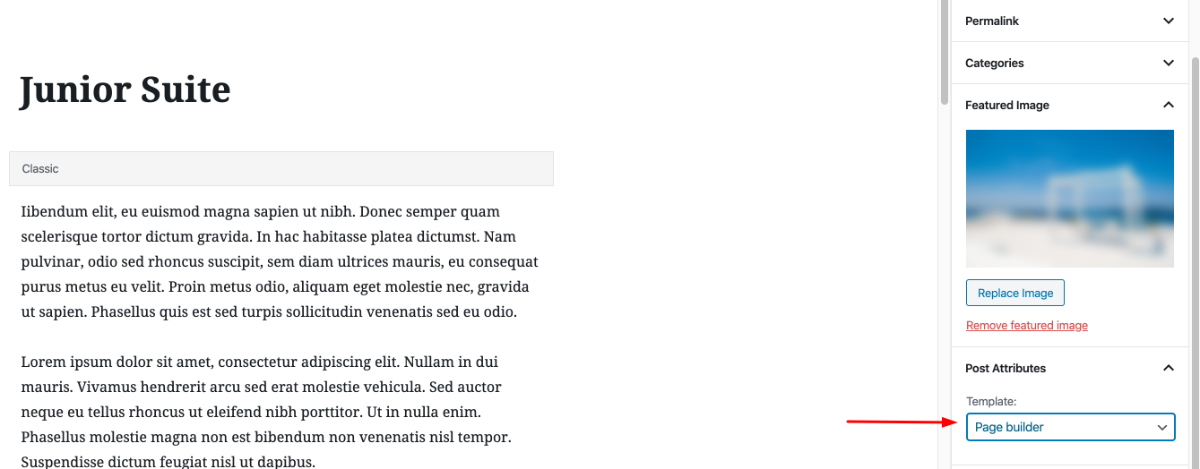
Page Builder for your Room post
If you want to use a page builder for your Room page you can select the page builder template from your post attributes. This way you will have a clean canvas to get started.
Room Listing
Here you can display all your Rooms. First, select the Room Listing template from the Page Attributes section.
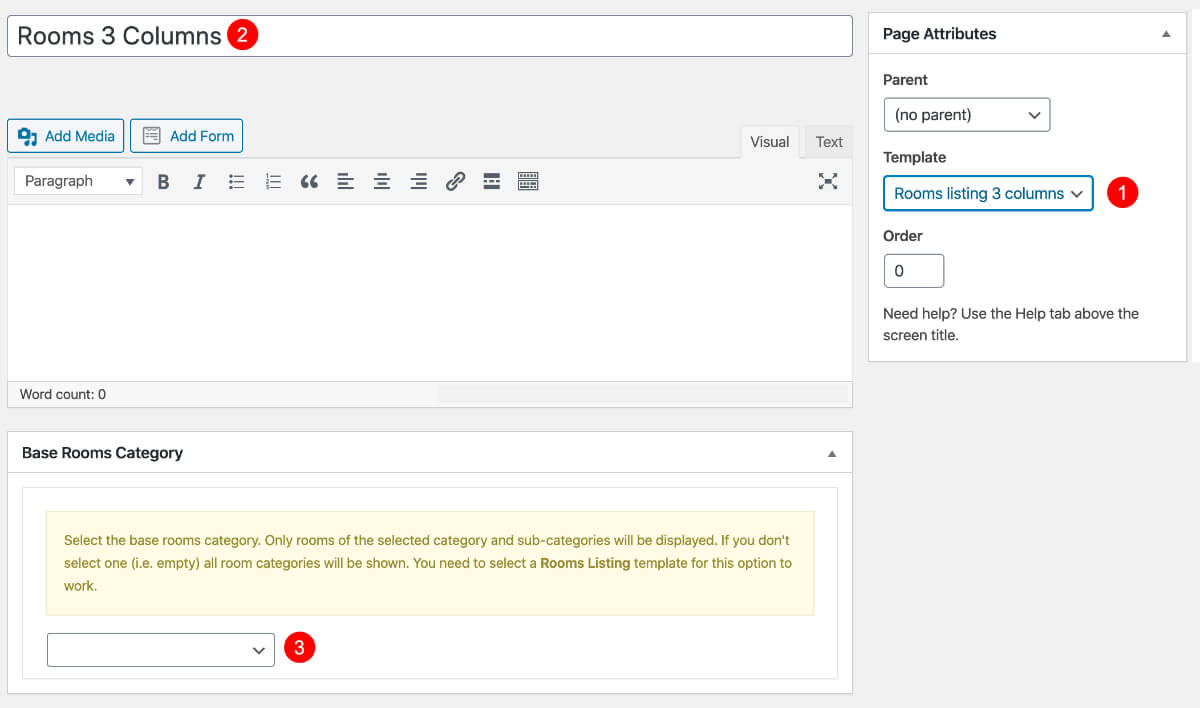
Here you can:
- Select between the Two layout templates that are available. Either a two-column layout by applying the “Rooms listing 2 columns” template from the page attributes panel, or a three-column layout by applying the “Rooms listing 3 columns” template.
- Set the page title
- Select the room category that you want to apply to the room listing template. Leaving this blank will just render all categories
Adding Galleries
To create a new gallery item go to Galleries → new Gallery. Here you can :

- Set the gallery’s name as a title
- Upload your images by clicking the “Upload Images” button in the “Gallery Details” panel
- Set a featured image. This is mandatory since the Gallery item will not appear in the Gallery listing page if an image is not set.
- Enter some text in the content editor
Gallery Listing
This page will display your galleries. Two layouts are available either a two-column layout by applying the “Gallery listing 2 columns” template from the page attributes panel, or a three-column layout by applying the “Gallery listing 3 columns” template.

Adding Videos
To create a new video item go to Videos→new Video.

- Select the title for your Video
- You can add your video’s URL. All major video providers are supported (YouTube, Vimeo, Facebook, etc). While you will need to use the full URL of the video and not a minified URL equivalent
Video Listing
This page will display your video items. Two layouts are available either a two-column layout by applying the “Video listing 2 columns” template from the page attributes panel, or a three-column layout by applying the “Video listing 3 columns” template.
Setting up the Slider
To add items to your homepage’s slider go to Slider Items > new Slider Item, set a title for the slider item and upload a featured image (which will be the image displayed on the homepage), finally, publish the slider item.
- Add a slide title
- Select the featured image which will be used as the main slide image.
Boxed Slider
You can adjust your Slider to transform to a boxed slider instead of the default fullscreen one. You can make this change from Appearance → CSSIgniter Settings and under the Display tab select
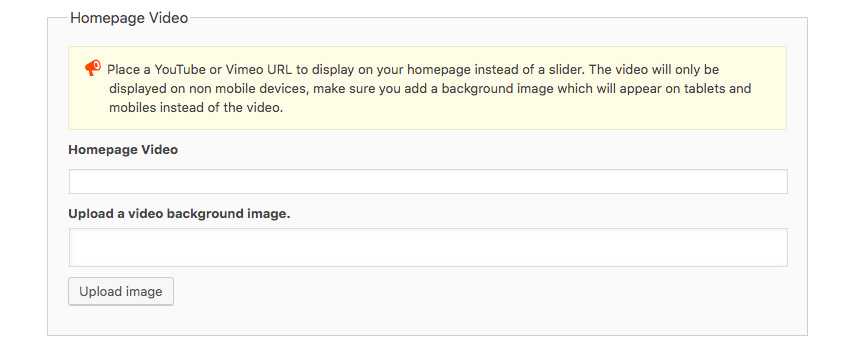
Video Slider
From Appearance → CSSIgniter Settings and under the Display tab you can select to display a Video instead of the native slider. Video will only be displayed on non-mobile devices, so make sure you add a background image that will appear on tablets and mobiles instead of the video.
Creating your menu
Now that your content is in place, you will need a menu. Go to Appearance → Menus, check the pages you want on your menu and add them, give your menu a name and save it. Finally, you will need to set your menu as “Main” menu, this can be done either by checking the “Main menu” box in “Menu Settings” just below your menu items in Menu Structure, or by going to the “Manage Locations” tab and selecting the menu you just created.
(TIP, for more info on creating and managing menus, please read the WordPress Menu User Guide here)
Setting up the weather
For info on how to set up the weather display on the theme, please have a look at this guide.
The CSSIgniter settings panel
Last but not least, under Appearance → CSSIgniter settings, you can find our custom-built settings panel. From here you can manipulate various aspects of your theme, including, but not limited to, changing your logo, setting a custom background, changing the color scheme and applying custom styles via the custom CSS tab. All options feature a description so you instantly know their provided functionality.
Logo
You can upload your logo (and a hi-res logo – normally 2x of the original logo) from CSSIgniter Settings→Site Options
![]()
Changing Footer text
The theme’s footer features an area for you to enter your copyright info, privacy policy etc. To change the text you need to go to CSSIgniter settings > Site options and use the appropriate box.
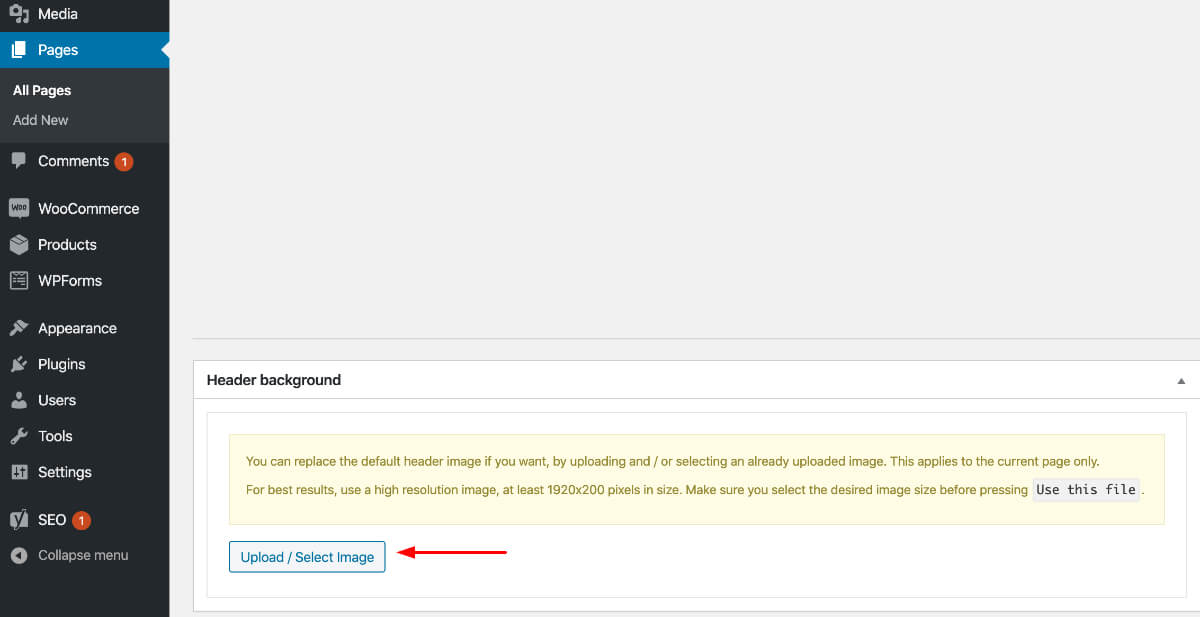
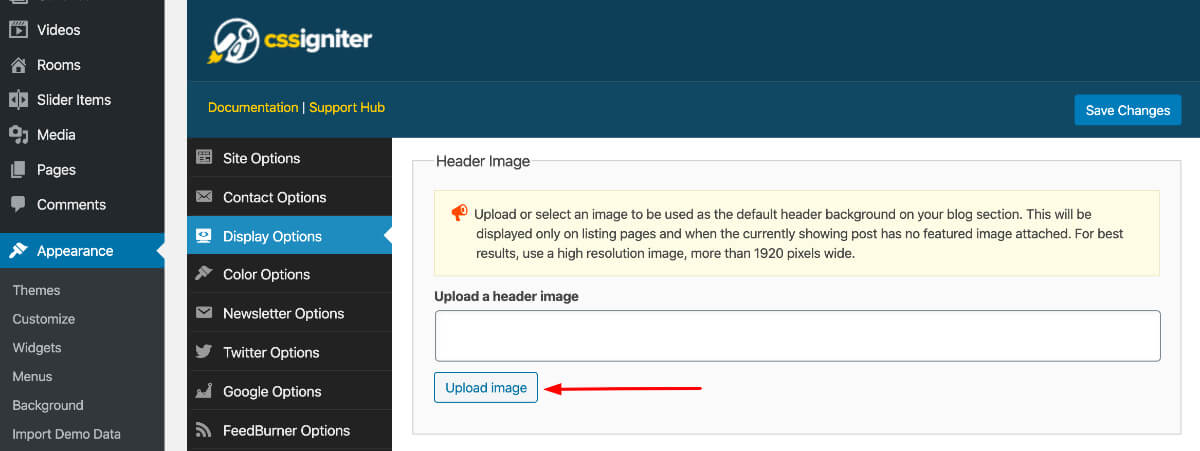
Header background
You can easily select a global hero background under CSSIgniter Settings→Display Options
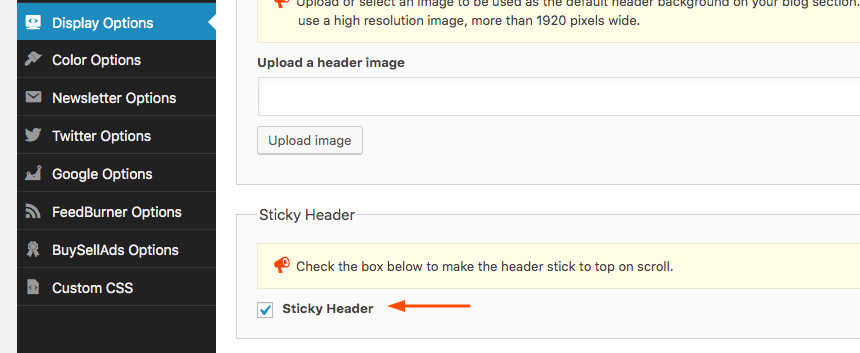
Setting a sticky menu
Navigate to Appearance > CSSIgniter Settings and under the Display Options tab select
Newsletter Setup
Aegean has a native way to integrate your Mailchimp newsletter from CSSIgniter Settings→Newsletter Options. You can find more details here
Footer setup
The footer in Aegean Resort, apart from the footer widgets, can display a few of your blog posts and a newsletter subscription form. These options can be controlled from CSSIgniter settings → Display options (last box down).
Changing theme colors
A great feature that might get handy if you don’t want to get dirty with custom CSS is the new Theme→Colors section under the Customizer. Here you can change both your Header and Global Colors

Changing theme typography
You can easily change theme typography using Google Fonts. Navigate to Appearance→Customize→Typography. There you can change the font for the body, heading, menu etc. We are going to present the changes you can make in the Body font, but same rules apply for all sections

- Enable or Disable Google Fonts
- Select the custom typography rules for desktop/tablet/mobile
- Select a font from the Google Fonts list
- Change the font-weight
- Change the font size
- Change the line-height
- Make text transformations (uppercase, lowercase, etc)
- Select the letter spacing.
Custom Widgets
All widgets can be accessed from Appearance → Widgets. Below each widget, you will find a small description explaining their functionality.

How to use the page builder and page builder contained template
The theme comes bundled with a page builder template which allows you to use your favorite page builder plugin on it and create unique layouts very easily. The main difference between them is that the Page Builder Contained template restricts the builder width to the theme’s default container width.
To use that template start by going to Pages > Add New. This will create a new page. Add a title to your page and select the Page builder or the Page Builder Contained template from the template drop down in the Page Attributes meta box.
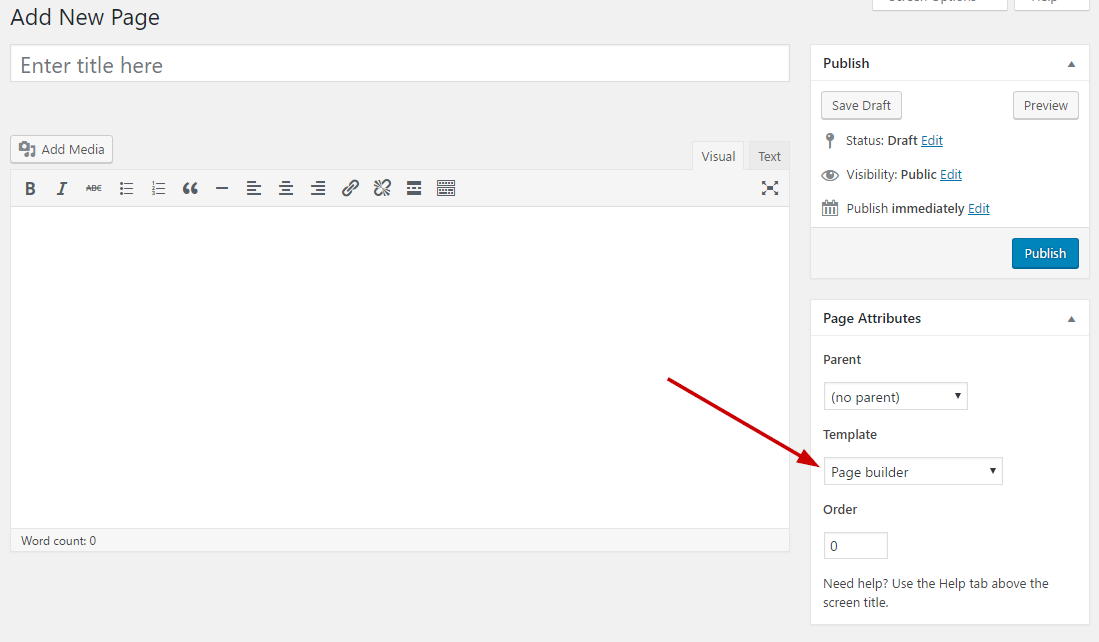
That’s it. You can now start building your page using the page builder of your choice, once done publish it and check it out.
Next Steps
Still have questions or problems setting up your CSSIgniter Theme? We will be happy to help you out! Please visit our support Hub