Streamline your WooCommerce checkout page

In today’s article we’re going to make some minor customizations to the checkout page in order to make it more friendly to both our customers and ourselves by eliminating extraneous information from the checkout process.
Install and activate a child theme
The first step on our process here is to create and install a child theme. If you are using one of our themes you can easily grab its child theme from our downloads section. If not, you can read our beginner’s guide on child themes to create your own. This step is essential in order to preserve our changes throughout theme updates.
Set a default country and state
If most of your orders come from a particular country or even state/region, perhaps the place your company is based in, you can set them as defaults on the checkout page saving your customers from having to fill them in on the checkout page.
To do that we use two hooks, default_checkout_billing_country for the default billing country and default_checkout_billing_state for the default billing state. In line 5 we need to fill in the code for our country and in line 9 the code for our state/region. For our example we have chosen Greece as the default country and Crete as the default state.
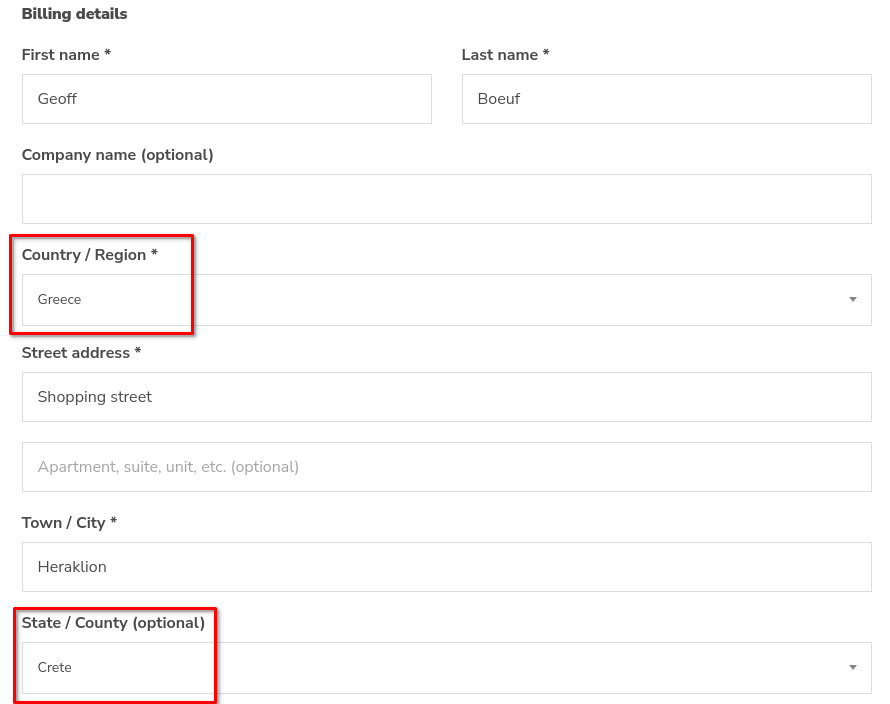
The default country and state are now pre-selected.
You can checkout lists of all available codes in the countries and states files in the plugin’s internationalization folder (i18n) or check them out on WooCommerce’s repository on GitHub (countries, states). That’s it, now these two fields will default to our selections on the checkout page.
Unset billing fields from the checkout page
The billing information form contains many fields and in some cases some of them might be of no use to our store, in such a case it would be beneficial to hide them in order to shorten the amount of time the customer has to spend filling in their information.
In the snippet above each line unsets a certain checkout billing fields, by their names we can easily understand which line unsets which field. In our example here we have left uncommented the lines which unset the company name, the second line of the street address and the country (this can be done for example if you only ship products within your base country, and have set a default country using the code described in the previous section).

The Company name, the Country and the 2nd address field have been removed.
By commenting or uncommenting any of the lines above you can tailor your checkout fields to your needs.
Restrict the size of the order notes textarea
WooCommerce offers a textarea for order notes for customers to fill in anything they deem helpful to the store owner, delivery people etc. WooCommerce does not impose any limit to the size of these notes which might lead customers to add too much information leading to confusion. To avoid such situations we’re going to filter the checkout fields using the woocommerce_checkout_fields hook to apply a limit of 500 characters to the order notes.
In the snippet above we append a notice to the default WooCommerce placeholder for the order notes area informing customers about the newly imposed limit and set that limit to 500 characters. Now the textarea won’t allow users to enter text larger than 500 characters.

On top is the default order note which allows unlimited characters.
Second comes our modified textarea with the restriction notice.
Finally we can see it in action on the 500 character cut-off.
Wrapping up
Today we have managed to lightly customize our checkout page and make it a bit more friendly and less time consuming for our customers, while making our life easier by having our customers write concise order notes instead of loosely structured stream of thoughts. Do you have any more ideas regarding checkout page modification? Let us know in the comments below.
2 responses to “Streamline your WooCommerce checkout page”
Dear:
As they are, I tell you that I have downloaded the Nozama theme, I loved it but I have the following problem:
When placing the product in the cart I need to change the language to Spanish.
are the following data:
1) your cart.
2) Check-out
3) Confirmation.
please your help
Hello, please submit a ticket to our support via this page https://www.cssigniter.com/support-hub/ (you will find the submit ticket button towards the lower left) and we’ll be along to help.