How to Create a Video Popup in WordPress

Are you looking for a way to make your website more engaging? Video popups are a popular feature among website owners that can help increase user engagement.
If you have a WordPress site, adding a video popup is a simple process that can make a big impact. Whether you want to highlight a specific video, promote your channel, or share your latest content, a video popup is an effective way to do so.
In this article, we will walk you through the step-by-step process of adding a video popup to your WordPress site. Whether you’re a beginner or an experienced user, our guide will help you create a professional and captivating video popup that will keep your audience engaged.
What is a Video Popup?
A video popup is a small window that appears over your website content and plays a self-hosted video. The popup can be customized to match your site’s branding and design, and it can be triggered by different events, such as clicking a button, scrolling down the page, or even when the page loads.
Self-hosting video, when done correctly, provides businesses with a variety of benefits, including:
- Control: By hosting the video on your server, you have full control over the video’s content, its quality, and its distribution. You can customize the video player to suit your needs and branding.
- Traffic: When people link to your videos, they will link back to your website instead of to YouTube, Vimeo, or another video platform. This increases the authority of your site.
- Privacy: If you’re concerned about privacy, self-hosting your videos can be a good option. You can keep your videos private and prevent user tracking by not using a third-party service like YouTube.
By displaying your videos in a popup, you can ensure that your website provides a seamless and engaging user experience while maximizing conversions and lead generation efforts.
What You Need to Know Before You Start
In this article, we will use FireBox to create the popup. FireBox makes it super simple to create powerful mobile-friendly popups that convert. It’s built around the new Gutenberg Block editor, which allows users to edit content in a new way. Using blocks, you can insert, rearrange, and style your pop-ups quickly and easily.
To install FireBox, simply navigate to Plugins → Add New in your WordPress dashboard and search for FireBox. Next, click the Install Now button and wait for the plugin to be installed. Once the plugin is installed, you can click the Activate button.
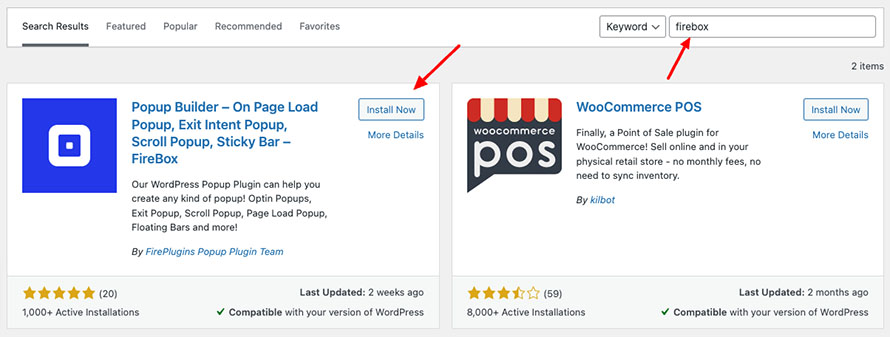
Read more about installing Firebox.
Next, to load a self-hosted video with a video player in our popup, we will use the Video Block from GutenBee. It’s a free collection of elegant WordPress blocks that can take your content creation to the next level.
Let’s install GutenBee too. While on the same screen on your WordPress dashboard, search for gutenbee, click Install Now, and then Activate as you did with FireBox.
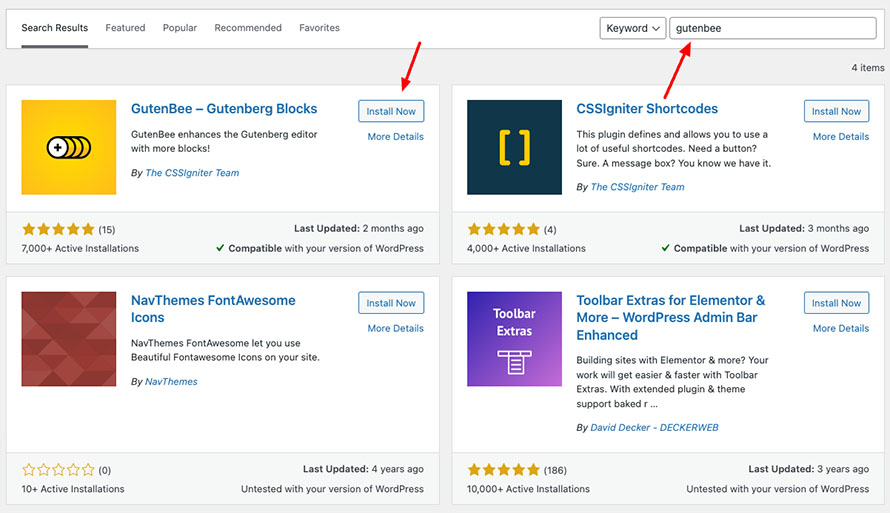
To read more details about the installation process of GutenBee, visit GutenBee’s documentation page.
How to Add a Video Popup in WordPress
Now that you understand the benefits of using a video popup and you’ve both required plugins installed, let’s look at how to create our popup.
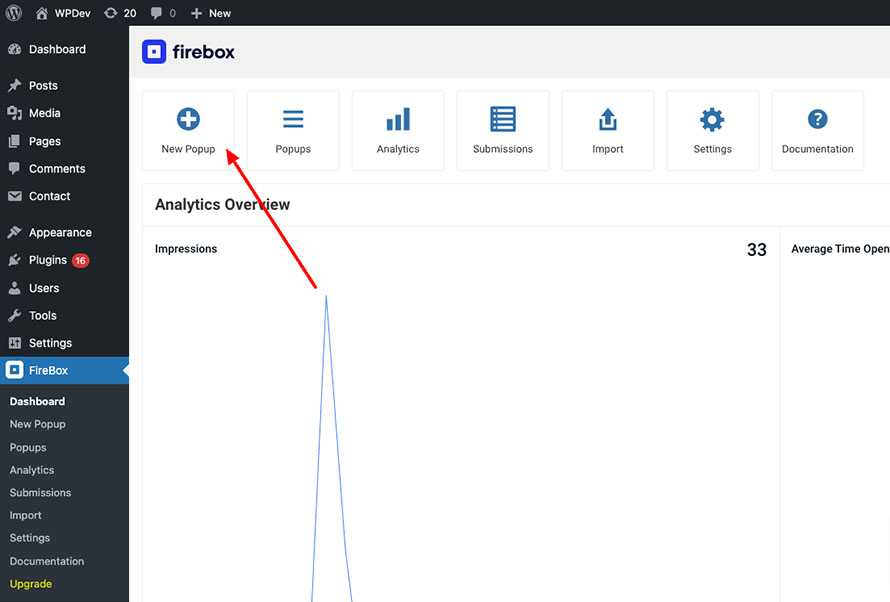
Head to the FireBox plugin in your WordPress dashboard and click New Popup.
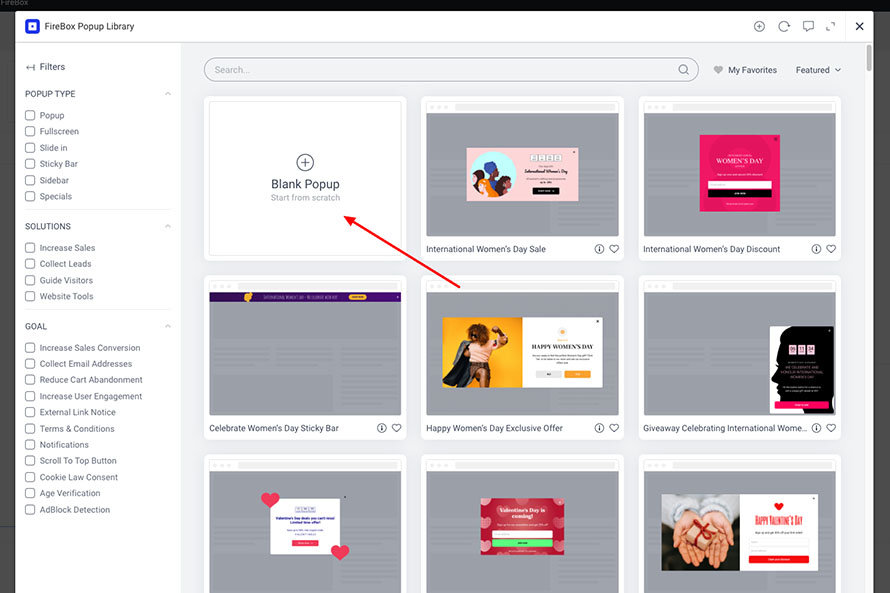
You will see a dialog with pop-up layouts appearing. FireBox comes with a big collection of pixel-perfect popup templates, but we will not use any of them for this case. So, instead, click Blank Popup to start creating one from scratch. Don’t worry, it’s not as scary as it sounds.
Once the popup builder editing page loads, you will notice an empty rectangle at the center of the screen. It should look like this:
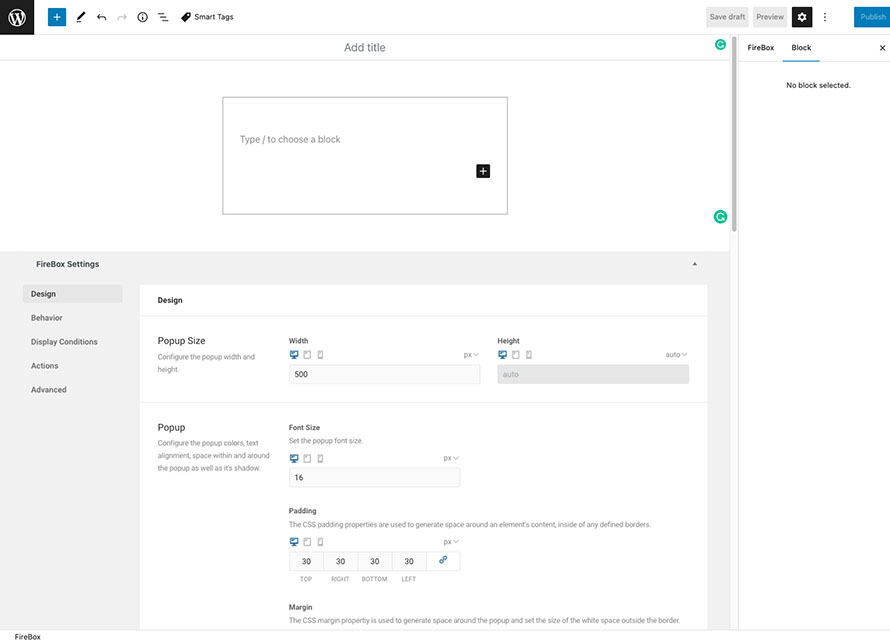
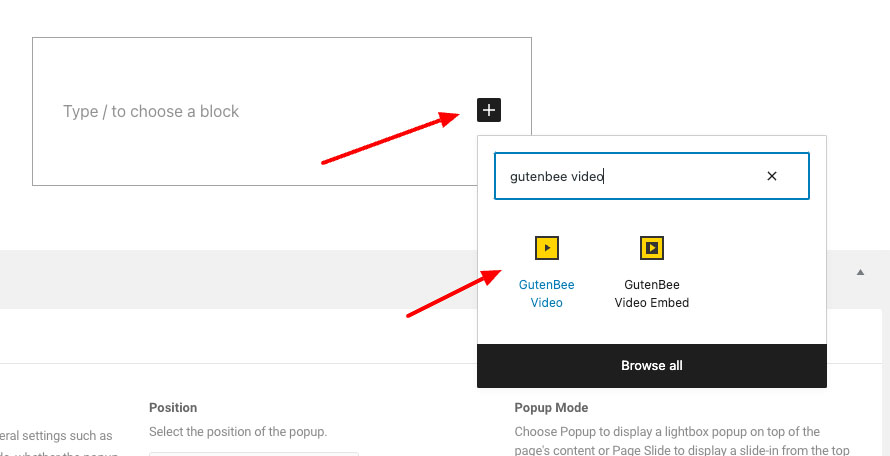
The first thing to do is add our video to the popup’s content. To do so, click the Plus icon to open the block selection dialog. Next, search for gutenbee video and click to add it.
Next, click either Upload to upload a new video on your site or click Media Library to select an existing video. Once you pick a video, your screen should look like this:
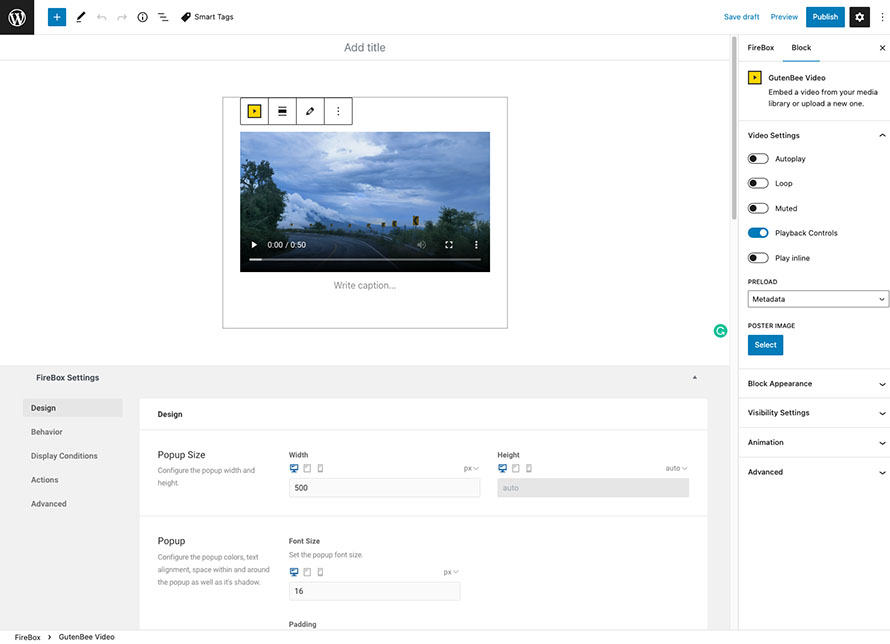
Theoretically, your popup is ready. If you click Publish, you will see the popup appearing on the front end. But before doing so, let’s customize it to make it more attractive and user-friendly.
Scroll to the FireBox settings in the Design tab, and apply the following:
- Set the Width to 900px to make the video a bit larger.
- Set Padding to 0 to remove the extra gap around the video.
- Set the Background Color to rgba(255,255,255,0) to have a transparent container.
- Set Shadow to Elevation to contrast the popup and the page’s content.
- In the Border section, set it to None. We don’t need any border in our case.
- Click to enable the Overlay option. This adds an extra contrast to our popup and secondly allows the closing of the popup by clicking on the area outside of the popup.
The popup is now ready, and you may hit Publish!
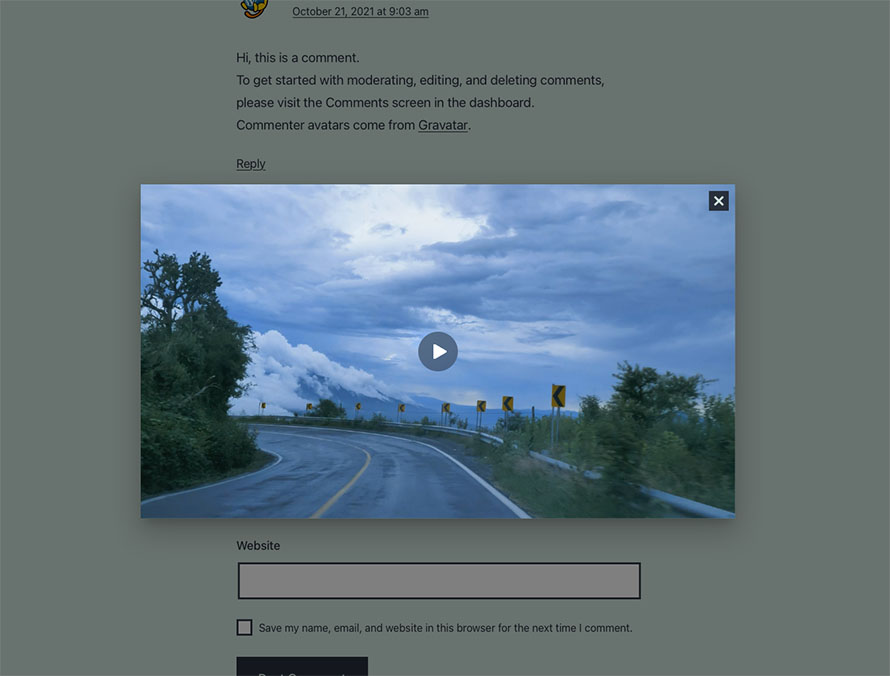
Once the popup is published, go to your front end and refresh the page. You will see the popup appearing automatically when the page loads. Congratulations, you’ve successfully created your first WordPress video popup!
Here’s what the popup looks like in our example:
If you don’t want the popup to appear on page load, you can change this in the Behavior tab in the Trigger Point section. FireBox has 10+ popup triggers, such as On Exit, Scroll, Idle, Click, and many more.

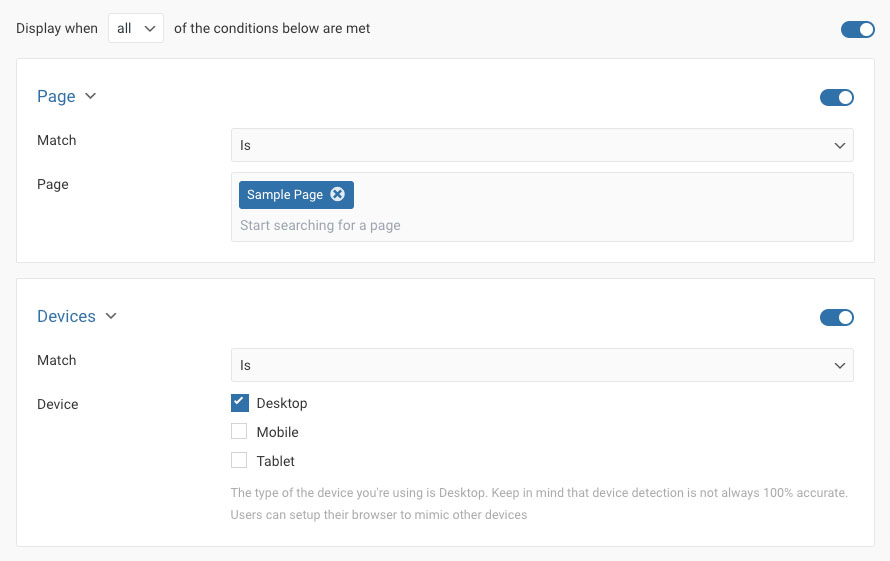
Moreover, you will notice that the popup appears on all pages. If you don’t like this, the Display Conditions tab can help you control when and where the popup will appear. You can set it to appear when visitors access specific menu items, URLs, contents, and pages. We can also schedule it to display based on the location or devices of visitors.
Best Practices for Creating a Video Popup in WordPress
Here are some best practices to keep in mind when creating a video popup in WordPress:
- Keep it short: The video should be short. Avoid using long videos that may lose your visitors’ attention.
- Choose the right trigger: Choose a trigger that makes sense for your content and visitors. For example, if you promote a product, use a button trigger on your product page instead of showing the popup on page load.
- Test different designs: Test different designs and settings to see what works best for your site and audience. You can also use A/B testing to compare different variations of your popup.
- Optimize for mobile: Make sure the popup is optimized for mobile devices, as many visitors may be using their smartphones to access your site.
Conclusion
Adding a video popup to your site is a great way to increase user engagement. Following these simple steps, you can create a professional and effective video popup to capture your audience’s attention and promote your content. Test different designs and settings to see what works best for your site and audience.