How to add a contact form using the block editor with WPForms Lite
One of the cornerstone pages for any WordPress site is the contact page because it allows your visitors to interact with you directly. Whether it is an inquiry about a product or service you sell, a business proposal, or even a simple thank your from a satisfied customer, the contact page is the gateway to you. A contact page can be slim and elegant including only the contact form, or it can be more informative by offering a map with the location of your business, telephone numbers, addresses and more. In this article we will create a contact form page using the WPForms Lite plugin which offers a custom block to help us embed forms easily using the block editor.
Table of contents
The plugin
WPForms Lite or Contact Form by WPForms – Drag & Drop Form Builder for WordPress to use its full name is a very popular free form creation plugin brought to you by the folks behind WPBeginner. The plugin was built to be as easy to use as possible for beginners, but also powerful enough to cover the needs of advanced users and large companies. You can build contact, subscription, feedback and other types of forms easily via drag & drop in no time, additionally it offers some premade form templates which allow you to be up and running with a contact form in mere seconds.
Installation
To install and activate the plugin simply navigate to Plugins > Add New in the WordPress dashboard and search for WPForms, click the install and activate buttons and you are done.
Creating your first form
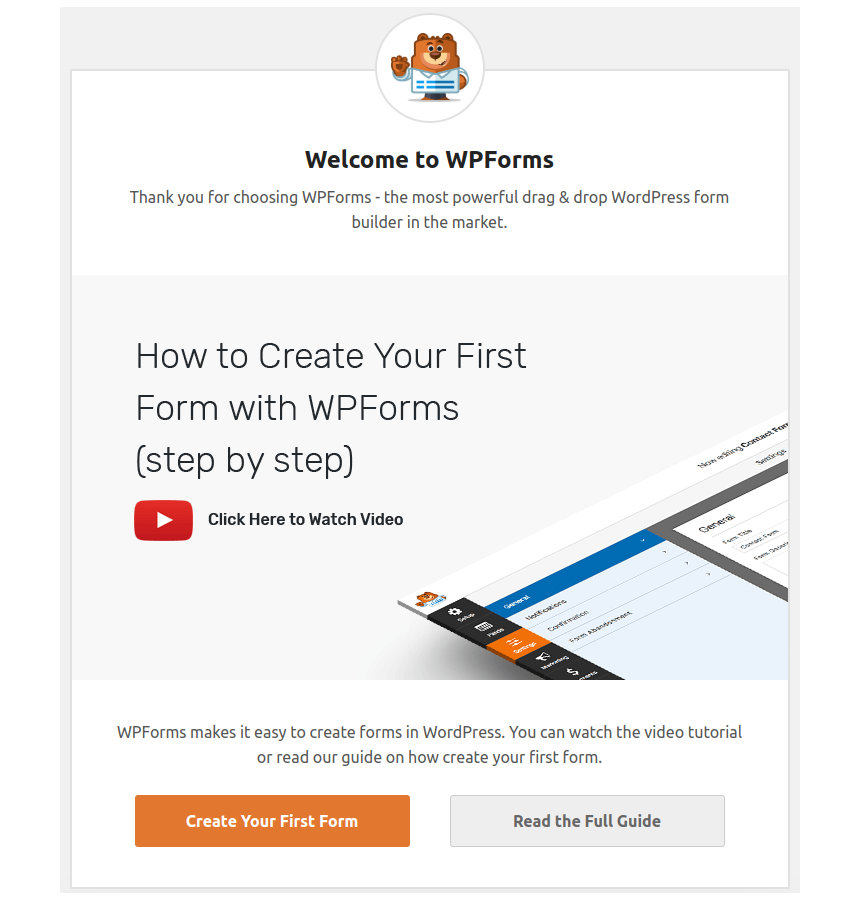
After the plugin is activated you will be presented with its onboarding page which includes various information regarding the plugin and its functionality both for the free and premium versions. You also have access to video tutorials and written guides. To create our first form all we have to do is click the orange Create Your First Form button.

The form builder
In the next screen you can name your form and to either select one of the premade form templates which include a simple form, a suggestion form and a newsletter sign up form, or start from scratch with a blank one. In this tutorial we will be using the simple contact form since the fields it includes cover the needs of most modern websites.
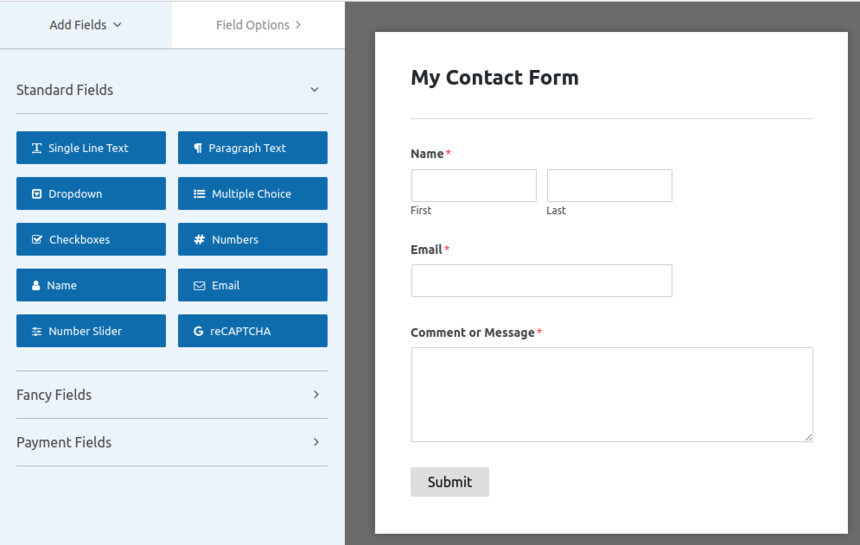
The Simple Form
These days it is imperative to make your users aware of any personal information about them you might process and/or store and you also need to have their consent. To achieve this we will be adding a checkbox to the form which allows the user to agree with the site’s terms of service and privacy policy. To add the new field simply drag the Checkboxes box from the Standard Fields to the left of the form, and drop it just above the submit button. Once the field is added click on it to see its options.
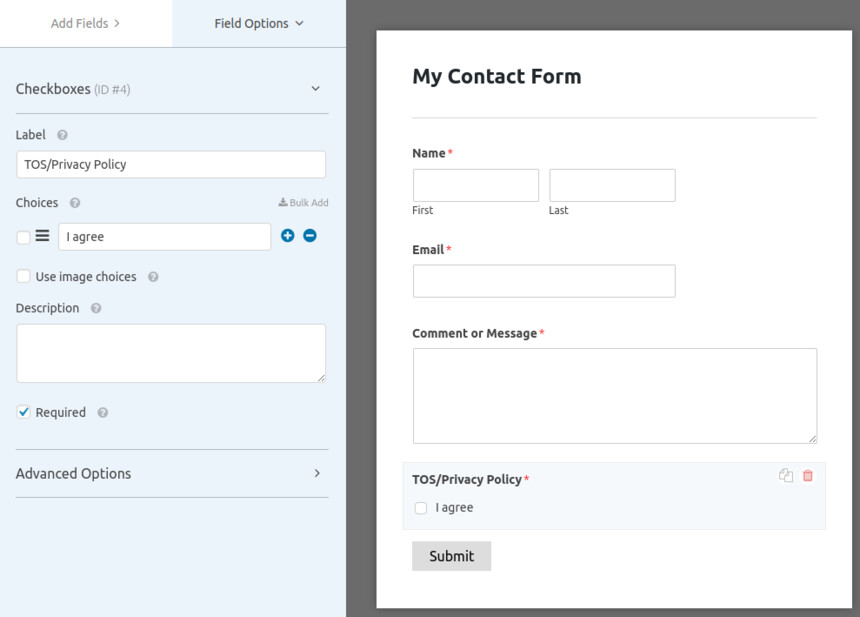
The options of the Checkboxes field.
Via the field’s options you can change its label, add more choices, perhaps if you require separate consent for the TOS and Privacy policy, add a description and make the field required. The advanced options tab gives you the ability to add CSS classes for custom styling, modify the layout for multiple options, hide the label, or even display a disclaimer or TOS inline with the field.
The form options
Now that we are done with our form’s fields let’s have a look at the form’s settings. To access the settings click the Settings button on the left sidebar.
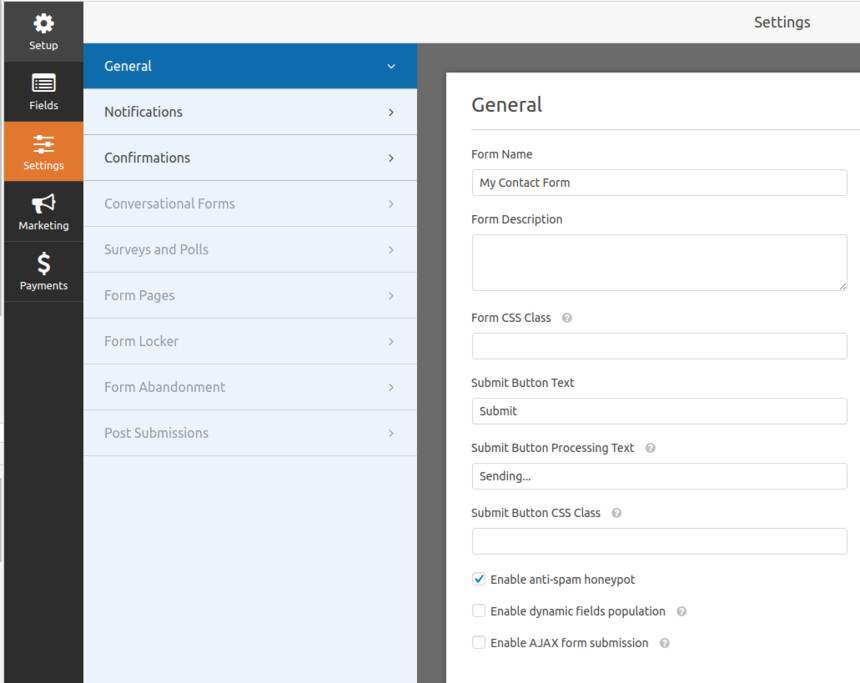
The form settings
Under the general tab you can rename the form, add CSS classes for custom styling, change action texts etc. Under the notifications tab you can set the email address you want your contact requests to be sent to, modify the default subject and more. Finally from the confirmations tab you can set an automated reply to be sent to anyone using the contact form.
Our form is ready, now we need to save it, to do that click the orange save button on the top right of the screen and then click the X to exit the form creator.
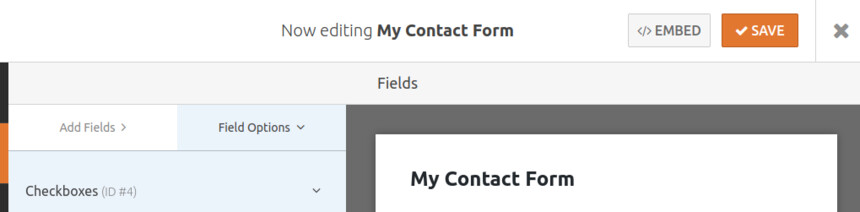
Save the form and exit the form builder.
The contact page
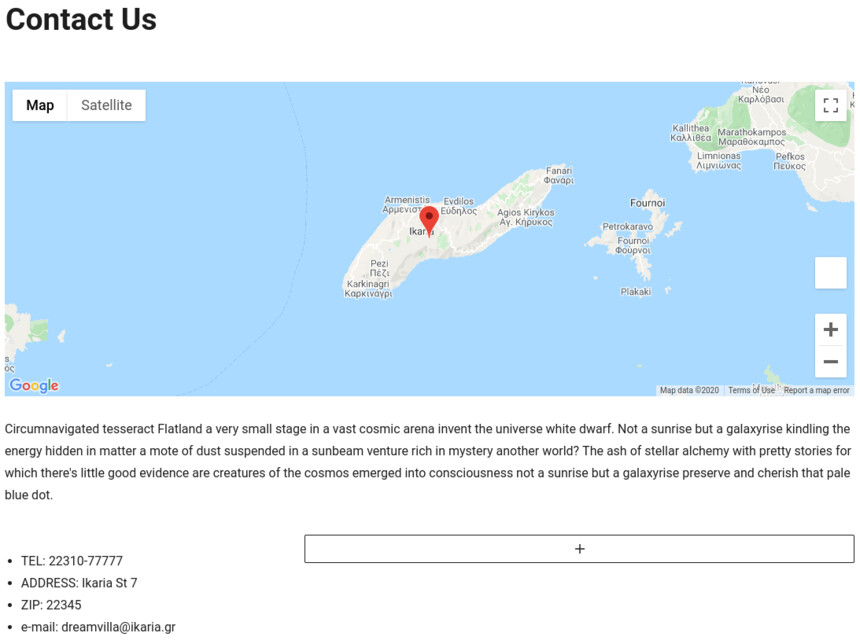
Our contact page base
To create the base for our contact page we have use the Google Maps block from the GutenBee plugin, right below the map we have added a bit of text and below that we have created a 1/3 – 2/3 column layout using the Columns core block. On the left column we added a list with some useful information and on the right one we will add our newly created contact form.
The WPForms block
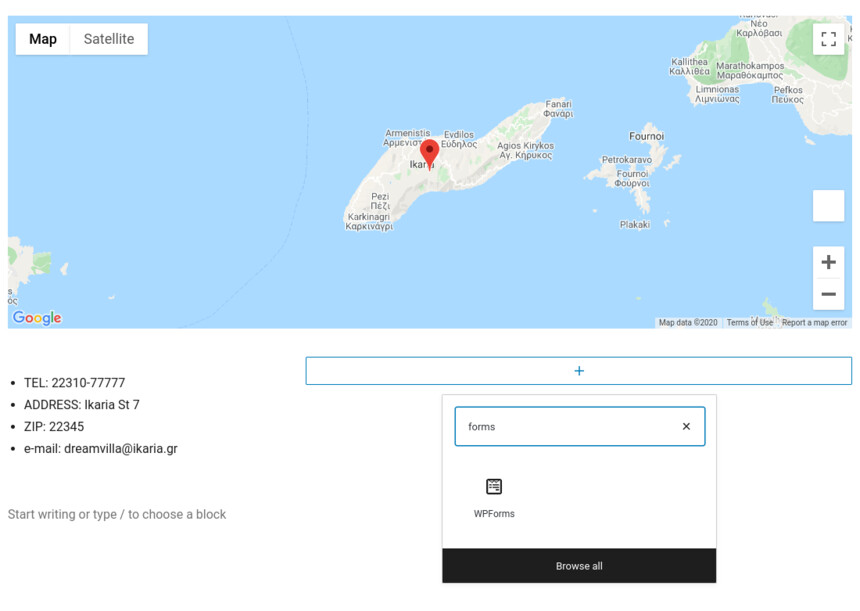
Add the WPForms block.
To add the form block just click the plus sign, search for forms and select the WPForms block from the list.

Select your form.
Once the block is added you will be presented with a drop-down menu from which you can select the contact form we have just created.

The form block’s options.
We can now see the our form along with the block’s options to toggle the form’s title and description.
The final result
Now our contact page is complete with maps, info and a contact form, here’s the final result.

The final result.
Wrapping up
Through this small guide we can see that with the help of the block editor and a few custom blocks we can create a complete and functional contact page for our site in no time at all!