Display number of items in cart on the add to cart button
In today’s tutorial we’ll be modifying the text of the add to cart button to display any already added items in the cart, instead of just the usual ‘Add to cart’ text, giving our customers more information regarding their upcoming purchases.
Install and activate a child theme
The first step on our process here is to create and install a child theme. If you are using one of our themes you can easily grab its child theme from our downloads section. If not, you can read our beginner’s guide on child themes to create your own. This step is essential in order to preserve our changes throughout theme updates.
Replacing the button text
Our first step is to replace the normal button text with the number of products in the cart for simple and variable products in product listings and the single product view. To do that we will use the woocommerce_product_add_to_cart_text and the woocommerce_product_single_add_to_cart_text hooks for the listing add to cart and the single add to cart button respectively.
In our code above we pull the cart quantities, this will give us back an array of product ids along with their respective cart quantities, if this returns nothing we stop there. For simple products we check if the product id is among the ones returned in the cart contents, if it is we add its quantity in a variable and return it as the button’s text, if the product is not among the cart’s contents we return the default text. Similarly for variable products, we check if any child product (or variation) is among the cart’s contents, if it is we follow the same procedure as with simple products.
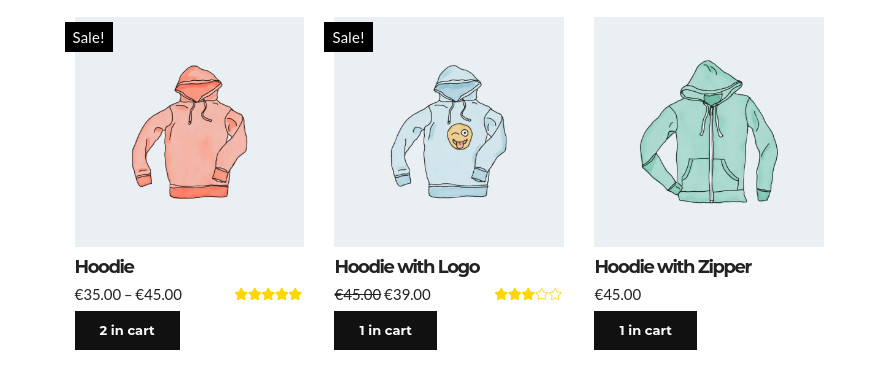
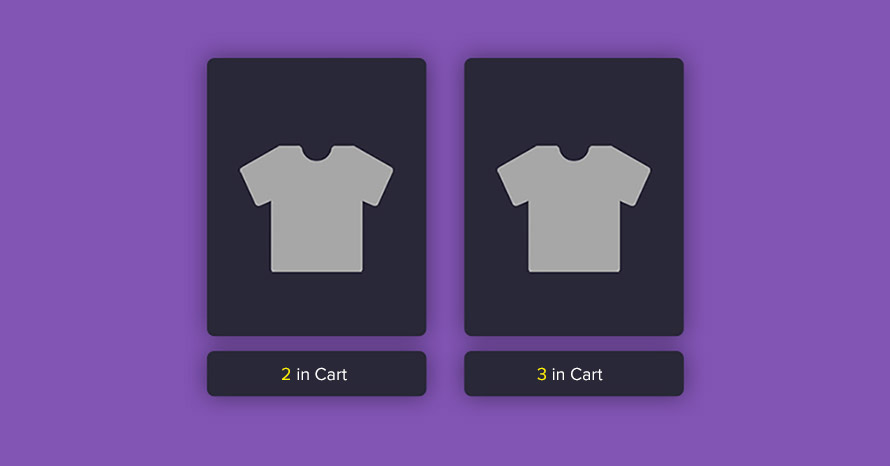
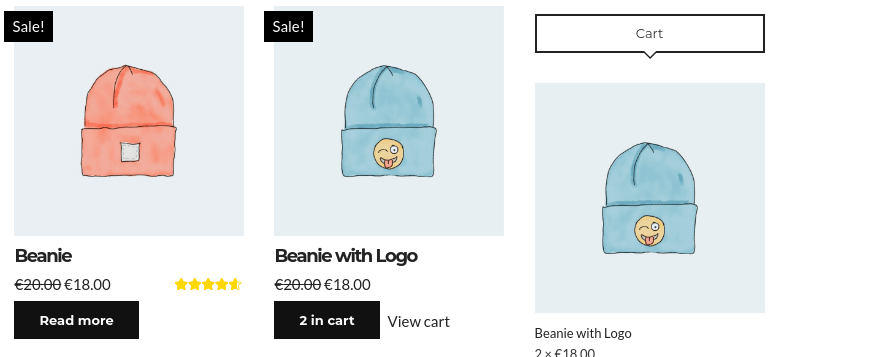
Quantities added to the cart appear on the add to cart button.
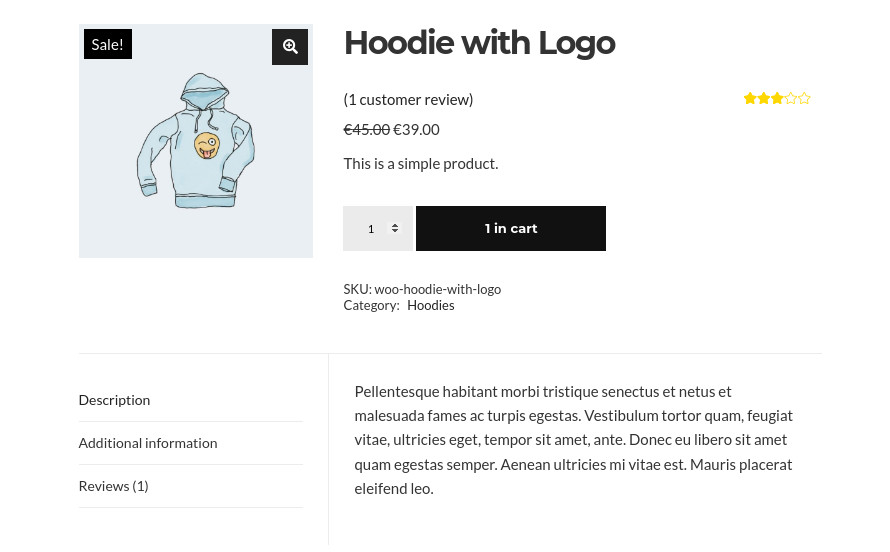
Quantities in the cart shown on the single add to cart button.
Now any quantity of a particular product added in the cart will appear on the add to cart button as well.
Using AJAX to update the button text in real time
Our initial goal is achieved, however we can go a step further. As it stands now, if a product is added to the cart from the listing page, we will need to refresh the page in order for the number of items is removed. Similarly if our theme supports an AJAX based minicart, removing items from the minicart would also need a page refresh in order to be reflected on the button text. To achieve that we will need some AJAX goodness.
First up we create a small JS snippet and hook it at the site’s footer using wp_footer. The snippet detects clicks on the add to cart button and the remove from cart button for AJAX powered minicarts and calls on our text changer AJAX hook. The function cssigniter_change_add_to_cart_text ran on our hook works pretty similarly with our first function which modifies the button text, it gets the current cart contents, checks if the product in question has any products in the cart, gets the amount and returns it to be used as the add to cart button’s text. For removals it gets the cart contents makes the removal, calculates the new cart contents if applicable and creates the string which will be used as the button’s text.
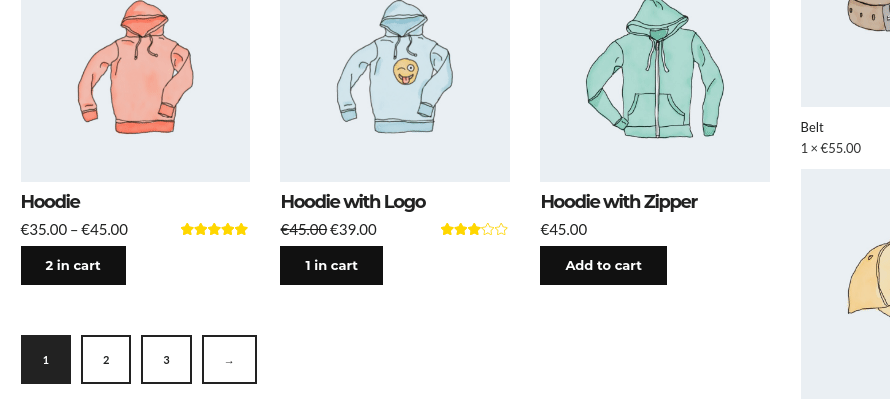
Cart text automatically updates when new items are added to the cart.
Removing items from the cart updates the button text.
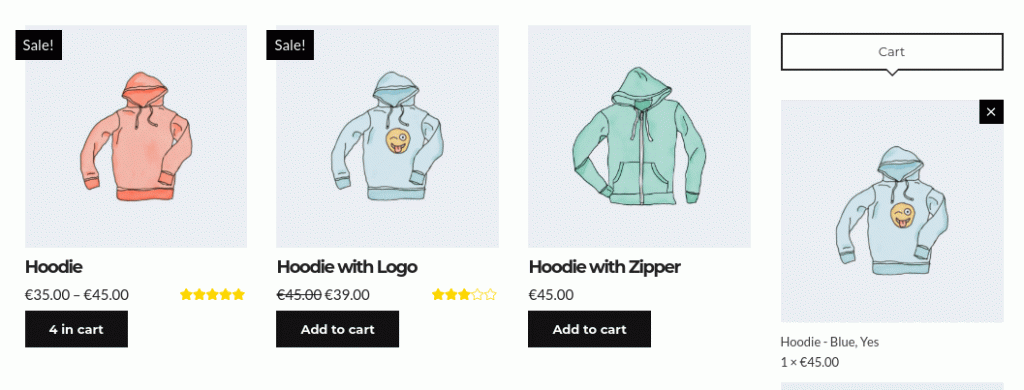
Works for variations added to the cart as well.
Wrapping up
We have successfully made cart quantities for each product appear on the add to cart button for product listing & single product views. Do you think this is a useful feature? Let us know in the comments below.
8 responses to “Display number of items in cart on the add to cart button”
Hello Single product page not working please solution provide ASPS
Website opetion my link add please check and solution provide
Not working page link:- https://zobo.aksharm.co.in/product/armor-twist/
Hello Nimita.
Did you use the code provided on the post or is it just that a product does not work? If you did use the code and you think it caused the issue, try removing it and see if it fixes itself.
Great idea! But it doesn’t work for me when I add a list of products to a simple page using Gutenberg. And for variable products, the button is not updated if you delete an item from the basket. Can you fix it?
Hello.
Thank you for letting us know. We’ll take a look at these issues and update the post if necessary.
Hi Nik! Thank you for this great article! It is possible to have something similar but as text or a badge with the qty added on a corner of the Add to cart button instead to change the text? What hooks/actions I need to use?
Hello.
Glad to hear you like this article. Adding proper badges to the buttons is quite more complex, it would require you to modify the template parts for the loop’s add to cart buttons, along with the ones for the single product to include the badge and then use AJAX to update the contents of the badge. I’m afraid added complexity like this one falls outside the scope of this tutorial.
Woo Commerce does this by default. Any way to turn it OFF?
Most probably the theme or an extension you are using implements this. You’ll need to find who is the culprit and consult its documentation on how to disable it.