Add a buy now button to your WooCommerce products
If your WooCommerce powered online store sells products that are often bought individually you might consider adding a buy now button which will add the single product to the cart and redirects the customer to the checkout page without them ever having to see the cart page, making their shopping experience more streamlined. In this small guide we’re going to take a look at how we can build such a button.
Install and activate a child theme
The first step on our process here is to create and install a child theme. If you are using one of our themes you can easily grab its child theme from our downloads section. If not, you can read our beginner’s guide on child themes to create your own. This step is essential in order to preserve our changes throughout theme updates.
Adding the button
We will start by displaying the button on simple products on the product listing and single product pages, just after the default add to cart button.
Our code here is pretty simple. We use two hooks, the woocommerce_after_shop_loop_item to show the button on the product listing pages, here we need the priority set to 15 in order for our button to appear after the add to cart. The second hook is woocommerce_after_add_to_cart_button to display the button on single the single product view. We start with some checks, first we check if we are on a simple product, then we check if the product is purchasable and if it is in stock, if we are good to go, we gather up some CSS classes needed for our button to look as required and we proceed with creating the button. Essentially line 29 is where everything happens. We create a URL for our button which adds the product to the user’s cart automatically and redirects them to the checkout page, skipping the cart page entirely, thus making the checkout experience a bit faster. This is what the button will look like:
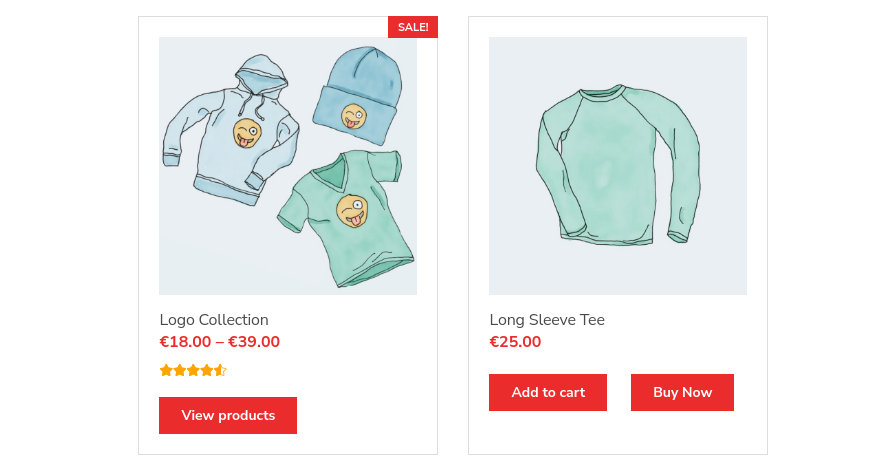
If we press it, for example on the Long Sleeve Tee product, it will send us directly to the checkout page with the product added to the cart.

Wrapping up
With today’s small guide we have successfully added a buy now button to our simple products, both on the product listing and the single product page, allowing our customers to quickly purchase a single product without having to see the cart page.
8 responses to “Add a buy now button to your WooCommerce products”
How to add Buy now on the single product?
Thank you
Hello.
This code should add the buy now button to the single product view for simple products.
Hi. How about variation product?
Hello.
Unfortunately due to the way WooCommerce handles variations, there is no simple way to do that. Functionality like that would require a more complex solution which falls outside of the scope of this post.
I only want the buy now option in single product page and not the product loop. How do I do this?
Hello.
Try removing this line
add_action( 'woocommerce_after_shop_loop_item', 'cssigniter_buy_now_button', 15 );from the code, it should do the trick.Hi, could you please share any article which shows how to add the buy now to variation product?
Hello.
There are some plugins which promise such functionality however we haven’t tested any of them so we can’t safely recommend one, you can search for “woocommerce buy now button on variable products” and pick one. Keep in mind that in order for the customer to be able to select a variation, dropdown menus will appear above the buy now button, which might not look optimal depending on the theme you use.