Knowledge base
Categories
Create a multilingual site with WPML and an Ignition Framework based theme
Creating a multilingual site with an Ignition Framework based theme is as simple as with any other theme. In this guide we take a look at how to create a bilingual site using the Aegean Resort theme. We are going to use the WPML plugin to achieve our goal.
WPML
WPML is one of the most popular premium WordPress plugins for creating multilingual sites. Once you download, install and activate the plugin click the Configure WPML button to continue.

Onboarding
This will trigger the onboarding procedure.
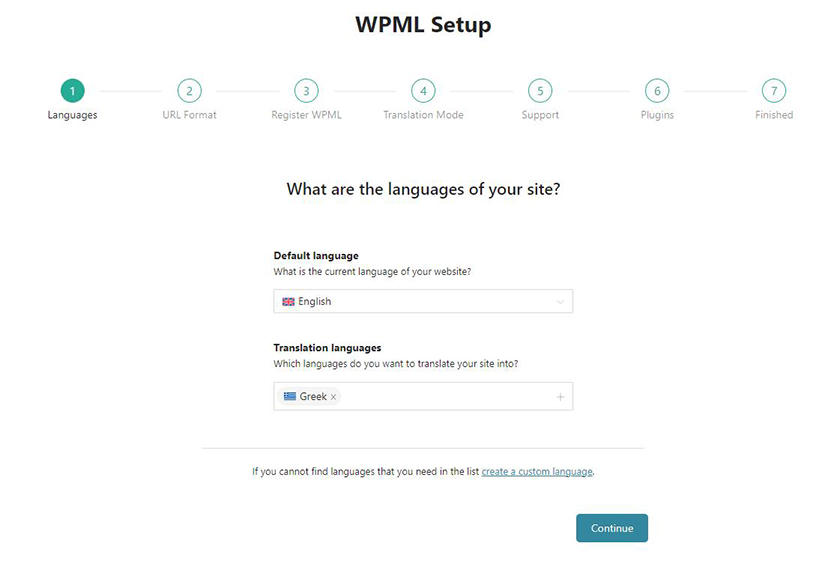
In the first step you will need to set the language for any existing content as well as the languages you want to translate your site to.
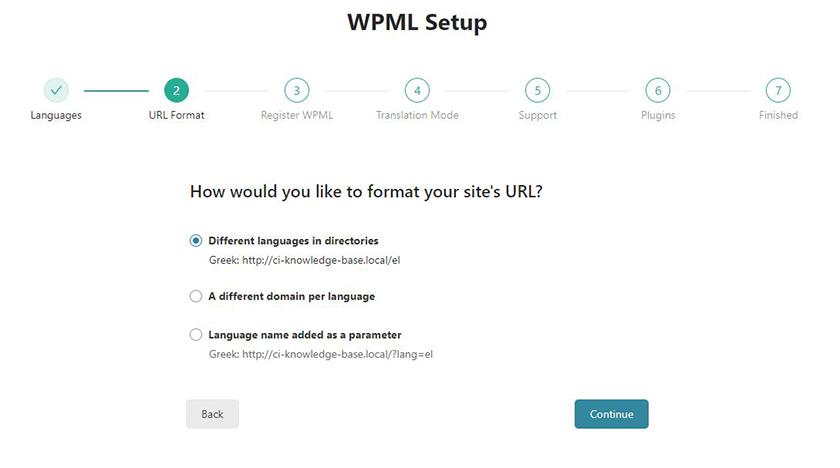
In the second step select the preferred format of the website’s URL for each language.
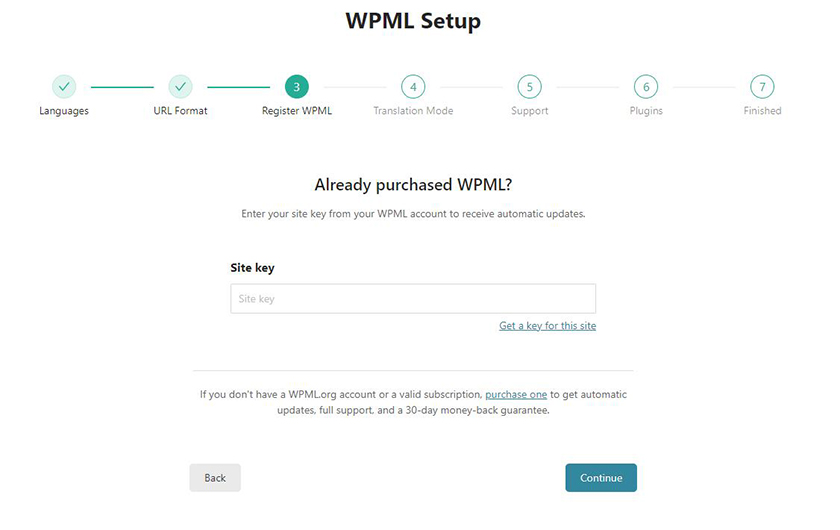
In the third step you have to apply your registered site’s key in order to register your plugin to receive automatic updates.

In the fourth step you can choose the way you would like your content to be translated (automatically or manually).
After clicking on Continue, before moving to step 5, you will be prompted to customize your previous choice.
Automatic Translation

For more about the automatic translation options, please refer to this WPML documentation guide.
Manual Translation
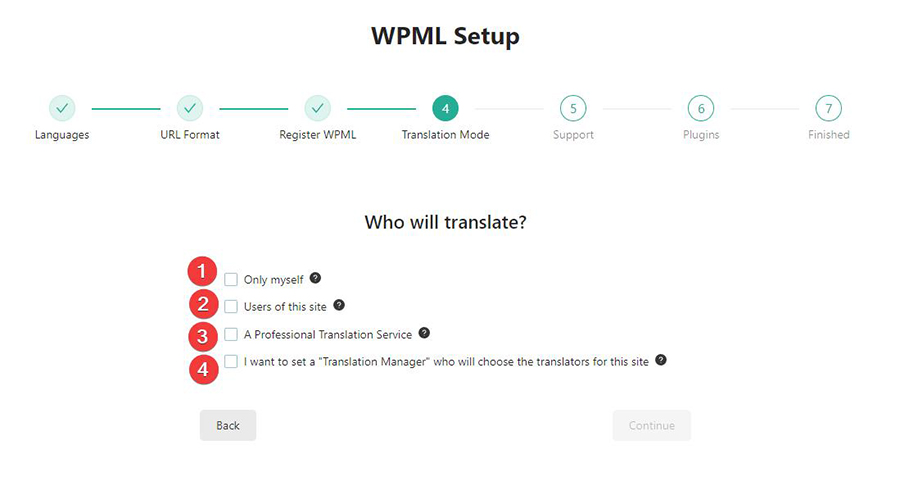
If you selected to translate your content manually, here you can choose if you would like to manage your translations by yourself (1), set existing users as Translators (2), add a Professional Translation Service (3) and finally, set a Translation Manager (4). You can select an existing user or create a new one and delegate the setup of translators to him/her. Choose this option when you are building a website for a client, who will set up translator users or choose a translation service.
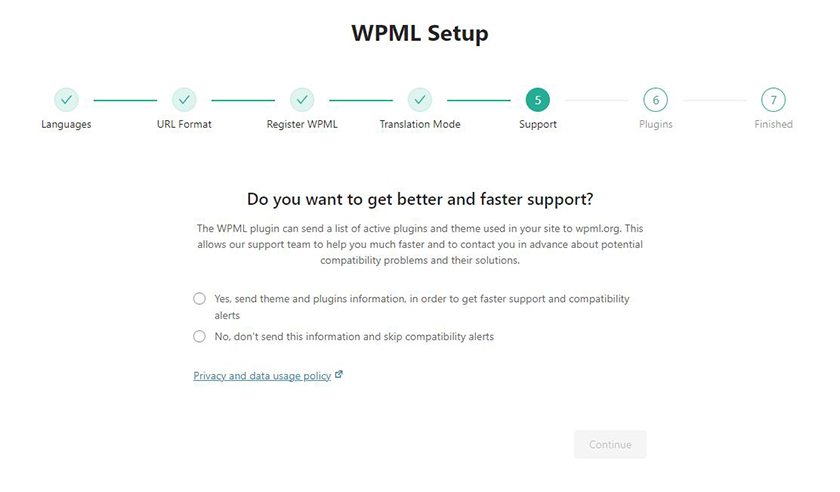
The 5th step allows you to share site’s data (active theme and plugins information) with WPML.
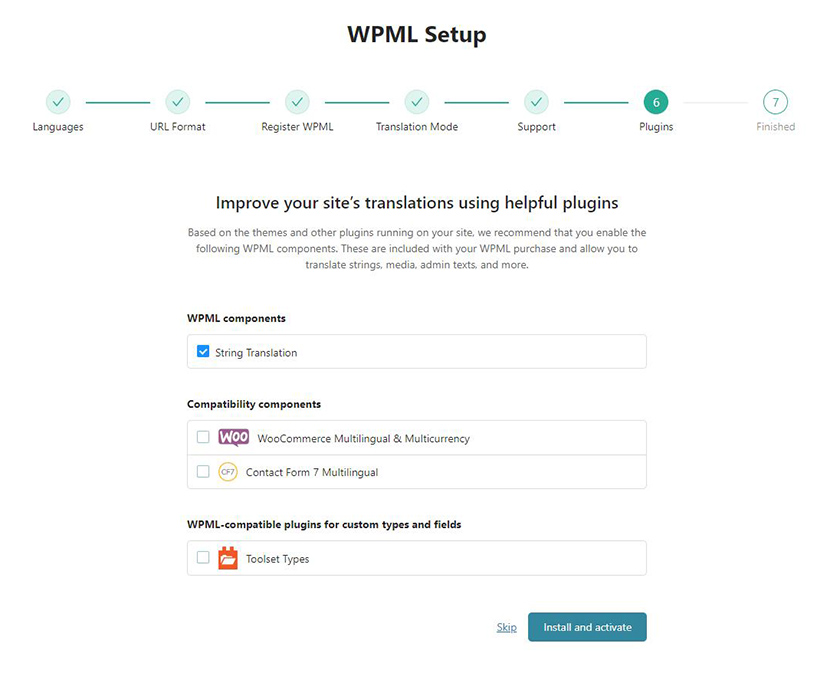
In step 6, WPML will check for the active theme and any active plugins on your site and recommend useful WPML components and compatible plugins.

That’s it! Hit Finish to start translating!
![]()
Once you are done with the onboarding you will be automatically transferred to the Translation Management screen.
Translating items
Now we’re ready to start translating our content. Let’s start with a post. Go to your Posts in the dashboard.
![]()
Notice that next to the title column we have the language column. Each post was a plus mark next to its title, this means that no translation exists for the particular language and we can add one.
Now press the plus button to proceed to the WMPL Translation Dashboard.
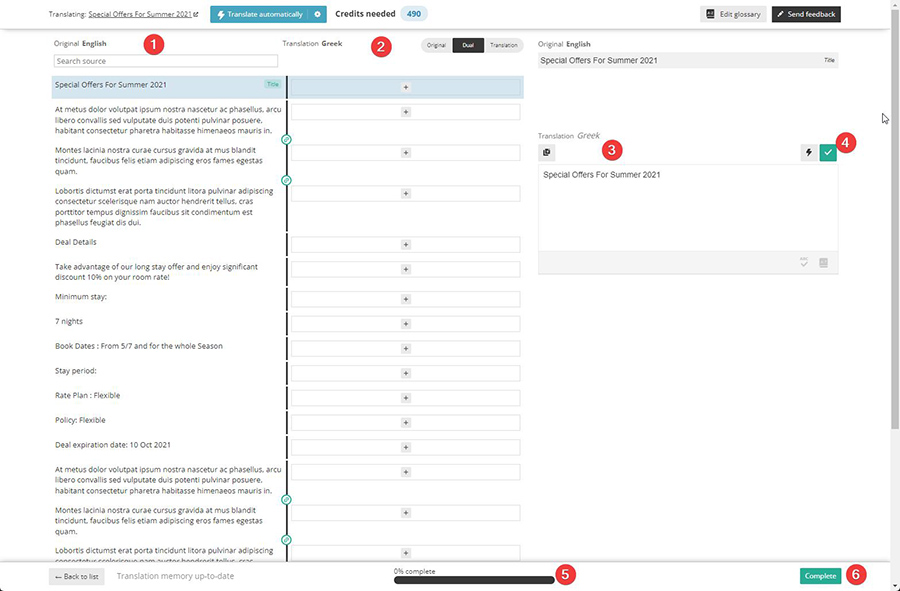
Here you can see the two columns, one with the original text (1) content of the selected post and one with the translation of that text (2).
To translate a string, click ok it and then add the translation to the translation textbox (3) and press the green tick button (4).
At the bottom of the page, you can see the current percentage of the translation completion (5).
When you have finished translating, press Complete (6) to return back to the WordPress Dashboard.
You can also use the same procedure to translate pages.
If you would like to learn more about the Advanced Translation Editor, please visit the WPML Documentation page.
Manual Translation
If a plugin is not compatible with the Advanced Translation Editor or if you want to create different designs for the same post/page in different languages, you can use manual translation.
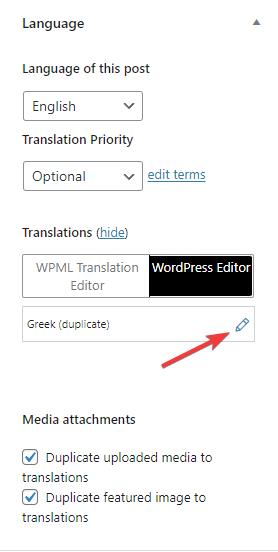
While editing a post/page, locate the Language metabox in the sidebar and choose the WordPress Editor (1).

In the popup dialog choose This Post (or This Page) and press Apply.

Next, tick the Duplicate (2) checkbox of the language you would like to translate this post/page to and press Duplicate (3).
Click on the pencil icon to open the duplicated post/page in the page editor.
Press the Translate independently button to prevent WPML from synchronizing this duplicated post/page with the original post/page.

You are all set! You can now start translating this post/page manually.
For more information about Manual Translation consider consulting the WPML Documentation page.
Translating categories
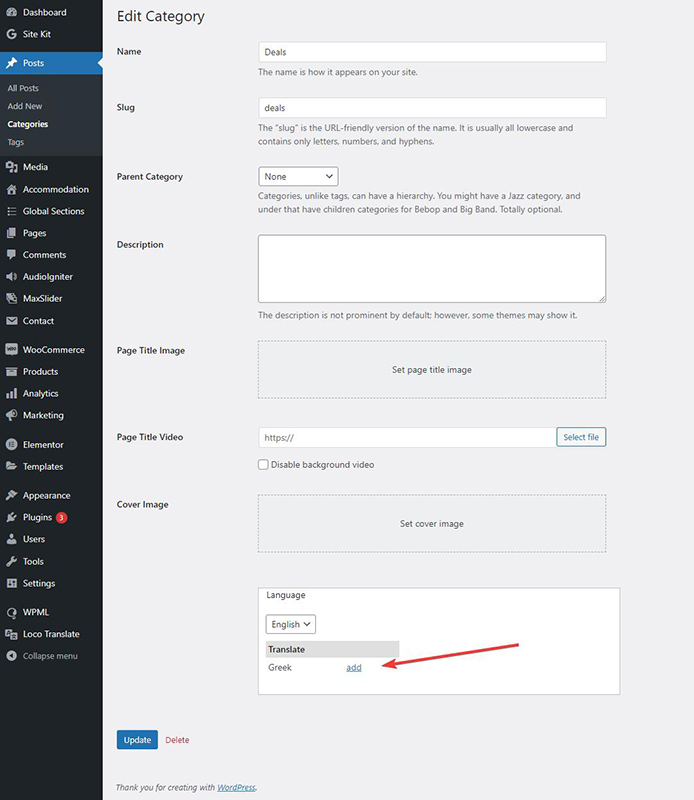
You can translate categories, either by going to Posts > Categories and open the desired category for editing.
Press add to enter your translation and then Update.
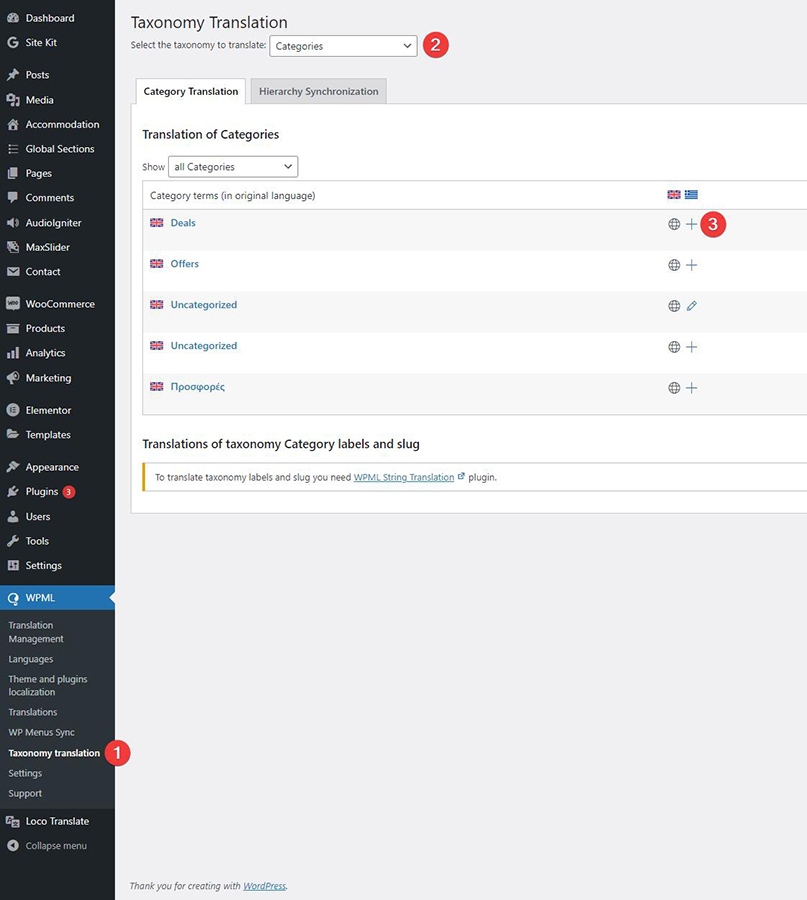
Alternatively, you can go to the WMPL > Taxonomy translation (1), choose the desired taxonomy from the dropdown list (2) and press the plus sign (3) next to the category you would like to translate.
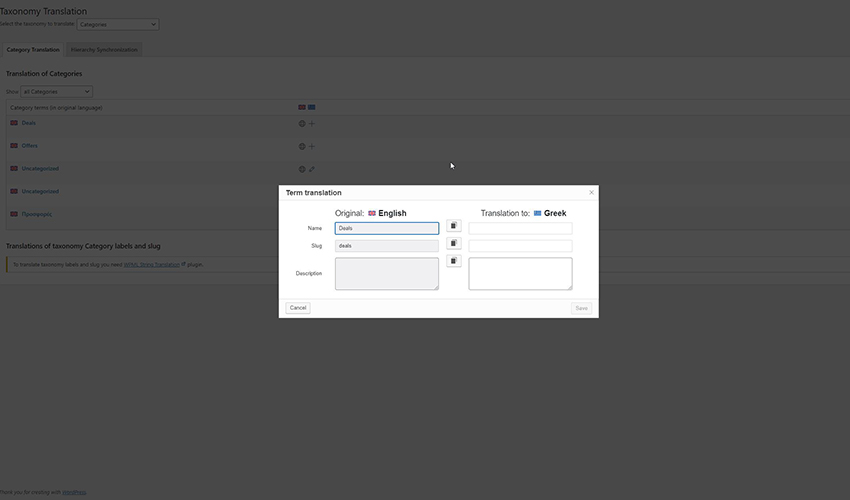
In the popup screen, enter you translated text and press Save.
Enabling translation for custom post types
By default custom post types will not appear as translatable, however you can easily enable this feature.
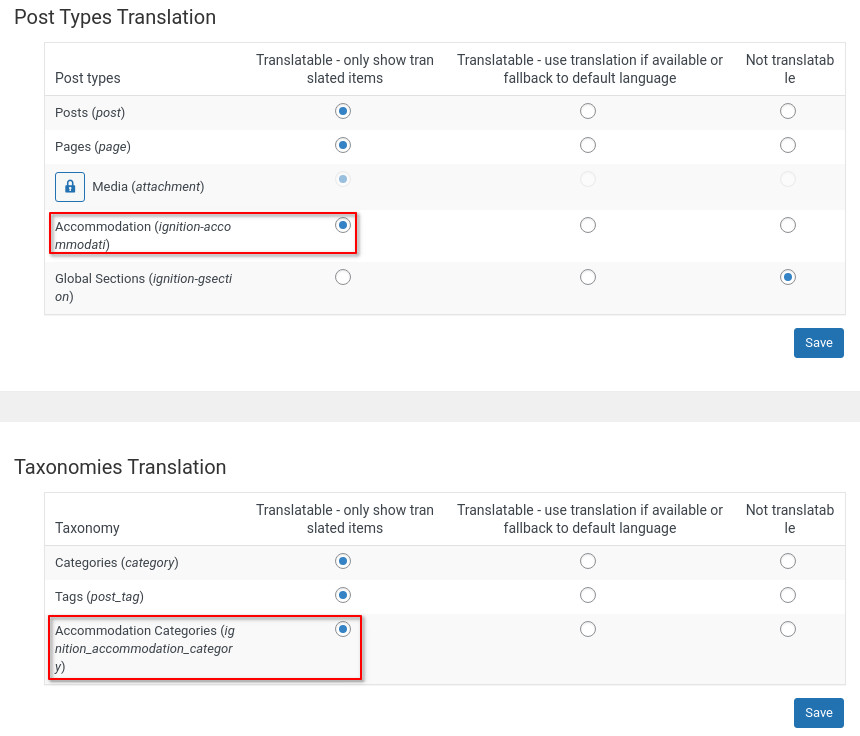
Navigate to WPML > Settings and from the Post Types Translation section set the Accommodation (or any other custom post type you want to translate) to Translatable. Save and then do the same for the Taxonomies Translation. Your final settings should look like the ones below.
Creating a menu
Navigate to Appearance > Menus and edit the current menu of your site.

In the menu structure section you will notice that the menu has a language assigned to it (this was done when we set the default language for any existing content during the onboarding procedure). To the right we have two options.
Adding a new menu
If you click the plus button next to the language you’re creating a translation for WPML will allow you to create a new menu for that language.

Give the menu a name, make sure the Language and Translation of options are correct, select the proper display location from Menu Settings and proceed to add the menu items to the menu just as you would normally do, once done click the Create Menu button to save the menu and you are good to go.
Menu sync
Another option WPML offers is menu sync, this can be activated if you click on the Synchronize menus between languages link shown in the second to last picture.
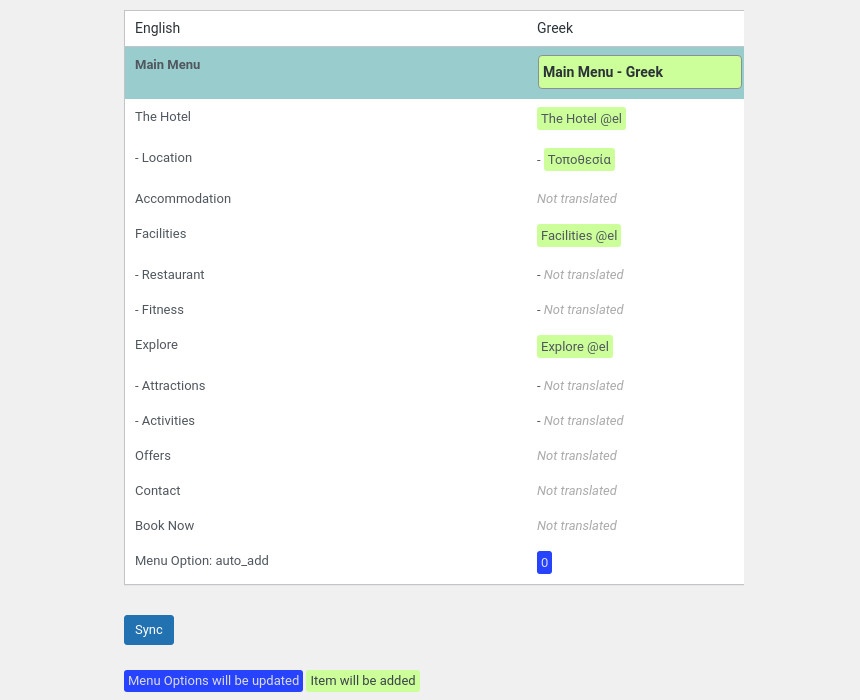
This will present you with the above screen. Essentially each time you translate an item that’s on the menu set for the default language, WPML will automatically add it to a menu created for the new language. This means that your menus will be identical, if this works for you you can choose the sync option and be done with it. If you need slightly different menus for each language you’ll have to go with the first option.
Add a language switcher to the top bar
The Ignition Framework bundles a shortcode specifically built to create a language switcher. To add one to the site’s top bar navigate to Customize > Top Bar and add it to any content area.

In the example above we have use the following shortcode:
Of course you can use the language switcher shortcode in any of the theme’s content areas in the top bar, header, footer, widgets or even in the content.
Translating widgets
Translating widgets is very easy. Navigate to Appearance > Widgets and notice the language drop down that appears in each widget.
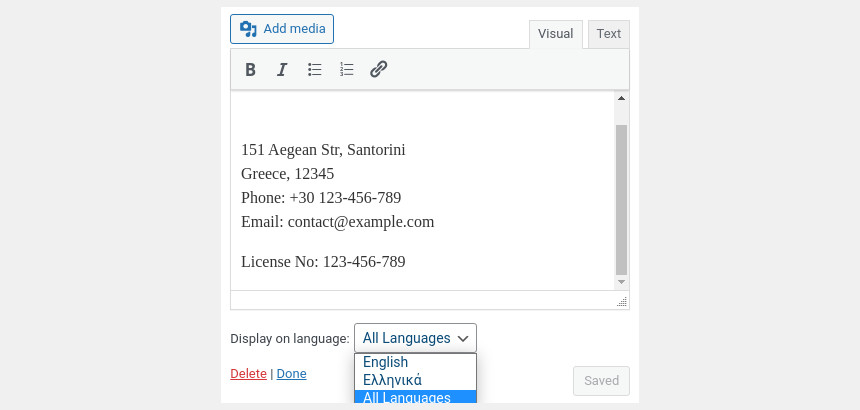
From the drop down, select which language this particular widget will appear in and save it.. Now create a new widget of the same type, add the same content but translated and select the proper language for it in the drop down. That’s it, now each widget will only appear on its set language.
Translate static strings
Take a look at this knowledgebase article for info on how to translate static strings.