How to manage redirections from your WordPress dashboard
Changing permalink structure, changing post slugs, deleting posts or pages, moving your WordPress installation to another folder, or even migrating your site to a completely different server will require you to take care of URL redirects. A redirect lets your visitor, or more specifically your visitor’s browser, know that the page they are looking for has moved and directs them to the proper address. Unhandled changes to any of the above circumstances might result to 404 errors which are not that great for your page’s SEO. Let’s take a look at how we can use a plugin to easily handle such redirects.
Redirection
Redirection is a free, and easy to use, WordPress plugin that allows you to create 301, 307 and 308 redirects. It will also log any 404 errors that occur on your site and allow you to easily map them to 301 redirects. Monitoring URLs for changes is also possible, so redirects can be created automatically should any URLs change. Creating a redirect is pretty straightforward. Once you activate the plugin, go to Tools > Redirection and fill in the blanks under the “add new redirection” section.
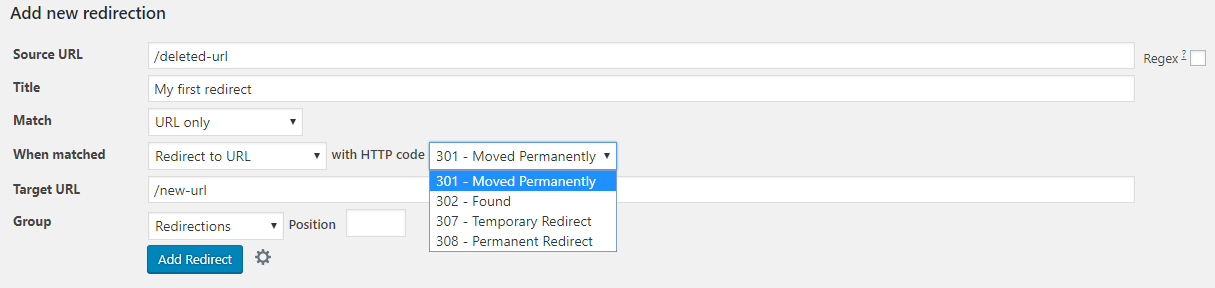
The source URL, Title and Target URL fields are pretty self explanatory. In the Match field you can fine tune what counts as a hit, this can be the URL, URL and login status, which allows you to create redirects for logged in users and visitors separately, URL and referrer, so you can redirect only visitors referred from certain referrers, and finally URL and user agent so you can target certain browsers. After the match you can choose to redirect to a URL, redirect to a random post, send to a 404 page, or do nothing, which allows you to just log the hit. What you will be using more frequently is the redirect to URL option in combination with the 301 HTTP code option. The plugin allows you to group your redirects in order to make managing them easier. By default you have two groups, the “Redirections” which can serve as a group to add redirections from URLs that do not exist on your site any more, like deleted pages or posts, and the “Modified Posts” one which can host items that do exist but their original URL might have been altered at some point, you can of course create your own groups under the “Groups” tab. Once everything is set up you can click the “Add Redirect” button and you are done, the redirect is now in place.
Under the log tab you will get a detailed view of all redirects logged on your site.
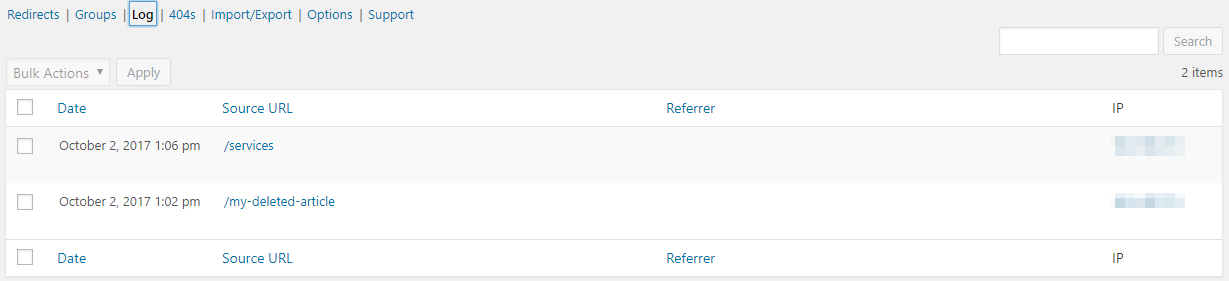
The date and time of the redirect is available along with the referrer, user agent and user IP.
Under the options tab you can configure how long you want the 404 and redirect logs to be kept, and also set which post group will be monitored for changes.
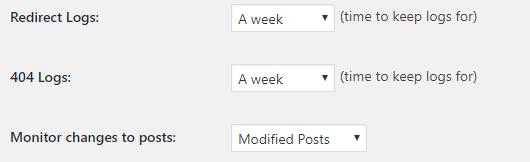
Redirects for the monitored group will be updated automatically should any of their target URLs change.
The plugin supports both apache and Nginx web servers and does not require .htaccess to work. All created redirects can be exported/imported to another site using JSON, CSV, .htaccess, and Nginx rewrite.rules.
Price: FREE
Source: https://wordpress.org/plugins/redirection/
2 responses to “How to manage redirections from your WordPress dashboard”
it’s very helpful, very nice explanation. Thank you.
I always thought redirecting a page is a big task and it needs some coding skills. But now I have come to know that it’s that simple as you explained it very well. Great article.