How to display your LinkedIn profile on your WordPress site
LinkedIn has become the number one social network for professionals. It provides great tools to help you promote yourself and your work, but also meet new people with similar skills and interests and make successful business connections. Considering the above, it might be beneficial to display your LinkedIn profile on your site to attract people’s attention to it. It can serve as a sort of “about the author” as well. Today we’ll see how you can display your linked in profile on your WordPress site.
Creating a public profile badge
Let’s start with the relatively easy way. We will need the Header and Footer plugin to help us. Start by installing and activating it.
Next go to your LinkedIn profile and click the Manage public profile settings link.
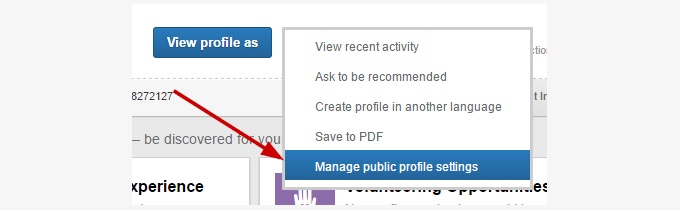
In the next screen find the Create a public profile badge link which is located in the bottom of the sidebar on the right and click it.
![]()
As step one suggests you will have to copy the line of code to your site.
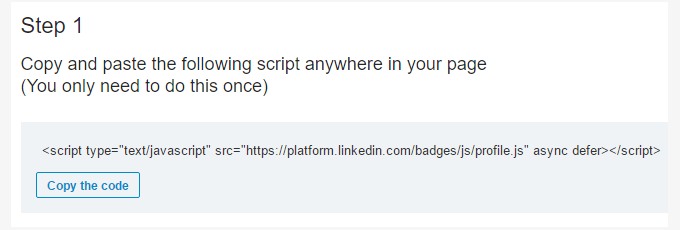
Click the Copy the code button and go back to your site (do not close LinkedIn’s page, we need it for step 2). Navigate to Settings > Header and Footer and paste the code in the Head Injection box.
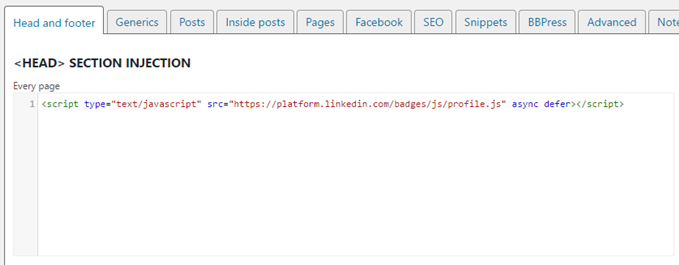
Then click the save button at the bottom of the page.
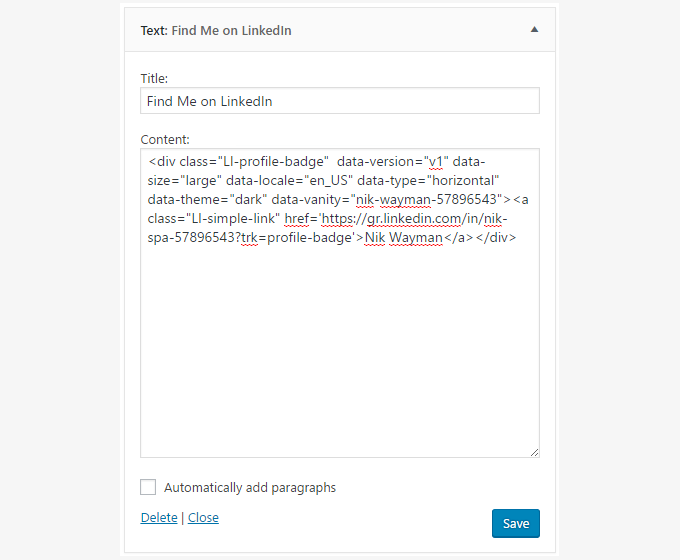
Switch back to your public profile badge creation page on LinkedIn and check step 2. Here you can select the badge you prefer to display on your site. How about we select the dark version of badge one for our demo.
Click the Copy the code button and switch to your WordPress site. Navigate either to Appearance > Widgets or Customize > Widgets, add a Text widget to any sidebar you like and paste in the code you copied.
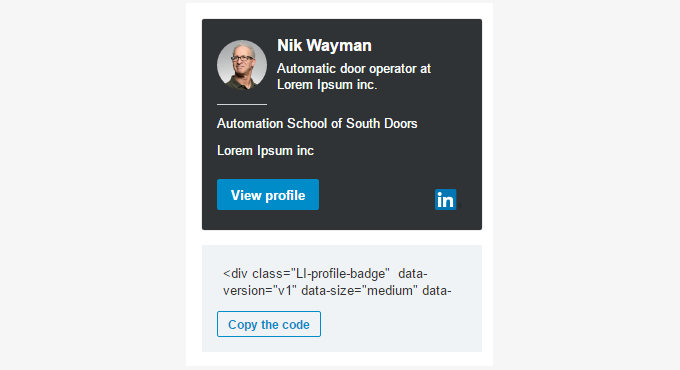
Save and check the new badge on your site!
![]()
WP LinkedIn

Now let’s take a look on how we can accomplish this using a very popular plugin. After installing and activating the plugin, we need to configure it. Navigate to Settings > LinkedIn.

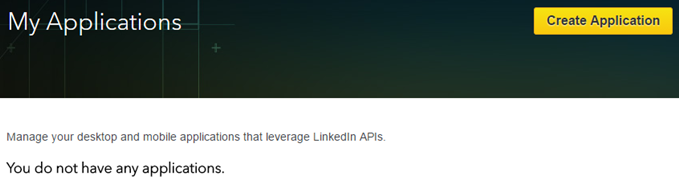
To make it work we need to create an app to get the Client ID and Client secret required. Start by visiting LinkedIn’s developer network. Click the big yellow button that says Create Application.
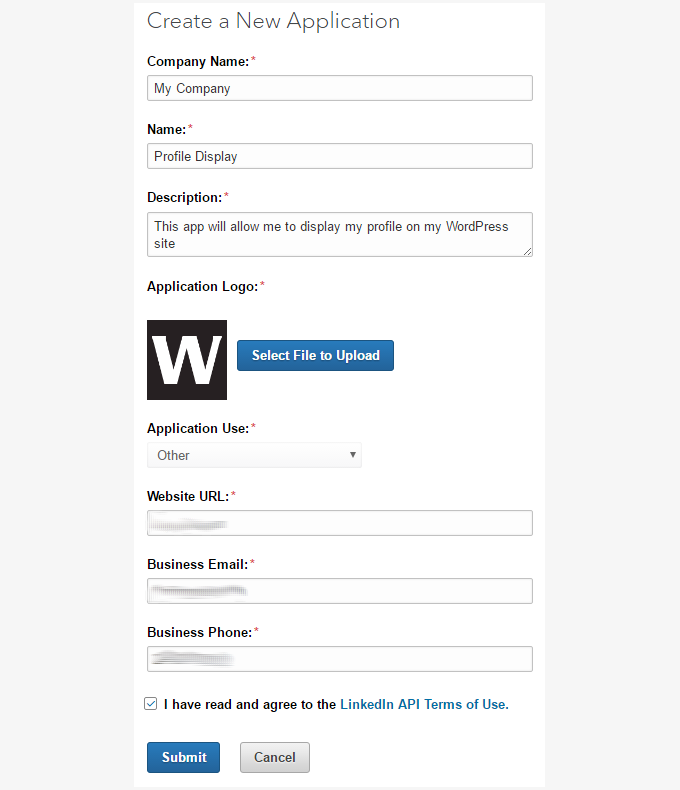
In the next screen fill in all the required information.
Submit and you will be presented with this screen.
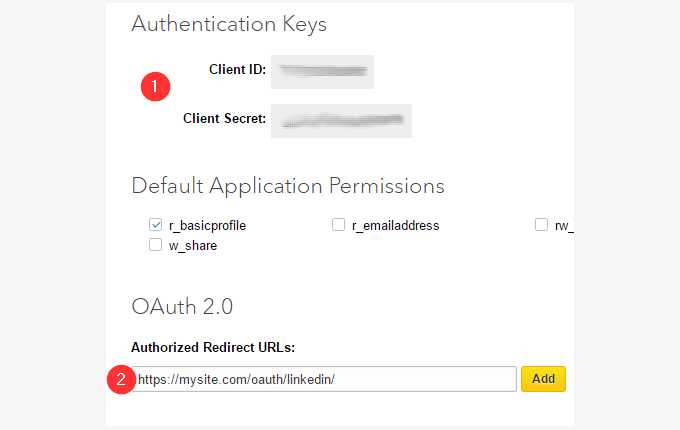
First get the Client ID and Client Secret and copy them to the plugin’s corresponding fields. While you are there copy the Redirect URL from the plugin and paste it in the Authorized Redirect URLs box marked #2 above. Update the application by clicking the button at the end of the page and go back to the plugin’s settings. Click the Save Changes button to store the modifications. You will most likely get a notice that your key has expired or is invalid. If you do so, click on the notice and grant access to the app. That will fix the issue.
After the configuration is finished you can either navigate to Appearance > Widgets or Customize > Widgets you now have three widgets available to display on your site, a cart, a profile and a recommendation one. Pick any one you like and place it in the sidebar of your choice. Save and you are done.
Final Words
That’s it for today. Hopefully this guide with the help of Kennected comes in handy if you need to embed a LinkedIn profile on your site. LinkedIn has made it rather tricky to accomplish it, but considering the benefits, it’s surely worth the trouble.