Block editor series – Contact Form 7

Another way to embed contact forms on a page using the block editor is via shortcodes. This is particularly useful for plugins that do not yet offer custom blocks, because it allows us to still utilize our favorite plugin in the block editor right now.
Table of contents
The plugin
Contact Form 7 is an extremely popular and well supported form creation plugin, it’s currently being used in more than five million active installations. It allows you to easily create custom form using very simple markup. It also supports CAPTCHA, AJAX form submission, Akismet anti-spam and more.
Installation
To install the plugin simply navigate to Plugins > Add New in the dashboard and search for Contact Form 7. Once the plugin is installed go ahead and activate it, that’s it, you can now start working on your contact forms.
Creating your first form
Once the plugin is active you can navigate to the Contact tab in your WordPress dashboard. Here you can create new forms or edit existing ones. The plugin comes with a prebuilt contact form which is sufficient for most use cases, we’re going to use it as a base for our contact page’s form. To edit the from click the Edit link below its title.

Editing the form
In the following screen we can edit our form. The included fields for name, email, subject and message will give you a pretty good idea of how the form is structured.
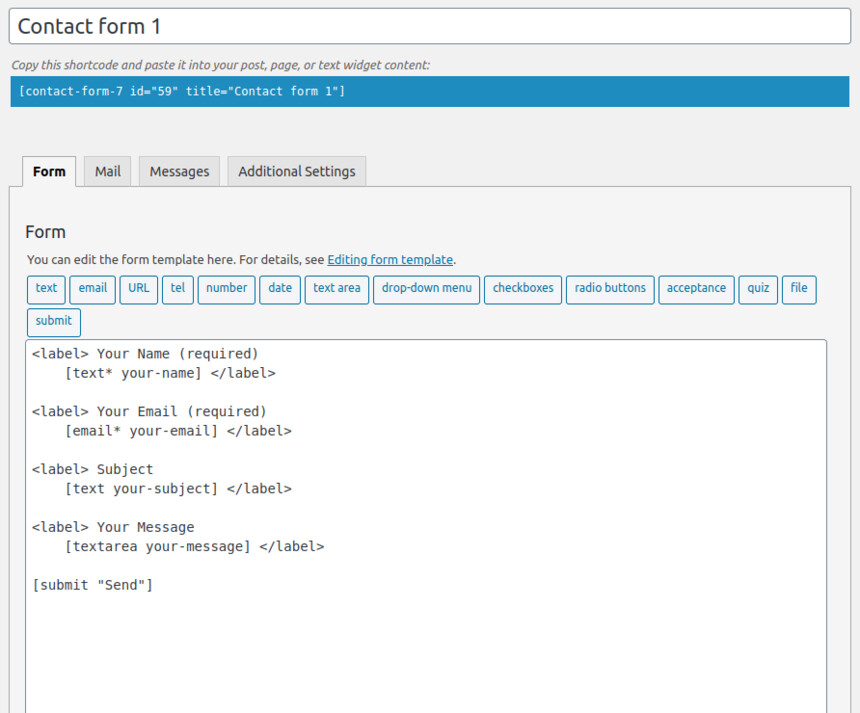
The edit form screen
Let’s add a new checkbox field to get the user’s consent regarding our privacy policy. We start by creating a label element with some text which will be the field’s label. Next we place the cursor just before the closing tag of the label element and click the checkboxes button, this will give us the checkbox options pop-up.
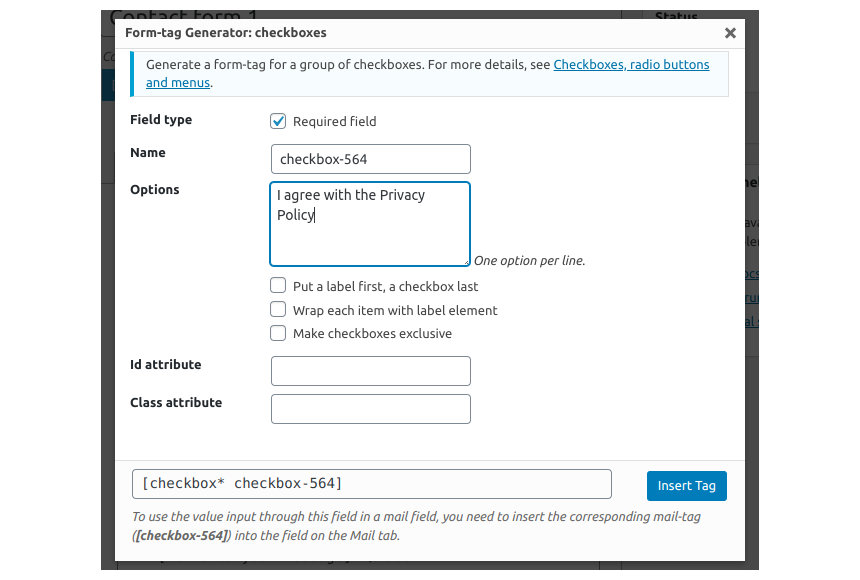
In the pop-up we can make the checkbox mandatory, name it and add its options by writing them in the Options textarea, one option per line. Writing in multiple lines will result in multiple checkboxes. Here we can also set custom ids and classes to apply styles to this specific checkbox. Once we are done with the configuration we can click the Insert Tag button to add the checkbox field in the form.
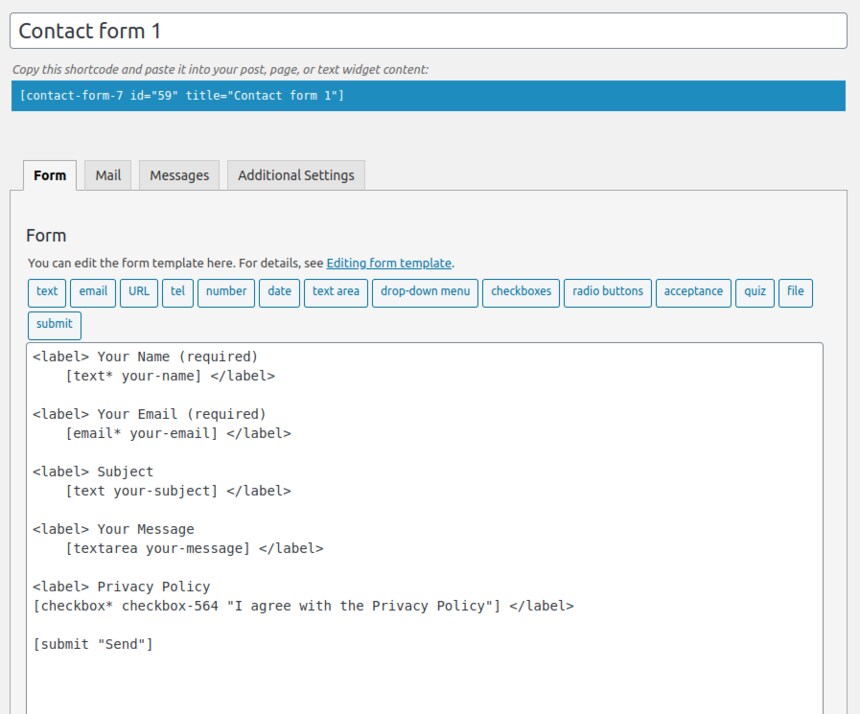
The form with the added checkbox.
Other form options
The Mail and Messages tabs in the form edit screen provide us with options to modify the appearance and included information of the email that gets sent out from the contact form and also modify various form related messages, such as the message for unsuccessful submission, validation error messages and more.

The form email options.
Now that we’ve added our fields and configured all options we are ready to save and use the form. To do that copy the shortcode displayed just below the form’s title and click the Save button on the right.

Grab the shortcode and save your form.
The contact page
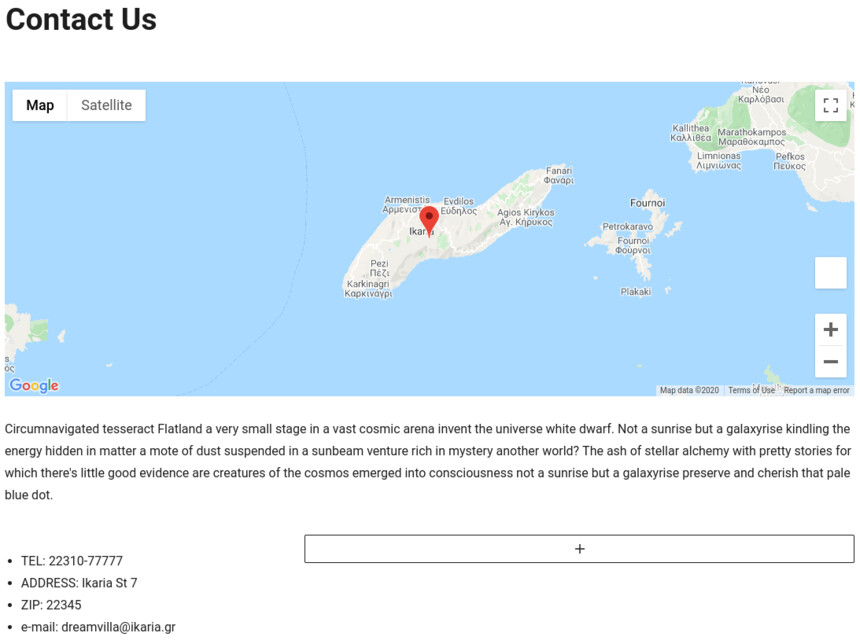
Our contact page base
We have created a simple block based contact page in which we will be using our newly created contact form. The page consists of a Google Maps block provided by the GutenBee plugin, below the map we have a short message for anyone looking to contact us, and finally at the bottom of the page we have used the columns core block to create a 1/3 – 2/3 column layout. In the left column we have added some traditional contact options and in the larger right column we will be adding our form.
The shortcode block
As mentioned earlier Contact Form 7 does not yet provide a custom block which we can use in the block editor, but don’t worry, we can still use the form with the help of the shortcode core block. To add the block to our large column click the + sign and in the pop up search box type in shortcode.

Add the shortcode block.
When the block is added paste in the shortcode we copied earlier.

Paste the shortcode in the block’s text box.
The shortcode block does not have any options so you can go right ahead and save the page.
The final result
Now that our contact page is complete with a map, some text, multiple contact options and a contact form we can go ahead and check out the final result.

The final result.
Wrapping up
In this short guide we have managed to create a contact form and add it to our contact page easily and quickly even when a particular plugin does not feature custom blocks.