Documentation for Socials Ignited
Plugin Installation
The plugin is available through the WordPress plugin directory and thus can be installed like any other plugin. Just navigate to Plugins > Add New and search for Socials Ignited. Then proceed to install and activate the plugin.
Plugin Settings
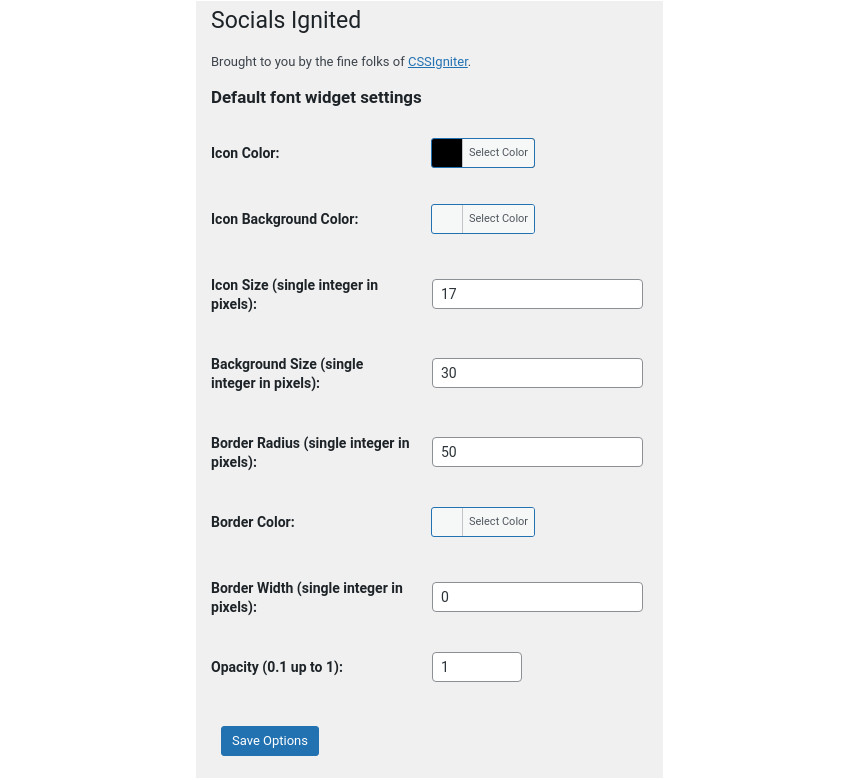
Under Settings > Socials Ignited you will find the plugin’s basic global settings. These allow you to set a default appearance for the social icons by configuring the desired colors and sizes, which can then be customized per widget.
Customizer Options

Under Customize > Socials Ignited you will find a preset list with the most popular social networks. Just fill in the URLs of the ones you wish to display and save the changes. If you don’t wish to use any of them or wish to create a completely custom list you can safely skip setting up this page and move to the widget.
The widget

The widget can be added to any sidebar under Customize > Widgets or Appearance > Widgets. The first option allows you to set up the widget’s title. The following 8 options are the same ones we saw in the plugin’s general settings page and allow you to customize the color and size of the icons per widget. Then we have three options that are unique to the widget. The first will make all icon links to open in new tabs, the second will add a nofollow rel on icon links. The third option, if selected, will display on the widget all the icons of the social profiles configured in the Customizer in the step above and will ignore any custom icons added below.
Creating custom icon groups
![]()
Just below you will find the widget’s repeating fields which you can use to create lists with icons to services not included in the Customizer tab. To do that start by clicking the Add Field button. This will present you with a field with three inputs. In the Icon Code one you will need to fill in the desired icon code exactly as shown below.
![]()
For example to display an envelope you will add in fas fa-envelope for Twitter fab fa-twitter etc. Then in the Link URL tab you can fill in the URL to your social profile, contact method etc. Finally the Title text input will output any text entered as the title attribute of the anchor element. Once done adding an image click the Add Field button, rinse and repeat.
Once done adding the networks save the widget and you are good to go.
If you have any questions or encounter any issues while working with Socials Ignited feel free to contact us using our Support Hub and we’ll be right along to help.