Documentation for Olsen Light
About
Olsen Light is a blogging WordPress theme aimed at fashion/beauty bloggers.
Video Tutorial
Theme installation
The easiest way to install the theme, is by accessing your WordPress admin panel, then go to Appearance > Themes.
Click the Add New button on the top of the page.

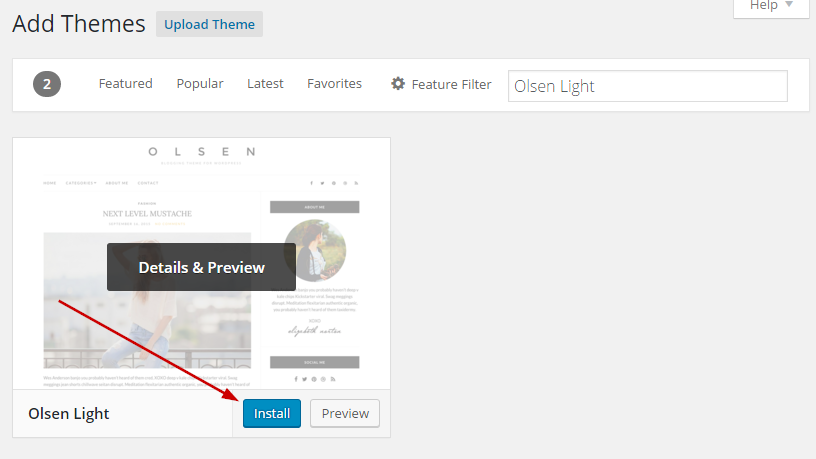
In the next screen type the theme’s name in the search box

When the search results appear, hover over the theme and click Install
Once the installation finishes click activate and the theme is ready to use.
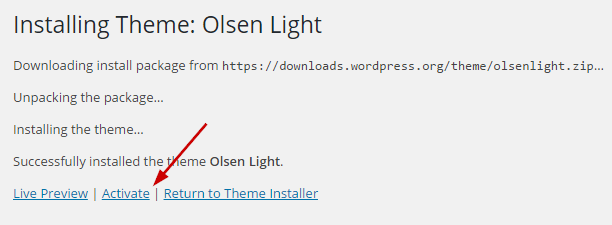
Image Sizes
The minimum recommended image sizes for Olsen Light are:
- Post thumbnail: 665x435px
- Slider images: 1110x600px
- About me thumb: 200x200px
Useful Plugins
These plugins provide functionality and features used directly (or not) by the Theme. So, it is recommended to install and activate them before importing your sample content.
- Contact Form 7 use this plugin to create a contact form, then copy the shortcode it gives you and paste it in a page which will serve as your contact page.
- WordPress Jetpack: You can use this to create a contact form instead of Contact Form 7, insert sharing buttons etc.
Sample Content
First you will need to download the Sample Content archive file for Olsen Light by clicking here. Extract the file like described here for MacOS and here of Windows PC. We are going to import these files using the One Click Import free plugin.
Install One Click Import plugin
Visit Plugins → Add New and
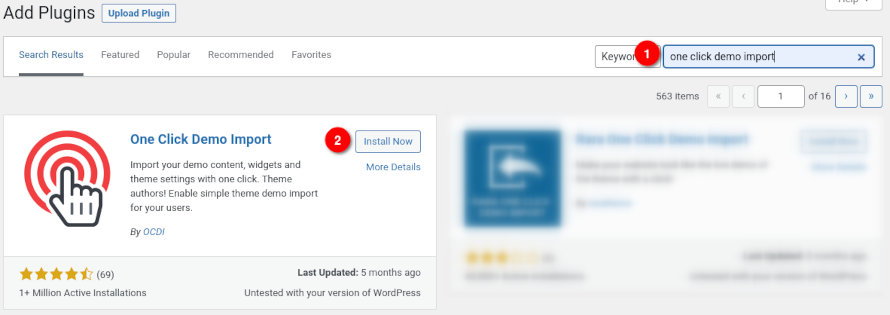
- Search for One Click Demo Import and install the plugin,
- Install and Activate One Click Demo Import from your Plugins page.
After activating the plugin navigate to Appearance→Import Demo Data. Now it’s time to use the extracted files from the zip we downloaded.
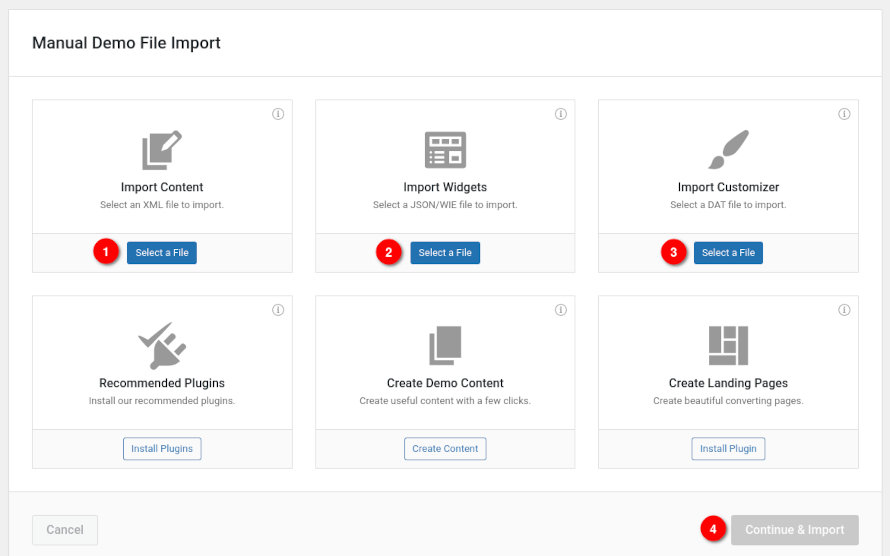
- Upload the content.xml from your sample content archive.
- Upload the widgets.wie from your sample content archive.
- Upload the customizer.dat from your sample content archive.
- Click to import the sample content.
This might take a few minutes depending on your server configuration. If you encounter any errors ask for help in the theme’s support forum here.
Setting up your theme
Populating your blog
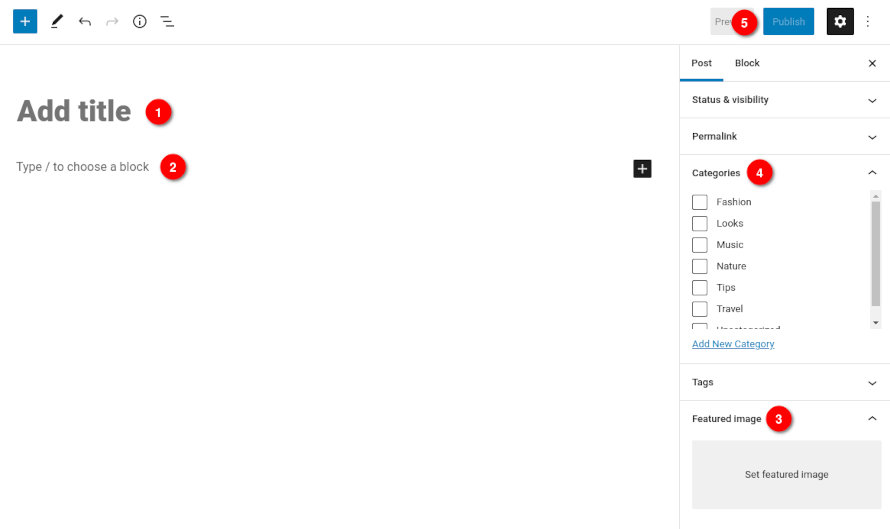
To add new posts to your blog, go to Posts > add new and proceed to:
- add a title to your post,
- enter the content in the editor,
- upload a featured image by clicking “Set featured image” on the Featured Image panel,
- and finally add a category and/or tag to the post.
- Once done click to Publish your new post.
Customizing the appearance
All theme customization is done via WordPress’s built in Customizer. If you haven’t used it or want to learn more about it, please read this article.
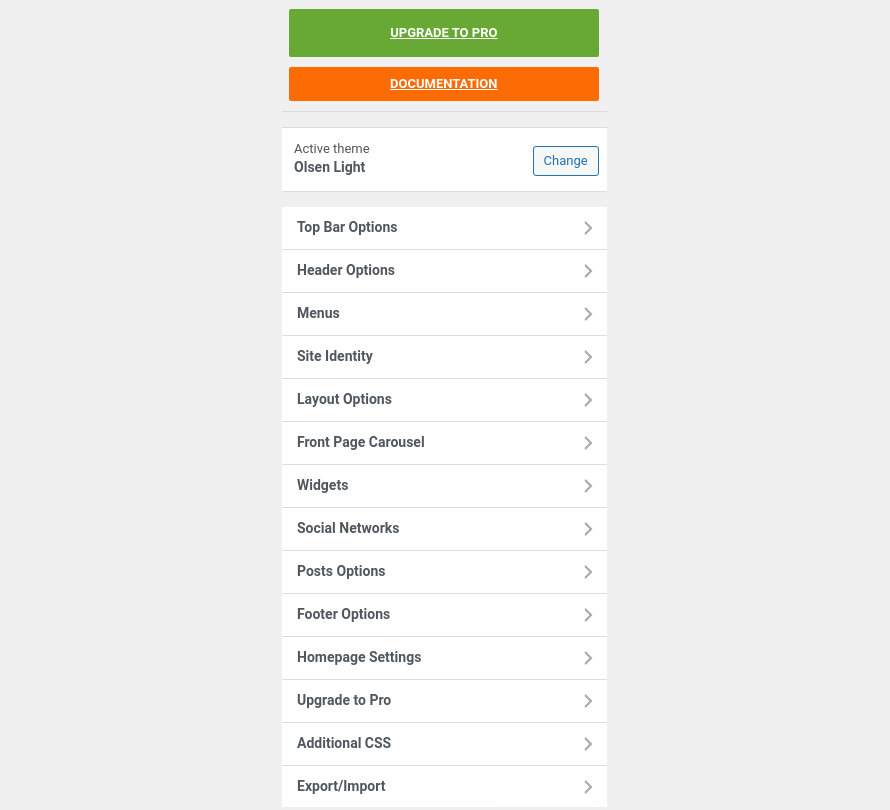
Go to Appearance > Customize where you will be presented with the following options on the left hand sidebar.
TIP: any changes you make in the tabs below will be previewed live on the site which appears in right side of the screen, however to save these changes you need to click the Save & Publish button on the top of the bar, if you have made a change but see the button grayed out (for example changed the font size of a heading), move the cursor outside the input box, for example, to the next input box, then the button should be clickable again.
Let’s take a look at the options each tab gives you.
Top Bar Options
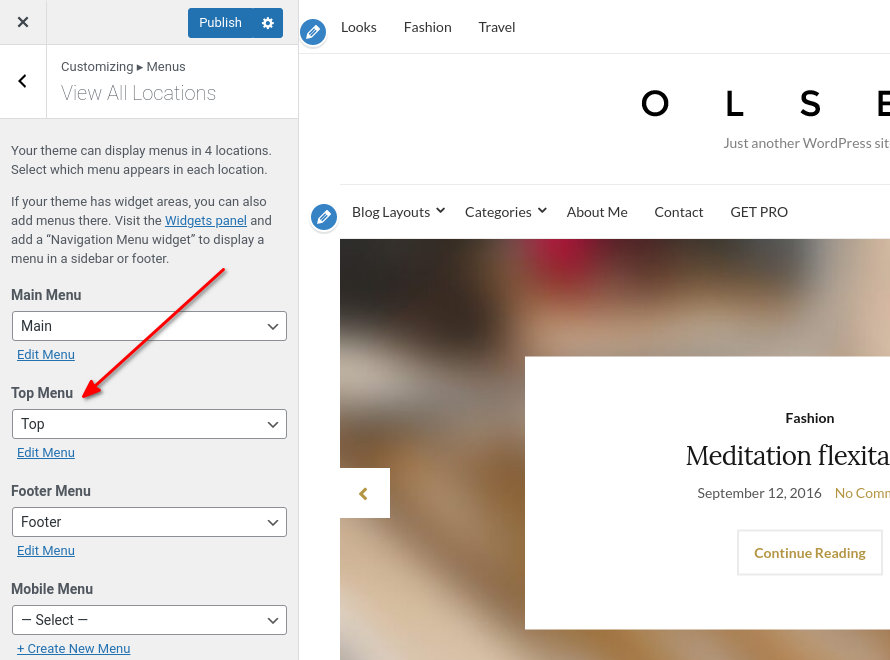
The top bar can display a menu and any social icons configured under Customize > Social Networks.
To display the top bar you need to set a menu as the Top Menu under Customize > Menus > View All Locations > Top Menu. You can either create a new menu or set an existing one.
If you need more info on WordPress menus, here is an extensive guide on WordPress menus.
You can toggle the appearance of the top bar’s Social Icons using the provided checkbox.
Header Options
Under these tab you will find two checkboxes. One which toggles the header’s social icons and one which controls the appearance of the pop-up header searchbox.
Menus
Here you can create and add menus to the theme. The theme features three menu locations, one in the top bar, one in the header and one in the footer. The footer menu does not support sub menu items. To learn more about menu creation check out our extensive WordPress menu guide.
Site Identity
In this tab you can modify the site’s title, tagline, logo, footer logo and site icon. You can also manipulate the padding above and below the logo image.
Layout Options
Here you can independently modify the blog layout, the category/tag layout and the layout for the rest of your pages. You can pick between a classic blog layout or one with two content columns and a sidebar. Additionally you can configure the length of the automatic excerpt, choose between numbered and older/newer pagination, toggle the appearance of related posts in the blog listing and change the related posts’ section title.
Front Page Carousel
This tab allows you to configure the homepage’s slider. You can toggle its appearance and automatic slide functionality. The images displayed on the slider are featured images pulled from your post, you can select a source post category via the drop down or fill in individual post ids in the text box below if you don’t want entire categories to appear on the slider, to learn how to find an individual post’s ID check this article. You can also limit the number of posts on it, change the effect and adjust the slideshow speed.
Widgets
Through this tab you can add widgets to the theme’s sidebars. The theme features two sidebars, the Blog Sidebar which appears on all posts & pages that have a sidebar, and the Footer Sidebar which can only display the widget provided by the WPZOOM Social Feed Widget plugin to create an Instagram carousel.
Social Networks
Here you can fill in the URLs to your various social network profiles supported by the theme. These will appear in the top bar, header and footer automatically, you can also display them in the post/page sidebar by adding the Theme – Social Icons widget in the blog or page sidebar. Additionally site-wide social icons can be displayed on the left hand side of the side by checking the corresponding checkbox.
Posts Options
Here you can modify the related posts’ section title.
Footer Options
Customize the theme’s footer by toggling the appearance of social icons and credits text. If the WPZOOM Social Feed Widget is installed and activated from this tab you can also toggle the footer Instagram carousel autoplay and its timeout.
Homepage Settings
If you don’t wish to have your latest posts on the front page and wish to display static content using a normal page, or want to use the looks template as your front page, you can do so here. Set the desired page as your static front page and save.
Theme pages
The contact page
For the contact page on the theme’s demo we used a page with the Fullwidth Page template applied to it and pasted in a contact form created with the Contact Form 7 plugin.
Widgets
Along with WordPress’s widgets we have created 3 custom ones. They are really simple and they let you display various important info around the site.

You will find a small description in each widget detailing its usage.
Formatting the newsletter widget
Most newsletter services provide an HTML form for you to place in a text widget and use in any sidebar. You can apply the theme’s default styling on that form by wrapping it in the div displayed below
<div class="widget_ci_newsletter">
<!–– Replace with form HTML ––>
</div>
How to use the page builder template
The theme comes bundled with a page builder template which allows you to use your favorite page builder plugin on it and create unique layouts very easily.
To use that template start by going to Pages > Add New. This will create a new page. Add a title to your page and select the Page builder template from the drop down in the Template metabox.
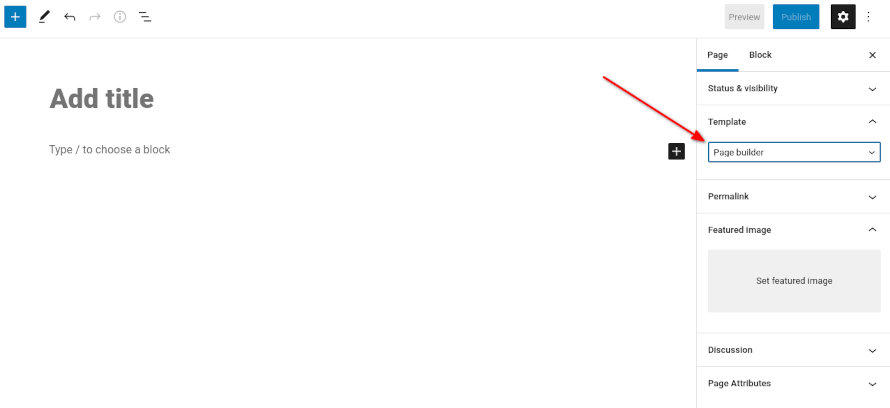
That’s it. You can now start building your page using the page builder of your choice, once done publish it and check it out.
Next Steps
Still have questions or problems setting up your CSSIgniter Theme? We will be happy to help you out in our support forums