Modify theme fonts using the Easy Google Fonts plugin
Sometimes you might want to modify the default font applied to the theme. The easiest way to do this is by using the Easy Google Fonts plugin, which allows you to select from the 700+ font families available on Google Fonts. Read on to find out how you can install and configure the plugin in order to apply new fonts to your site.
To install the plugin you navigate to Plugins > Add New, search for “Easy Google Fonts” and click the Install button.
Once the plugin is installed and activated you can navigate to Appearance > Customize > Typography > Default Typography to get started.

Above you can see the Typography panel. The plugin allows you to control fonts for paragraphs, which will cover the majority of a theme’s text and all headings separately. Let’s see how we can modify the font applied to paragraphs.
Start by clicking on the Edit Font button.

We are presented with a three tab interface which allows us to configure our font properties. The most important is the first one, the Styles tab. Here we will select the font.
The first drop down sets the script/subset of the font, here you can narrow down fonts that support the alphabet you need, for example if you want a font that supports the Cyrillic alphabet, select it from the drop down, this way, on the next step, you will only be presented with fonts that support it.
Next we move to the Font Family drop down, here we select the font we want to use. There is a search box so if you know the font’s name you can type it in to save time.

Once you select your font you can move to the next three drop downs, which will allow you to select a weight/style, such as bold, italic etc, text decoration i.e. underline, overline etc and finally text transform, such as uppercase, lowercase or capitalize.
That’s about it, you have changed the font for paragraph elements and if a paragraph was visible on the right side of the page you would see the changes applied live.
The Appearance tab will allow you to change the font color, size, line height and more. Finally the Positioning tab will allow you to apply margins, padding and borders to the selected element.
But I want to change the font of links and links are not listed in the typography panel.
Indeed that’s true, luckily the plugin allows us to create custom font control sets to change the font to any element we like.
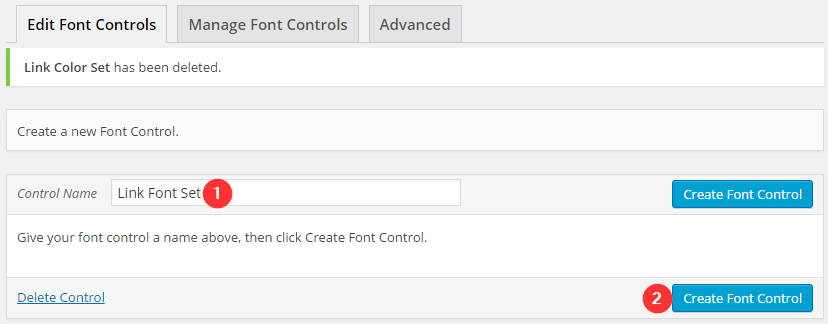
To do that go to Settings > Google Fonts and in the Edit Font Controls tab create a new font control by entering a name for it and clicking the Create Font Control button.
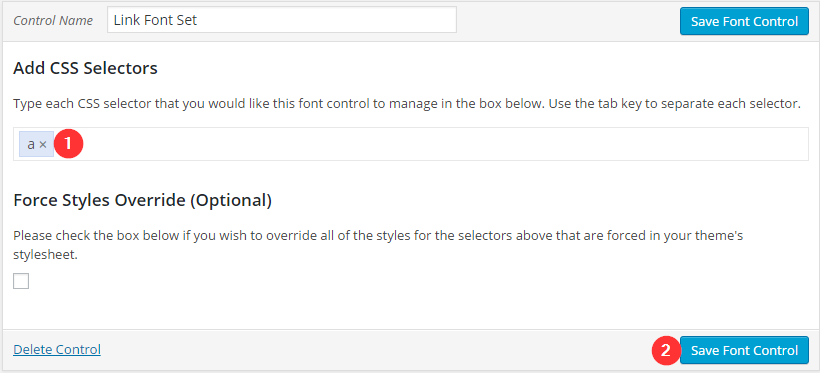
in the box that appears below we type in a which is the symbol for the HTML anchor element (link) and hit the Tab key, next we click Save Font Control
Now if we navigate back to Appearance > Customize > Typography we will see that we have another option besides the Default Typography, this option is the Theme Typography
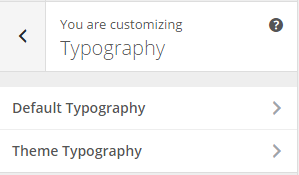
If we select it we will be presented with the control set we created to allow us to change the font on elements other than the ones provided by default, in our example we have the Link Font Set which allows us to modify the font on anchor elements. From here on the procedure is exactly the same as described for paragraphs above.
I have applied a new font but I still see the theme’s default one
Some times the theme’s design dictates applying the font to a specific element. For example in Santorini’s testimonial slider widget below the homepage’s slider here the testimonial text is a paragraph element, however if you apply a new font to the paragraph element as seen before it won’t work because the theme’s design specifically requires us to apply a font on that paragraph.
Here we will need to employ our Developer Tools skills to locate the selector required and create with it a new Font Control Set. If you don’t know how to use your browser’s developer tools, have a look at this article.
Using the developer tools we find out that we need to target the .testimonial-wrap blockquote p selector. We go to Settings > Google Fonts and create a new font control, the Testimonial Text one for example, we add the selector in and save.
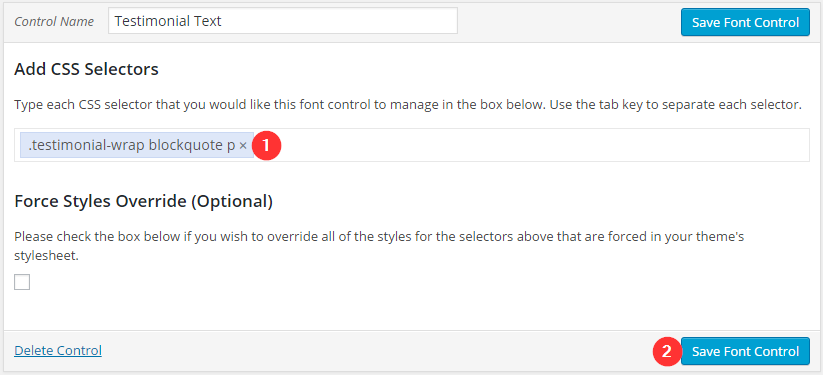
Once done we navigate back to Appearance > Customize > Typography > Theme Typography, now we can proceed to change the font for the testimonial paragraph’s text using our new custom font control.
7 responses to “Modify theme fonts using the Easy Google Fonts plugin”
Excellent article thank you
Hi, I use Easy Google Fonts and when I applied a new font, I noticed that my social media icons turned into squares. Do you know how to change them back? I’m assuming the plugin did that…
Hello Brittany. Indeed this must be coming from the plugin. Is there a link where I can check out this issue?
When you add a custom font control, how do you identify the right CSS selector on your theme?
Hello!
You will need to use the browser’s developer tools to find an appropriate class or id to target. Check out our small guide here https://www.cssigniter.com/kb/using-the-developer-tools/ for more information.
Nik, I’ve bookmarked this page with *** meaning it’s top tier reference material! You’ve nicely explained working with Easy Google Fonts controls. What I still can’t find is how to import the Divi palette colors into the EGF palette. I’ll enter all hex codes manually tonight, but for future reference it would be nice to know. Thanks.
Hello Chaz.
Glad to hear you like our simple tutorial. When it comes to combining Divi with Easy Google Fonts you would be better off inquiring one of the plugins’ developers for more info, either Divi or EGF support would be better suited to help you with your task.